Connect with us

How To

How to Change WhatsApp Phone Number Without Losing Chats: Best Easy Tricks

Published

on

How to Change WhatsApp Phone Number Without Losing Chats: Best Easy Tricks

Switching to a new phone number doesn’t have to mean losing your precious WhatsApp conversations. Many users worry that changing their number will wipe out their chat history, but that’s not the case. WhatsApp offers a built-in feature that lets you change WhatsApp phone number seamlessly while preserving all your messages, media, and group chats.

In this guide, we’ll walk you through the entire process step by step. You’ll learn the best tricks to ensure nothing gets lost, from backing up your data to notifying your contacts automatically.

Why Would You Need to Change Your WhatsApp Number?

There are plenty of reasons why someone might want to update their number on WhatsApp. Perhaps you’ve got a new SIM card for personal use, or you’re switching to a business line. Moving to a different country is another common scenario where a local number becomes necessary.

Whatever the reason, the good news is that WhatsApp has made this transition smooth. The app automatically informs your contacts about the change, so you don’t have to send individual messages. Plus, your chat history remains intact, which is a huge relief for anyone who relies on WhatsApp for important conversations.

What You Need Before You Start

Before diving into the steps, there are a couple of prerequisites you must fulfill. First, insert your new SIM card into your phone. Ensure it can receive SMS messages and phone calls, because WhatsApp will send a verification code to this number.

Second, verify that your old number is still active on WhatsApp. Open the app, go to Settings, and check that your current number appears correctly. If everything looks good, you’re ready to proceed.

Step-by-Step Guide to Change WhatsApp Phone Number Without Losing Chats

Back Up Your Chats First

Although WhatsApp’s change-number feature preserves your chats, it’s always smart to create a backup. Open WhatsApp, tap the three dots in the top-right corner, and go to Settings > Chats > Chat backup. Hit the backup button to save your conversations to Google Drive or iCloud.

This extra step ensures that even if something goes wrong, you can restore your messages later. It’s a simple precaution that takes just a minute.

Access the Change Number Option

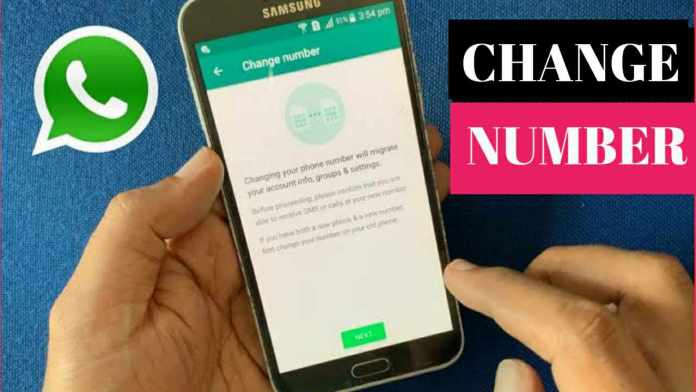
Now, open WhatsApp and navigate to Settings. Tap on Account, then select Change Number. This is the official feature designed specifically for updating your phone number.

You’ll see a screen explaining what happens next: your data transfers to the new number, and your contacts get notified. Tap Next to continue.

Enter Your Old and New Numbers

You’ll be prompted to enter both your old and new phone numbers. Make sure to use international format, including the country code. For example, if you’re in the US, enter +1 followed by your number.

Double-check the digits carefully. A typo here could cause complications, so take your time.

Choose Who to Notify

WhatsApp gives you the option to inform your contacts about the number change. You can choose to notify all contacts, only those you have active chats with, or no one at all. Pick the option that feels right for you.

If you’re changing numbers for privacy reasons, you might prefer to skip the notification. Otherwise, telling your contacts helps them update their address books automatically.

Verify Your New Number

After tapping Done, WhatsApp will send a six-digit verification code to your new number via SMS. Enter this code in the app to confirm the change. Once verified, your account will be linked to the new number, and all your chats will remain accessible.

That’s it! You’ve successfully completed the process. Your old number will no longer be associated with WhatsApp, but your conversation history stays right where it is.

Common Questions About Changing Your WhatsApp Number

Will I Lose My Group Chats?

No, you won’t. Group chats remain intact because they’re tied to your account, not your phone number. After the change, you’ll still be a member of all your groups, and your message history within them will be preserved.

What Happens to My Profile Picture and Status?

Your profile picture, status updates, and about section all carry over to the new number. Nothing changes except the phone number associated with your account.

Can I Change My Number Without Notifying Contacts?

Yes, you can. When you reach the notification step, simply select “No One” from the options. Your contacts won’t receive any alerts, but they might notice your new number if they check your profile.

Additional Tips for a Smooth Transition

To make the switch even easier, consider updating your number on other platforms that use WhatsApp verification, like banking apps or social media. Also, let close friends and family know directly about your new number.

If you’re interested in other WhatsApp tricks, check out our guide on how to read deleted WhatsApp messages or explore the latest WhatsApp features you might be missing.

Changing your WhatsApp number doesn’t have to be a headache. With the built-in tools and a little preparation, you can update your number quickly and keep all your chats safe. Follow these steps, and you’ll be back to messaging in no time.

Continue Reading
Click to comment

Leave a Reply

Your email address will not be published. Required fields are marked *

How To

How to Hide Instagram Last Seen: A Complete Guide to Protecting Your Online Activity

Published

on

How to Hide Instagram Last Seen: A Complete Guide to Protecting Your Online Activity

Instagram is one of the most popular social media platforms in the world, allowing users to share photos, videos, and connect with friends. However, many people are unaware of how their online activity is visible to others. The hide Instagram last seen feature is a crucial privacy tool that lets you control who sees when you’re active. In this guide, we’ll walk you through everything you need to know about managing your Instagram activity status.

Why You Might Want to Hide Your Instagram Last Seen

Just like Facebook and WhatsApp, Instagram shows your friends when you were last active. This feature, known as “Activity Status,” can be useful for some but intrusive for others. Have you ever felt pressured to reply immediately because someone saw you online? That’s a common frustration.

Privacy is a growing concern in the digital age. Many users prefer to keep their online habits private, whether to avoid awkward social situations or simply to maintain personal boundaries. By learning how to hide Instagram last seen, you can enjoy the app without feeling watched.

What Is Instagram Activity Status?

Instagram’s activity status shows your friends and followers when you were last active on the app. This appears as a green dot next to your profile picture or a timestamp like “Active now” or “Active 5 minutes ago.” Similarly, you can see the same information for people you follow.

This feature is enabled by default, meaning everyone you follow can see your online activity. However, Instagram provides a simple way to disable it. Understanding how to manage this setting is key to taking control of your Instagram privacy settings.

How to Hide Last Seen on Instagram: Step-by-Step Guide

Disabling your activity status on Instagram is straightforward. Follow these steps to hide your last seen and protect your privacy:

Step 1: Open the Instagram App

Launch Instagram on your mobile device. Tap on your profile icon in the bottom right corner to access your profile page.

Step 2: Access Settings

Tap the three horizontal lines (menu icon) in the top right corner. From the dropdown menu, select “Settings.” This will open your account settings.

Step 3: Navigate to Activity Status

Within Settings, scroll down to find the “Privacy” section. Tap on “Activity Status” to see the available options.

Step 4: Disable Show Activity Status

You’ll see a toggle next to “Show Activity Status.” By default, it is enabled, which means your followers can see when you’re active. Tap the toggle to turn it off. Once disabled, you won’t be able to see the activity status of others either—this is a two-way street.

That’s it! You have successfully learned how to hide Instagram last seen from your followers. This simple change ensures your online activity remains private.

What Happens When You Hide Your Instagram Last Seen?

When you disable activity status, your friends and followers will no longer see a green dot or a timestamp next to your name. However, keep in mind that you also lose the ability to see the activity status of others. This trade-off is often worth it for those who value Instagram online status privacy.

It’s important to note that this setting applies to all your followers and the people you follow. You cannot selectively hide your status from specific users—it’s an all-or-nothing feature. If you need more granular control, consider using Instagram’s “Close Friends” feature for sharing stories.

Additional Tips for Managing Your Instagram Privacy

Beyond hiding your last seen, there are other ways to enhance your privacy on Instagram. For example, you can switch to a private account to approve followers manually. You can also turn off read receipts in direct messages by going to Settings > Privacy > Messages.

Another useful trick is to use Instagram privacy settings to limit who can comment on your posts or tag you. These small adjustments can make a big difference in how much control you have over your online presence.

For more detailed guides on managing social media privacy, check out our article on how to hide WhatsApp blue ticks.

Common Questions About Hiding Instagram Last Seen

Can I hide my last seen from specific people? No, Instagram does not offer selective hiding. You must disable the feature for everyone.

Will people know I disabled my activity status? No, there is no notification when you disable it. Your activity status will simply disappear.

Does hiding last seen affect DMs? Yes, when you disable activity status, you won’t see when others are typing or active in direct messages.

Final Thoughts

Privacy on social media is more important than ever. By learning how to hide Instagram last seen, you can use the app on your own terms without feeling pressured to respond immediately. This small adjustment can significantly improve your experience and peace of mind.

If you found this guide helpful, consider sharing it with friends who might also benefit. For more tech tips, explore our other articles on how-to guides and social media tips.

Continue Reading

How To

Complete Guide: How to Uninstall McAfee on Your PC or Mac Without Leftovers

Published

on

Complete Guide: How to Uninstall McAfee on Your PC or Mac Without Leftovers

If you’re looking to uninstall McAfee completely from your computer, you’re not alone. Many users find that McAfee, while effective, can be resource-heavy or overly persistent with renewal reminders. Whether you’re switching to another antivirus or simply relying on built-in protection, removing McAfee entirely—without leaving behind hidden files—is essential for a clean system. This guide covers every method for Windows and Mac, including the official McAfee removal tool (MCPR).

Why You Might Want to Remove McAfee

McAfee often comes pre-installed on new PCs, usually as a trial version. After the trial ends, users frequently encounter frequent pop-ups urging renewal. Additionally, some people find that McAfee slows down their system or conflicts with other security software. As a result, many decide to uninstall McAfee completely to free up resources and eliminate distractions.

But simply uninstalling through standard methods may leave behind registry entries, background services, or browser extensions like WebAdvisor. That’s why a thorough removal process is crucial.

How to Uninstall McAfee on Windows 10 and 11

Using Windows Settings (Recommended for Most Users)

Windows provides a built-in way to remove programs. This method works well for most McAfee installations and is the first step you should try.

  1. Press the Windows key and type “Settings.” Open the Settings app.
  2. Navigate to Apps > Installed Apps (Windows 11) or Apps & Features (Windows 10).
  3. In the search box, type “McAfee” to locate the installed product.
  4. Click the three-dot menu next to the McAfee entry and select Uninstall.
  5. Confirm the uninstall when prompted, and allow any permissions requested.
  6. Follow the on-screen instructions. If asked to remove related files, select Yes.
  7. Restart your computer after the process finishes to clear temporary files.

This method typically removes the main application, but it may not delete all associated files.

Using Control Panel (Alternative Method)

For users who prefer the classic interface, the Control Panel offers another reliable route.

  1. Open Control Panel from the Start menu.
  2. Select Programs and Features (or Add or Remove Programs on older Windows versions).
  3. Find the McAfee product in the list, right-click it, and choose Uninstall.
  4. Follow the wizard steps and restart your PC afterward.

You can also open Programs and Features quickly by pressing Windows + R, typing appwiz.cpl, and hitting Enter.

Removing McAfee WebAdvisor and Other Components

McAfee often installs browser extensions like WebAdvisor, which may remain after the main uninstall. To remove it:

  1. Go to Settings > Apps > Installed Apps.
  2. Search for “WebAdvisor” and select Uninstall.
  3. Confirm and restart your browser if necessary.

Removing WebAdvisor ensures that no McAfee components linger in your browser, preventing pop-ups or slowdowns.

Using the MCPR Tool for Stubborn Leftovers

Sometimes, standard uninstall methods fail, leaving behind registry keys or background processes. In such cases, the McAfee Consumer Product Removal (MCPR) tool is your best bet. This official utility is designed to completely erase all traces of McAfee software.

When Should You Use MCPR?

Consider using MCPR if:

  • You receive error messages during uninstall.
  • McAfee refuses to uninstall normally.
  • Security alerts or pop-ups continue after removal.
  • You find leftover files or services still running.

How to Download and Run MCPR

  1. Visit the official McAfee support site and search for “MCPR tool.”
  2. Download the latest version of MCPR.exe.
  3. Close all open programs and temporarily disable your antivirus (if any).
  4. Right-click the downloaded file and select Run as Administrator.
  5. Click Yes if prompted by User Account Control.
  6. In the tool, read the license agreement and click Agree.
  7. Enter the security characters displayed on the validation page, then click Next.
  8. The tool will scan and remove McAfee files. Wait for the “Removal Complete” message.
  9. Click Restart to finish the process.

After rebooting, your system should be completely free of McAfee software.

How to Uninstall McAfee on a Mac

Mac users can also remove McAfee, but the process involves several steps to ensure no files remain.

Remove the Main Application

  1. Open Finder and go to the Applications folder.
  2. Look for McAfee Internet Security Uninstaller or McAfee Total Protection Uninstaller.
  3. Double-click the uninstaller and follow the prompts, entering your administrator password when required.
  4. Click Finish after the process completes.

Delete Remaining Files

  1. In Finder, click Go in the menu bar and select Go to Folder.
  2. Search for folders containing “McAfee” in common locations like /Library and ~/Library.
  3. Delete any McAfee-related files you find (be careful not to remove system files).
  4. Empty the Trash to permanently delete them.

This extra step ensures that no configuration files or caches remain.

Final Thoughts on Removing McAfee Completely

To uninstall McAfee completely, always start with the standard Windows or Mac removal methods. If leftovers persist, the MCPR tool is your most reliable option. By following these steps, you’ll eliminate all traces of McAfee, freeing up system resources and stopping unwanted notifications.

For more tech guides, check out our articles on checking suspicious links and hiding WhatsApp blue ticks.

Continue Reading

How To

WhatsApp Rolls Out ‘Unknown Business Accounts’ Feature for Beta Testers: What You Need to Know

Published

on

WhatsApp is once again refining the user experience with a fresh update. This time, the messaging giant is rolling out a new feature called Unknown Business Accounts for its beta testers. Designed to give users more clarity and control, this update specifically targets messages from business accounts that aren’t saved in your contact list.

If you’re a beta tester on Android, you might soon notice a subtle but significant change. Instead of simply receiving a message from an unknown number, you’ll now see a clear indicator at the bottom of the chat. This indicator tells you that the account reaching out is a business account not stored in your contacts. From there, you have two straightforward options: add the business to your contacts or block it entirely.

How Does the Unknown Business Accounts Feature Work?

Previously, WhatsApp would notify users about any unknown contact sending a message. However, the new Unknown Business Accounts feature adds a layer of specificity. It now distinguishes between a regular unknown contact and a business account. This distinction is crucial because business accounts often send promotional or transactional messages, which can sometimes feel intrusive.

When a business account that you haven’t saved tries to contact you, a banner or message will appear at the bottom of the chat screen. This banner clearly states that the sender is a business account not in your contact list. As a result, you can make an informed decision immediately. You can either choose to save the business for future reference or block them to prevent further messages.

Why This Matters for User Control and Security

This update is a direct response to the growing need for better spam management. Unsolicited messages from businesses can clutter your chat list and compromise your privacy. By implementing this feature, WhatsApp is giving users a proactive tool to manage their inbox. It’s a small change, but it significantly enhances transparency.

Moreover, this feature aligns with WhatsApp’s broader commitment to security. It helps users avoid potential scams or unwanted marketing pitches. Instead of wondering who is contacting you, you now have immediate context. This makes the decision to engage or ignore much simpler.

Who Can Access the Unknown Business Accounts Feature Right Now?

As of now, this feature is available exclusively to a select group of beta testers on WhatsApp for Android. It is not yet live for all users. If you have installed the latest beta version but don’t see the feature, don’t worry. WhatsApp often activates new features gradually. More activations are expected with future updates.

To become a beta tester, you can join the Google Play Beta Program for WhatsApp. However, keep in mind that beta features are subject to change and may contain bugs. If you prefer stability, it’s best to wait for the official public release.

What This Means for the Future of WhatsApp Messaging

WhatsApp started as a simple messaging app, but it has evolved into a comprehensive communication platform. Features like Unknown Business Accounts show that the company is listening to user feedback. The goal is to make interactions safer and more organized.

Building on this, future updates may introduce even more granular controls. For instance, users might be able to set preferences for how they want to handle messages from unknown businesses. Some could choose to automatically block them, while others might prefer to review each request manually.

How to Prepare for the Update

If you’re eager to try the new feature, make sure you have the latest WhatsApp beta installed. You can download it from the Google Play Store if you are enrolled in the beta program. Alternatively, you can sideload the APK from trusted sources, but this carries some risk.

Once the feature is activated on your account, you’ll see the notification for any unknown business account that messages you. Remember, this feature is designed to complement existing privacy settings, not replace them. For more tips on managing your WhatsApp privacy, check out our guide on how to block and unblock contacts.

In addition, you can explore other recent updates like the new privacy settings for desktop beta users. These changes collectively aim to create a safer messaging environment across all devices.

Ultimately, the Unknown Business Accounts feature is a welcome addition. It puts the power back in your hands, allowing you to decide who can reach you and how. As WhatsApp continues to roll out updates, staying informed will help you make the most of the platform.

Continue Reading

Trending