Connect with us

How To

How to Enable Immersive Mode on Android: A Step-by-Step Guide to a Distraction-Free Screen

Published

on

Immersive Mode on Android

What Exactly Is Immersive Mode on Android?

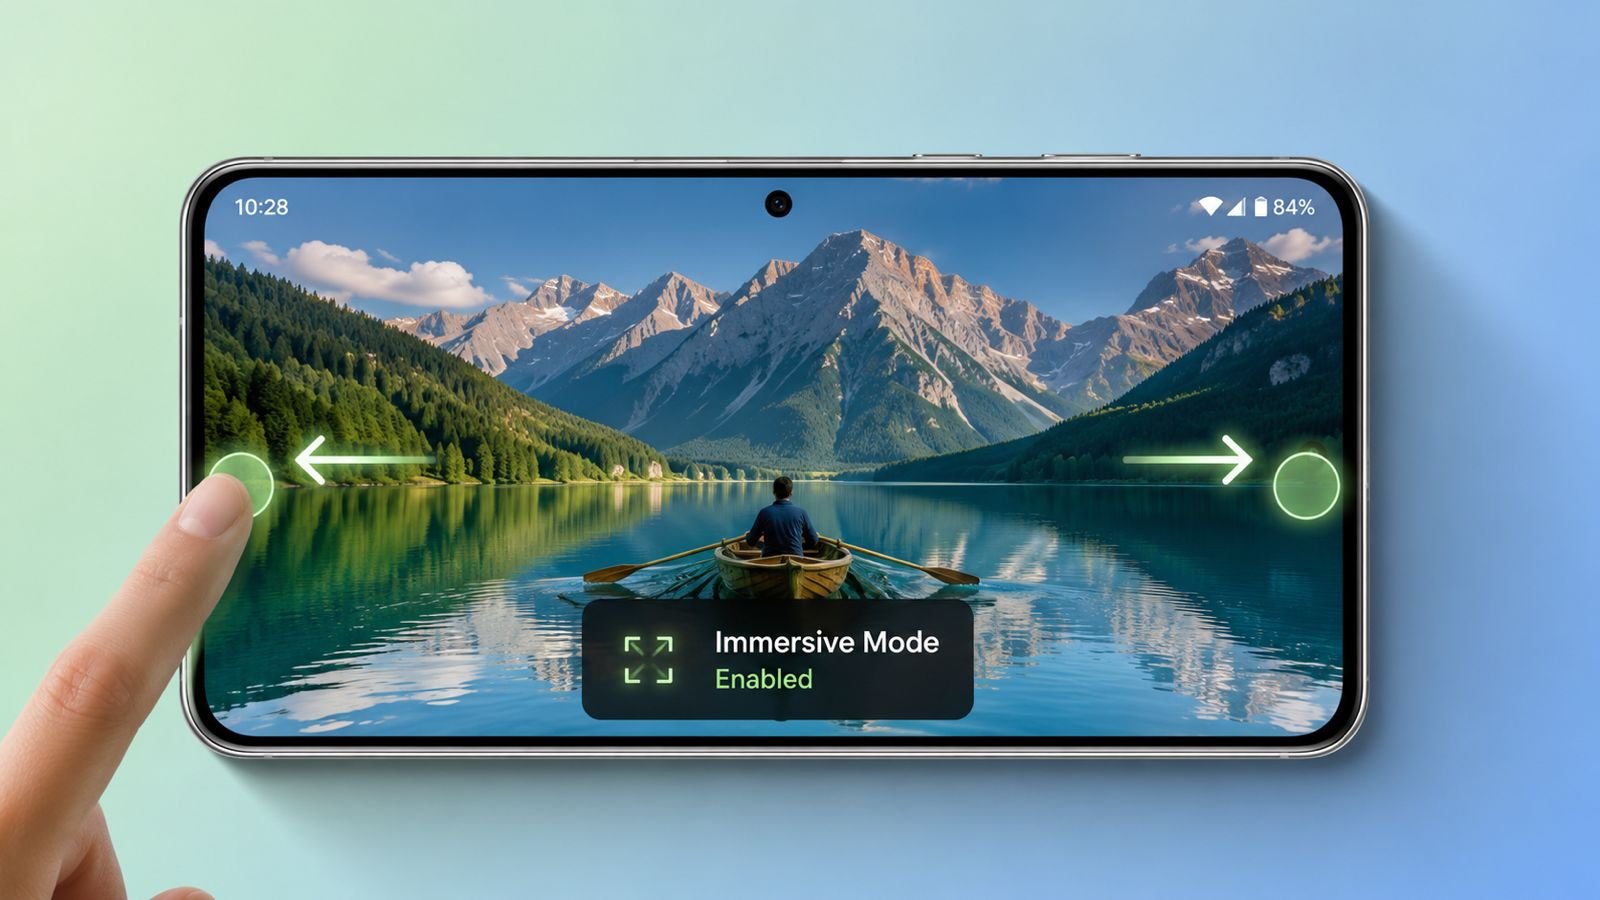
Immersive Mode on Android lets you run apps in true full screen. It hides the status bar at the top and the navigation bar at the bottom. The result? More room for what matters — games, videos, books, or web pages.

Google introduced this feature back in Android 4.4 KitKat. Every version since supports it. Some apps, like video players and games, trigger immersive mode automatically. You can’t turn that off. But for everything else, you have options — and you don’t need root access.

What You Gain (and Lose) by Hiding the Bars

The status bar shows your time, battery, notifications, and signal strength. The navigation bar holds Back, Home, and Recent Apps. On older phones like the LG G6 or Samsung Galaxy S8, those buttons were on-screen. Modern phones still use them. Some people like the clean look of hardware buttons. Others find the on-screen bars a waste of space.

Immersive mode gives you:

  • More usable screen real estate.
  • Bigger video playback.
  • Less clutter during gaming.
  • A cleaner reading layout.
  • A more modern app feel.

But it’s not perfect. Notifications stay hidden. You can’t see the battery level or time at a glance. Swiping from the edge can trigger accidental touches. And on some devices, the keyboard doesn’t play nice with hidden buttons.

The good news? Swipe down from the top or up from the bottom, and both bars reappear temporarily. You’re never locked out.

Method 1: Using the Fullscreen Immersive App

The easiest route is a third-party app. Fullscreen Immersive by PhotoSafe is the most popular choice on the Google Play Store. There are paid alternatives like Immersive Mode Manager, but the free version works well for most people.

Setup Steps

  1. Install Fullscreen Immersive from the Play Store.
  2. Open it and tap I Agree.
  3. Flip the switch at the top right to On.
  4. Tap Grant to allow the overlay permission.
  5. Go back to the main screen and pick your preference: Hide Nothing, Hide Navigation Bar, or Hide Navigation and Status Bar.

Your choice applies system-wide, immediately.

Free Version Limitations

The free app has a known quirk: hidden navigation buttons can interfere with the keyboard on some phones. Typing becomes awkward. The Pro version fixes this. If you run into trouble, try excluding specific apps (more on that below).

Method 2: Using Shortcutter and ADB

This method gives you a Quick Settings tile. No root required, but it takes a few more steps.

Step 1: Enable Developer Options and USB Debugging

Go to Settings > About Phone. Tap Build Number seven times. Now Developer Options appears in your settings. Open it and enable USB Debugging.

Step 2: Install the Apps

Install Shortcutter from the Play Store. Then install Android Debug Bridge (ADB) on your computer. On Windows, grab the SDK Platform-tools. On macOS, use Terminal to install ADB via Homebrew.

Step 3: Grant Permission via ADB

Connect your phone to your computer with a USB cable. Open Terminal (macOS) or Command Prompt (Windows). Run adb devices to confirm your phone is recognized. Then run adb shell pm grant com.tortel.syslog android.permission.WRITE_SECURE_SETTINGS. Disconnect your phone.

Step 4: Enable the Quick Settings Tile

Open Shortcutter. Go to Tile Settings and enable Immersive Full Screen Tile. Pull down your Quick Settings panel, edit the tiles, and add the new one. Tap it and choose Full. Both bars disappear.

You can also hide just one bar. Swipe the screen edges to bring them back temporarily.

Setting Immersive Mode for Individual Apps

Fullscreen Immersive lets you customize per app. Open the app, tap Usage Access, and grant permission. Then go back. A list of your installed apps appears. Search for the one you want.

Tap an app repeatedly to cycle through modes:

  • First tap: show both bars.
  • Second tap: show only the status bar.
  • Third tap: hide both bars.
  • Fourth tap: restore default.

App-specific settings override the global one. But remember: apps that use immersive mode by default (like many video players) ignore these changes.

Excluding Problematic Apps

Some apps just don’t work well in immersive mode. Google Hangouts is a classic example. To exclude an app, connect your phone to your computer again, open ADB shell, and run a command like: adb shell settings put global policy_control immersive.preconfirms=* — replacing preconfirms with the actual package name.

This tells the system to leave that app alone. No more manual toggling.

Things to Consider Before You Enable It

Immersive mode is great, but it’s not for everyone. Think about your daily use:

  • Pros: bigger view, better gaming, cleaner reading, fewer distractions.
  • Cons: hidden notifications and battery, invisible time, accidental edge swipes, keyboard conflicts on some devices.

Pick the settings that match your habits. Some apps behave differently than others. Experiment with app-specific modes before committing system-wide.

The Bottom Line

Enabling Immersive Mode on Android is one of the quickest ways to reclaim screen space. Whether you use a simple app or the ADB route, you get a cleaner, more focused display. No root required. Just a few minutes of setup and you’re done.

Try it for gaming. Try it for reading. You might never want those bars back.

Continue Reading
Click to comment

Leave a Reply

Your email address will not be published. Required fields are marked *

How To

Ditch the subscription: how Jellyfin streams your own media remotely for free

Published

on

Jellyfin self-hosted media server

Plex made you pay to stream your own stuff. Jellyfin says no.

There’s something quietly absurd about paying a monthly fee to watch movies you already own. They’re sitting on a hard drive in your living room. You ripped them, you organized them, you stored them. Yet Plex — the service that built its name on solving exactly this problem — now locks its best features behind a subscription called Plex Pass. Want to stream remotely? That’ll cost you. Mobile apps? Pay up. Offline downloads? Another fee.

It doesn’t have to be this way. Jellyfin is a free, open-source media server that does everything Plex does — remote streaming, mobile apps, offline downloads, metadata scraping, collections — without asking for a cent. And it’s surprisingly easy to set up.

What Jellyfin actually does

Jellyfin is a self-hosted media server. You install it on a computer or NAS in your home, point it at your folders of movies, TV shows, music, or photos, and it serves them to any device on your network. It also handles remote access — meaning you can watch your library from a hotel room, a friend’s house, or anywhere with an internet connection.

The feature set is nearly identical to Plex’s paid tier:

  • Remote streaming — watch your media outside your home network.
  • Mobile apps — official apps for Android, iOS, and Android TV at no cost.
  • Offline downloads — save media to your phone or tablet for plane rides.
  • Metadata and artwork — automatic fetching of posters, descriptions, cast info.
  • Collections and playlists — organize your library however you like.
  • Live TV and DVR — if you have a tuner, Jellyfin can record over-the-air broadcasts.

No ads. No upsells. No feature gates.

How Jellyfin handles remote access

This is the big one. Plex’s remote streaming works through their relay servers, which is convenient but requires a subscription for anything beyond a minute-long preview. Jellyfin takes a different approach.

By default, Jellyfin uses your own connection. You open a port on your router (usually 8096) and point a domain or dynamic DNS at your server. It’s a few extra steps, but the result is a direct connection — faster, more reliable, and entirely under your control. No middleman. No bandwidth limits.

If you’re not comfortable opening ports, Jellyfin supports reverse proxies like Nginx or Caddy, and there are community guides for setting up HTTPS with Let’s Encrypt. For less technical users, services like Tailscale or ZeroTier can create a secure tunnel to your home network without exposing anything to the public internet.

Setting up Jellyfin: not as hard as it sounds

Installation varies by platform, but the core process is the same. On a Linux machine, you add the Jellyfin repository and run a few commands. On Windows, there’s an installer. On a NAS running Docker, you pull the image and map volumes. Most setups take under 15 minutes.

Once installed, the web interface walks you through adding libraries. You point Jellyfin at a folder, choose the content type (movies, TV, music), and let it scan. Metadata — posters, ratings, summaries — populates automatically. From there, you can access your library from any browser or the Jellyfin app.

The mobile apps deserve special mention. Plex charges $5 to unlock the mobile app per device. Jellyfin’s apps are free, open-source, and available on the Play Store, App Store, and F-Droid. They work offline, support Chromecast, and handle subtitles without drama.

What Jellyfin doesn’t do (yet)

Let’s be honest: Jellyfin isn’t as polished as Plex. The UI is functional but not gorgeous. The app ecosystem is smaller — no native Roku app, though there are third-party options. Live TV and DVR work, but setup is more manual.

Hardware transcoding — converting video on the fly for devices that can’t handle the original format — requires a bit of configuration. Plex makes this nearly automatic with a subscription. Jellyfin supports Intel Quick Sync, NVIDIA NVENC, and AMD AMF, but you may need to install drivers or enable GPU passthrough in Docker.

But here’s the thing: those gaps are closing fast. Jellyfin’s development is active, with releases every few weeks. The community is large and helpful. And for the price — zero — the trade-off is more than fair.

Why you should switch (or at least try it)

If you’re already paying for Plex Pass, you might not feel the pain. But think about the principle: you own the media, you own the hardware, and you’re still paying a toll to watch it outside your house. That’s a subscription that exists because of a technical limitation, not because of any real value add.

Jellyfin eliminates that entirely. It’s your server, your data, your rules. No one can change the pricing model, add ads, or remove features you rely on. It’s also a great option if you’re building a home media server from scratch and don’t want to lock yourself into a proprietary ecosystem.

Start small. Install Jellyfin alongside Plex on the same machine. Point it at one folder. Test remote streaming with a friend. Chances are, you’ll wonder why you didn’t do it sooner.

Continue Reading

How To

yt-dlp Is Already a Powerhouse. This Upgrade Finally Makes It a Joy to Use

Published

on

yt-dlp upgrade

The Command-Line Beast Gets a Makeover

For years, yt-dlp has been the go-to weapon for anyone who needs to pull video files off the web. It’s fast, it’s flexible, and it supports an absurd number of sites. But let’s be honest: its default interface is a wall of green text on a black terminal window. It works, but it doesn’t exactly spark joy.

A new yt-dlp upgrade changes that. Not by dumbing anything down, but by wrapping that raw power in an interface that actually feels good to use. If you’ve bounced off yt-dlp before because it felt too technical, this is the moment to give it another look.

What Makes yt-dlp So Powerful in the First Place?

Before we talk about the upgrade, it helps to understand what yt-dlp already does that no other tool quite matches. It’s a command-line program that can download videos from YouTube, Vimeo, Dailymotion, Twitch, and hundreds of other platforms. It handles playlists, subtitles, thumbnails, and metadata with surgical precision.

You can tell it to grab only the audio, download the best quality available, or even extract specific chapters from a long video. It’s the kind of tool that rewards you for learning a few flags and arguments. But that learning curve is exactly what keeps casual users away.

The Upgrade That Changes Everything

The latest yt-dlp upgrade introduces a proper graphical user interface (GUI) that sits on top of the existing command-line engine. Think of it as a friendly translator between you and the terminal. Instead of typing yt-dlp -f bestvideo+bestaudio --embed-thumbnail --add-metadata, you just check a few boxes and click a button.

The GUI is clean, responsive, and surprisingly complete. It gives you:

  • A simple URL input field with paste detection
  • Dropdown menus for format selection (video-only, audio-only, combined)
  • Quality presets from 144p all the way up to 8K
  • One-click options for subtitles, thumbnails, and metadata embedding
  • A download queue with progress bars and pause/resume controls

It still uses the same engine underneath, so you’re not losing any of the raw capability. You’re just getting a much better way to interact with it.

Why This Matters for Regular Users

Most people don’t want to memorize command-line syntax. They want to paste a link, pick a quality, and get a file. That’s exactly what this upgrade delivers. It makes yt-dlp accessible to anyone who can copy and paste a URL.

It also solves a common pain point: managing multiple downloads. The old way meant opening several terminal windows or writing a script. Now you can queue up a dozen videos, walk away, and come back to find them all waiting in your downloads folder. The interface shows estimated time remaining, file size, and download speed for each item.

For power users, the upgrade doesn’t take anything away. The command-line version still works exactly as before. You can switch between the GUI and the terminal depending on what you’re doing. It’s the best of both worlds.

What About Privacy and Safety?

One concern with any new GUI is whether it phones home or adds bloat. According to the developers, the interface is entirely local. It doesn’t send your download history anywhere, and it doesn’t inject ads or tracking code. It’s the same open-source philosophy that made yt-dlp popular in the first place, just with a better face.

The upgrade also includes improved error messages. Instead of a cryptic line like ERROR: unable to extract video data, you now get a human-readable explanation and a suggestion for what to try next. That alone is a huge quality-of-life improvement.

How to Get the Upgrade

If you already have yt-dlp installed, the upgrade is available through the usual channels. On Windows, you can download the new installer from the official GitHub releases page. macOS users can grab it via Homebrew with brew upgrade yt-dlp. Linux users will find it in their package manager or via the GitHub repo.

The first time you launch the new version, you’ll see a setup wizard that walks you through the basic options. It asks where you want to save files, what default quality you prefer, and whether you want to automatically embed subtitles. You can change all of this later in the settings panel.

For those who prefer to stick with the terminal, nothing has changed. The command-line interface is still there, still works the same way, and still accepts all the same flags. The GUI is an addition, not a replacement.

Final Verdict: A Rare Upgrade That Actually Delivers

Most software upgrades are either bug fixes or feature bloat. This one is different. It takes an already excellent tool and makes it usable by a much wider audience without sacrificing what made it great in the first place.

If you’ve been using a browser extension or a paid downloader that only works with YouTube, now is the time to switch. The yt-dlp upgrade gives you a better experience, broader site support, and zero cost. It’s rare to see an open-source project nail the balance between power and usability this well.

Go grab it. Paste a link. Watch the progress bar fill up. It’s that simple now.

Continue Reading

Social Media

Zuckerberg reveals Meta’s enterprise AI play is bigger than just agents

Published

on

Meta enterprise AI

Meta’s enterprise AI ambitions go far beyond customer service bots

Mark Zuckerberg has a message for investors: don’t think of Meta enterprise AI as just another chatbot play. During the company’s second-quarter earnings call on Wednesday, the Meta CEO laid out a far bigger vision — one that spans APIs, direct compute sales, and even internal productivity tools repackaged for external customers.

In June, Meta quietly entered the enterprise AI market with an AI agent designed to help businesses handle customer service, support, and daily operations. But that was just the opening act. Zuckerberg made it clear that the company sees a much larger opportunity ahead.

“We see a large enterprise opportunity to sell to businesses, including APIs, business agents, potentially selling compute directly, and other services that we’re building for large customers,” he said.

These additions could help Meta build new revenue streams beyond its core advertising business — which still drives the overwhelming majority of its revenue — and subscriptions, which contribute a much smaller slice.

Advertisers first, then the rest

For now, Meta is focused on serving its existing base of millions of advertisers. The company plans to offer AI agents that work across its messaging apps and other platforms, allowing businesses to interact with customers through an AI interface.

“And, just like the ad system, effectively, we will get paid when we deliver results for those businesses,” Zuckerberg explained. “We view this as an extension of the sales and the partnerships that we have with many millions of advertisers and hundreds of millions of small businesses that use our platforms.”

That’s a smart starting point. Meta already has deep relationships with small and medium businesses through its ad platform. Offering AI agents as a natural extension of that relationship feels less like a pivot and more like an upgrade.

Internal tools, external customers

But Zuckerberg also hinted at a bigger play. He described how Meta could eventually sell its own internal tools — the software the company built for its own engineers and product teams — to external customers.

“We’re building coding and developing and internal productivity tools partially because we need to build them ourselves, and we need to make sure that we have tools that are tuned for ourselves,” he said. “Now that we have those, we feel like there’s a large opportunity to serve — whether that’s small businesses or larger businesses.”

It’s a classic move: build something for yourself, then sell it to the world. But Zuckerberg admitted this won’t be easy. Selling to enterprise customers, he acknowledged, is a “different muscle” than the one Meta has historically flexed.

Meta’s compute play: sell now or save for later?

One of the more interesting parts of the call was Zuckerberg’s discussion of compute sales. Meta has invested heavily in AI infrastructure, and the company sees an opportunity to sell some of that compute capacity to enterprise customers — at a premium.

The company pointed out multiple times that it currently has the opportunity to sell compute at “a significant premium over what we paid for it.”

But Zuckerberg cautioned against cashing out too quickly. “It would be foolish,” he said, to “sell all of the compute and take a short-term profit.” Instead, he described Meta’s approach as a “portfolio” that balances long-term and short-term plans for its compute infrastructure.

“As we get closer to personal superintelligence, we are … going to need hardware that allows you to seamlessly interact with it,” he noted.

That’s a reminder that Meta’s enterprise AI ambitions are tied to a much bigger bet on agentic AI — systems that can act on a person’s or business’s behalf, rather than just answer questions.

Consumer AI agents and smart glasses are also on the table

Enterprise customers aren’t the only ones getting AI agents. Zuckerberg also promised that consumers will get “personal AI agents” and AI-powered smart glasses that can interact with the world in front of them.

These consumer-facing products are part of a broader strategy that uses large language models to rapidly build out Meta’s suite of social apps. Recent launches include an app for Marketplace sellers, another for Facebook Groups, one for vibe-coded games, and other experiments.

“I expect it to become a lot easier to ship new apps,” said Zuckerberg. “So we are planning to build out more ideas and use our recommendation systems to scale them to the people who will find them interesting.”

More experiments are on the way. The message is clear: Meta is betting big on AI across the board — enterprise, consumer, and everything in between.

Continue Reading

Trending