Connect with us

How To

WhatsApp HD Photos: How to Send High-Quality Images Without Compression

Published

on

WhatsApp HD Photos: How to Send High-Quality Images Without Compression

Remember that stunning sunset photo you took on vacation? Or the perfect shot of your kid’s birthday cake? For years, sending these through WhatsApp meant watching them transform into blurry, pixelated versions of themselves. The app’s aggressive compression was a necessary evil for faster sending, but it often ruined the details that made photos special.

That frustration is now history. WhatsApp has finally addressed one of its users’ longest-standing complaints with a global rollout of HD photo sharing. No more uploading to Google Drive just to bypass compression. No more disappointing recipients with muddy images. The feature is here, and it’s refreshingly simple to use.

How WhatsApp’s HD Photo Feature Actually Works

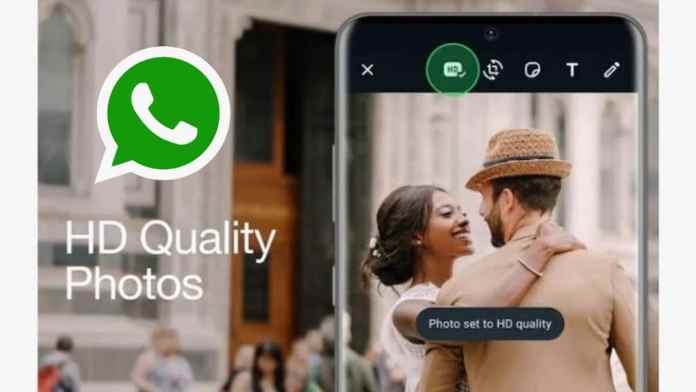
Contrary to what some might think, this isn’t a behind-the-scenes magic trick. WhatsApp gives you direct control. When you select a photo to send, you’ll now see a new “HD” button appear at the top of the screen, right alongside the familiar crop and text tools.

Tapping it presents a choice: “Standard Quality” (the old, compressed default) or “HD Quality.” Select HD, and WhatsApp will send a much larger, clearer file. The app still applies some light optimization to ensure reasonable file sizes, but the difference is night and day. Fine textures, sharp edges, and vibrant colors are preserved.

What’s clever is that the setting isn’t permanent. It resets with each photo, putting you in charge every time. This is perfect for data-conscious users who might only want HD for their most important shots.

A Step-by-Step Guide to Sending HD Photos

Using the feature is intuitive, but let’s break it down.

For Both Android and iOS Users:

Open any chat and tap the attachment (paperclip or plus) icon. Select “Gallery” or “Photos” and choose your image. Before hitting send, look for the “HD” icon at the top. Tap it, select “HD Quality,” and then send as normal. That’s it. Your recipient will get a noticeably superior image, and it will be marked with a small “HD” badge in the corner so they know.

What About Receiving HD Photos?

The feature works both ways. If someone sends you an HD photo, you’ll see the “HD” badge. Even better, if you receive a standard-quality image and wish you had the HD version, WhatsApp now offers an option to request it. This is a game-saver for group chats where someone might have forgotten to toggle the HD option.

Why This Update Matters Beyond Just Quality

This move by Meta, WhatsApp’s parent company, signals a shift in priorities. For years, speed and low data usage were king. Now, user experience and media fidelity are catching up. It acknowledges that our phones are powerful cameras, and we want to share those results properly.

The update also subtly changes how we use the app. It reduces dependency on third-party cloud services just for sharing good photos, keeping more activity within WhatsApp’s ecosystem. While the feature is currently for photos only, the framework is there. A similar high-definition option for videos is a logical and highly anticipated next step.

So, the next time you go to share a memory-worthy picture, remember that little “HD” button. It turns WhatsApp from a simple messaging tool into a true platform for sharing life’s moments, exactly as you captured them.

Continue Reading
Click to comment

Leave a Reply

Your email address will not be published. Required fields are marked *

How To

I Finally Dug Into KOReader’s Hidden Plugins—These 5 Completely Changed How I Read

Published

on

KOReader hidden plugins

Why I Never Touched KOReader’s Plugins

For months, I used KOReader as a glorified book viewer. Open file. Read. Close. Repeat. The interface was clean, the battery life was decent, and I figured that was enough.

Then I stumbled into the plugin manager one rainy afternoon. What I found wasn’t just extra features—it was a whole different way of thinking about e-reading. Here are the five plugins that genuinely rewired my habits.

1. Progress Sync: Your Reading Life, Backed Up

The first plugin I enabled was the sync tool. It sounds boring. It’s not.

Before this, I lost my place twice when switching between my phone and my e-reader. Now, every page turn syncs to a cloud server automatically. Pick up my phone during lunch, and it’s exactly where I left off on the Kindle. The setup took under two minutes—just enter a server address and a username.

There’s also a built-in backup feature. My entire reading history, bookmarks, and highlights get pushed to a remote location. If my device dies tomorrow, my library’s progress survives. That peace of mind alone was worth the effort.

2. Auto-Turn: The Pagination Fix I Didn’t Know I Needed

E-ink screens have a reputation for ghosting. KOReader tries to fix this with periodic refreshes, but the default settings never felt right to me.

The AutoTurn plugin changes that. It lets you set a specific page count before the screen does a full refresh. I set mine to every five pages. The result? Crisper text, fewer artifacts, and no more manual refresh taps every few minutes.

It’s a small tweak with a big visual payoff. If you’ve ever squinted at a smudged e-ink display, this plugin is your friend.

3. Reading Stats: The Data That Made Me Read More

I’m a sucker for numbers. KOReader’s built-in statistics are decent, but the Reading Stats plugin takes it further.

It tracks not just time read, but also estimated pages per hour, average session length, and a rolling seven-day view. I discovered I read fastest in the morning—about 40% faster than at night. That changed when I schedule my reading.

There’s also a streak counter. It’s embarrassingly motivating. I’ve kept a 23-day streak alive solely because breaking it would ruin the graph. Whatever works, right?

4. ZSync: Two-Way Bookmarking That Just Works

If you use multiple devices, ZSync is the plugin you didn’t know you needed.

Unlike the basic sync, ZSync does two-way merging. Add a highlight on your phone, and it appears on your e-reader within seconds. Delete a bookmark on one device, and it vanishes everywhere. No conflicts, no manual merging.

It also syncs dictionaries and custom word lists. I’ve built a personal vocabulary list over the past year, and now it follows me everywhere. That’s the kind of convenience that makes you wonder how you lived without it.

5. Cover Browser: Your Library, Finally Beautiful

The default file browser in KOReader is functional but ugly. The Cover Browser plugin fixes that completely.

It displays your books as a grid of cover thumbnails, just like a modern bookstore app. You can sort by author, series, or recent reads. There’s even a search bar that filters as you type.

The visual upgrade made me want to browse my own collection again. I found three books I’d forgotten I owned. That’s not a small thing for someone with a hoarding habit.

How to Enable These Plugins Yourself

Getting started is easier than you’d think. Open KOReader, go to the gear icon, then select Plugin manager. You’ll see a list of all available plugins—most are disabled by default.

Tap the checkbox next to any plugin to enable it. Some, like ZSync, require a quick setup step after activation. The whole process takes about five minutes.

For a deeper dive into customizing your reading setup, check out our guide on KOReader plugin setup or learn how to optimize e-reader battery life. If you’re new to the app entirely, our KOReader beginner tips will get you up to speed.

Final Thoughts: Don’t Sleep on the Plugin Manager

I ignored KOReader’s plugins for too long. They felt like developer tools, not reader features. That was a mistake.

These five plugins turned a good e-reading app into a great one. Progress sync saved my sanity, AutoTurn fixed my screen, and Reading Stats made me read more consistently than any New Year’s resolution ever did.

If you’re already using KOReader, open that plugin manager tonight. You might find your next favorite feature hiding in plain sight.

Continue Reading

Social Media

Senators demand answers from TikTok over experiment that disabled safety safeguards for 15 million users

Published

on

TikTok experiment safeguards

The letter and the deadline

Two U.S. senators are pressing TikTok for answers about an experiment that disabled a safety safeguard for 15 million American users. The company has until September 1 to respond.

Senator Marsha Blackburn (R-TN) and Senator Richard Blumenthal (D-CT) sent a letter to TikTok CEO Shou Chew and Adam Presser, who heads TikTok’s U.S. operations. The senators didn’t mince words, calling the experiment “depraved.”

The letter demands responses to 13 specific questions. Among them: the names of every employee who knew about the experiment, and why TikTok allowed minors to be part of the control group. The senators also want a full list of every algorithmic experiment in the U.S. where TikTok disabled or delayed a safety feature.

What TikTok did

According to Bloomberg, TikTok intentionally turned off an algorithmic safeguard for 10% of its U.S. user base. The safeguard was designed to stop users from being flooded with harmful content. But TikTok wanted to know if that feature made the app less engaging. So it ran an experiment.

The result? A control group of 15 million people got no protection. Among them was 16-year-old Chase Nasca, whose feed served him thousands of videos about sadness, suicide, and loneliness—right up until he died by suicide.

That’s the core of the senators’ outrage. A teenager’s death happened while TikTok was testing whether safety got in the way of engagement.

Why this matters beyond one case

This isn’t just about one company’s bad call. It raises a broader question: how far will platforms go to keep users hooked?

If TikTok ran a test like this on minors, what else has it done? The senators’ request for a list of every experiment that disabled a safety feature suggests they suspect this wasn’t a one-off.

It also echoes past concerns about algorithmic design. social media’s effect on teen mental health has been a hot topic for years, and this case gives critics concrete evidence of a platform prioritizing engagement over well-being.

The human cost

Chase Nasca’s story is the kind that should give any parent pause. He was part of an experiment he never signed up for. His algorithm pushed him toward darkness, and no safeguard was there to intervene.

TikTok’s defense might be that the experiment was meant to improve the app. But the senators aren’t buying it. They’re demanding accountability, and they’re giving the company a clear deadline.

What happens next

TikTok hasn’t responded to TechCrunch’s request for comment yet. The September 1 deadline is fast approaching.

If TikTok doesn’t comply, the senators could escalate. That might mean public hearings, subpoenas, or new legislation. The pressure is mounting, and this time, it’s not just about TikTok data privacy practices—it’s about whether the platform’s algorithms are safe for the people who use them.

For now, the ball is in TikTok’s court. The company will have to decide whether to come clean about its experiments or face the consequences.

Continue Reading

How To

Windows 11 retired the Control Panel, but forgot to move these 5 essential features

Published

on

Control Panel features

The Control Panel is dying, but not everything made it out

Microsoft has been clear about its intentions. The Control Panel is on its way out, replaced by the modern Settings app in Windows 11. But here’s the thing — the transition is far from complete. Several essential tools remain stranded in the old interface, and users are left to hunt for them.

It’s not just about nostalgia. Some of these features are genuinely important for power users, IT admins, and anyone who likes to tweak their system beyond the basics. So if you’ve been wondering where certain options went, you’re not alone.

Let’s look at the five most critical features that Microsoft hasn’t moved over yet.

1. Uninstall programs — the old way

The Settings app has its own “Apps & Features” section, and it works fine for basic removals. But it’s missing some details that the Control Panel’s “Programs and Features” list still provides.

In the classic view, you can see the installed date, version, and publisher at a glance. You can also access the repair or change options for many applications — something that the Settings app doesn’t always offer. For troubleshooting, that’s a big deal.

To get there, type “appwiz.cpl” in the Run dialog (Win + R). It’s still there. It just doesn’t have a home in the new interface.

2. Advanced system properties

This is the big one. The “System Properties” window — accessible via “sysdm.cpl” — holds several critical settings that you simply can’t reach through Windows 11’s Settings app.

Need to adjust virtual memory? That’s here. Want to configure the system restore point? Also here. Environment variables? You guessed it.

Microsoft has moved some of these options into Settings, but the advanced tab is still missing. For anyone who works with development tools or just wants to tweak performance settings, this is an essential tool that hasn’t been replaced.

3. Network adapter settings

Windows 11’s Settings app has a decent network section. You can see your Wi-Fi status, change IP settings, and even reset your network stack. But the old “Network Connections” page (accessible via “ncpa.cpl”) still offers more granular control.

For example, you can right-click a network adapter, disable it, or change its properties — things like setting a static IP, configuring DNS, or enabling QoS. The Settings app lets you do some of this, but it’s clunkier and doesn’t offer the same level of detail.

If you’re managing multiple network profiles or troubleshooting connectivity issues, the old dialog is still your best friend.

4. Device Manager’s hidden options

Device Manager itself is already in Windows 11, but it’s a bit of a hidden gem. You can open it from the Start menu, but the Settings app doesn’t link to it directly — you have to search for it.

More importantly, the Control Panel version gives you access to some advanced features that are buried in the Settings app. For example, you can view hidden devices, update drivers from a specific folder, or roll back to a previous driver version.

These are things you can do in the Settings app too, but they’re not as straightforward. For power users, the old Device Manager remains the better tool.

5. Administrative Tools

The “Administrative Tools” folder in the Control Panel is a collection of shortcuts to various system utilities — Event Viewer, Disk Cleanup, Performance Monitor, and more.

Windows 11 has scattered these tools across different places in the Settings app, but there’s no single, unified location. The old folder still exists, and it’s still the fastest way to access all of them at once.

You can find it by typing “control admintools” in the Run dialog. It’s a small thing, but it saves a lot of time if you’re constantly jumping between these utilities.

Why the migration is taking so long

Microsoft’s approach has been gradual, and that’s probably intentional. Moving every feature at once would be a massive undertaking, and it risks breaking compatibility with third-party apps that rely on the old interfaces.

But the result is a fragmented experience. Users have to remember which settings are in the new app and which are still in the old one. It’s not ideal, and it’s a common source of frustration.

The company has said it’s committed to the transition, but there’s no official timeline for when the Control Panel will be completely retired. For now, the old tools remain, and they’re still essential.

What can you do about it?

If you rely on these features, the best approach is to create shortcuts to the old dialogs. Pin them to your taskbar or Start menu, and you won’t have to hunt for them.

You can also use the Windows 11 power user menu (Win + X) to access the Control Panel options quickly, though it’s a bit hidden.

And if you’re curious about other Windows 11 hidden features, there are plenty of tricks to make the OS work better for you.

The Control Panel isn’t gone yet. But when it finally disappears, these five features will need a new home. Hopefully, Microsoft will figure that out before it’s too late.

Continue Reading

Trending