Connect with us

How To

Complete App Permission Manager Review: Take Control of Your Mobile Privacy and Data Security

Published

on

Understanding App Permission Manager: Your Privacy Guardian

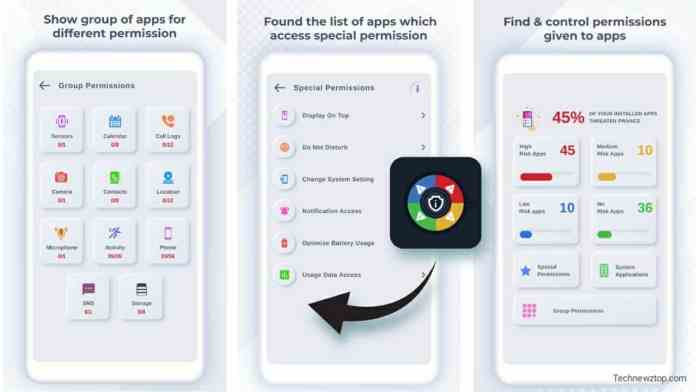
In today’s digital landscape, protecting your personal information has become more crucial than ever. The App Permission Manager emerges as an essential tool designed to help users monitor and control what data their installed applications can access. This powerful utility provides transparency into the permissions granted to various apps on your device.

However, many smartphone users remain unaware of the extensive permissions they’ve granted to applications during installation. This oversight can lead to potential privacy breaches and unauthorized data collection by malicious or overly intrusive apps.

Why App Permission Manager Matters for Your Digital Safety

Therefore, understanding the importance of permission management becomes critical for maintaining digital privacy. Every time you download an application, it requests specific permissions to function properly. These permissions might include access to your camera, microphone, location data, contacts, or storage.

Unfortunately, some applications request more permissions than necessary for their core functionality. This practice raises legitimate concerns about data misuse and privacy violations. An effective app permission manager addresses these concerns by providing users with detailed insights into their granted permissions.

In addition, regular permission auditing helps identify potentially problematic applications that might be collecting unnecessary personal information. This proactive approach significantly enhances your overall mobile security posture.

Installation and Setup Process

Getting started with an app permission manager requires following several straightforward steps. First, locate and download the application from your device’s official app store or trusted source. Once downloaded, the installation process typically takes just a few moments to complete.

Subsequently, launch the newly installed application by tapping its icon from your home screen or app drawer. The interface usually presents an intuitive dashboard displaying all installed applications alongside their respective permission statuses.

As a result, you’ll immediately gain visibility into which applications have access to sensitive device features. This transparency empowers you to make informed decisions about your privacy settings.

Key Features and Functionality

The core functionality of any reliable permission management tool centers around comprehensive oversight capabilities. Most applications in this category offer real-time monitoring of permission usage, allowing users to track when and how often apps access specific device features.

Building on this foundation, advanced features often include permission history logs, automatic alerts for suspicious activity, and batch permission management options. These capabilities streamline the process of maintaining optimal privacy settings across multiple applications.

On the other hand, some tools also provide detailed explanations of what each permission type means and why applications might require specific access levels. This educational component helps users make more informed decisions about their privacy preferences.

Managing Permissions Effectively

Effective permission management involves regularly reviewing and adjusting access levels based on your comfort level and actual usage patterns. Start by examining applications that have access to sensitive information like your location, camera, or personal files.

Consider whether each application truly needs the permissions it has been granted. For example, does a simple calculator app really need access to your contacts or camera? These questions help identify potentially unnecessary permission grants that could be revoked.

This process of permission optimization not only enhances privacy but can also improve device performance by reducing background processes and data usage. Regular maintenance ensures your device remains both secure and efficient.

Best Practices for Mobile Privacy Protection

Implementing robust privacy protection goes beyond just installing an app permission manager. Establish a routine of reviewing new app installations before granting extensive permissions. Read permission requests carefully and question whether each access level aligns with the app’s stated functionality.

As a result of this mindful approach, you’ll develop better awareness of potential privacy risks. Consider creating different user profiles or using app containers to isolate sensitive applications from others that might pose higher security risks.

Furthermore, keep your permission management tools updated to ensure they can detect and address the latest privacy threats. Regular updates often include improved detection capabilities and support for newer application types.

Taking control of your mobile privacy requires both the right tools and consistent vigilance. By leveraging an effective app permission manager and following security best practices, you can significantly reduce your exposure to privacy risks while maintaining the functionality you need from your favorite applications.

Want to learn more about mobile security? Check out our comprehensive guide on smartphone security tips and discover additional ways to protect your personal information. You might also find our article about Android privacy settings helpful for further securing your device.

Continue Reading
Click to comment

Leave a Reply

Your email address will not be published. Required fields are marked *

Social Media

Senators demand answers from TikTok over experiment that disabled safety safeguards for 15 million users

Published

on

TikTok experiment safeguards

The letter and the deadline

Two U.S. senators are pressing TikTok for answers about an experiment that disabled a safety safeguard for 15 million American users. The company has until September 1 to respond.

Senator Marsha Blackburn (R-TN) and Senator Richard Blumenthal (D-CT) sent a letter to TikTok CEO Shou Chew and Adam Presser, who heads TikTok’s U.S. operations. The senators didn’t mince words, calling the experiment “depraved.”

The letter demands responses to 13 specific questions. Among them: the names of every employee who knew about the experiment, and why TikTok allowed minors to be part of the control group. The senators also want a full list of every algorithmic experiment in the U.S. where TikTok disabled or delayed a safety feature.

What TikTok did

According to Bloomberg, TikTok intentionally turned off an algorithmic safeguard for 10% of its U.S. user base. The safeguard was designed to stop users from being flooded with harmful content. But TikTok wanted to know if that feature made the app less engaging. So it ran an experiment.

The result? A control group of 15 million people got no protection. Among them was 16-year-old Chase Nasca, whose feed served him thousands of videos about sadness, suicide, and loneliness—right up until he died by suicide.

That’s the core of the senators’ outrage. A teenager’s death happened while TikTok was testing whether safety got in the way of engagement.

Why this matters beyond one case

This isn’t just about one company’s bad call. It raises a broader question: how far will platforms go to keep users hooked?

If TikTok ran a test like this on minors, what else has it done? The senators’ request for a list of every experiment that disabled a safety feature suggests they suspect this wasn’t a one-off.

It also echoes past concerns about algorithmic design. social media’s effect on teen mental health has been a hot topic for years, and this case gives critics concrete evidence of a platform prioritizing engagement over well-being.

The human cost

Chase Nasca’s story is the kind that should give any parent pause. He was part of an experiment he never signed up for. His algorithm pushed him toward darkness, and no safeguard was there to intervene.

TikTok’s defense might be that the experiment was meant to improve the app. But the senators aren’t buying it. They’re demanding accountability, and they’re giving the company a clear deadline.

What happens next

TikTok hasn’t responded to TechCrunch’s request for comment yet. The September 1 deadline is fast approaching.

If TikTok doesn’t comply, the senators could escalate. That might mean public hearings, subpoenas, or new legislation. The pressure is mounting, and this time, it’s not just about TikTok data privacy practices—it’s about whether the platform’s algorithms are safe for the people who use them.

For now, the ball is in TikTok’s court. The company will have to decide whether to come clean about its experiments or face the consequences.

Continue Reading

How To

Windows 11 retired the Control Panel, but forgot to move these 5 essential features

Published

on

Control Panel features

The Control Panel is dying, but not everything made it out

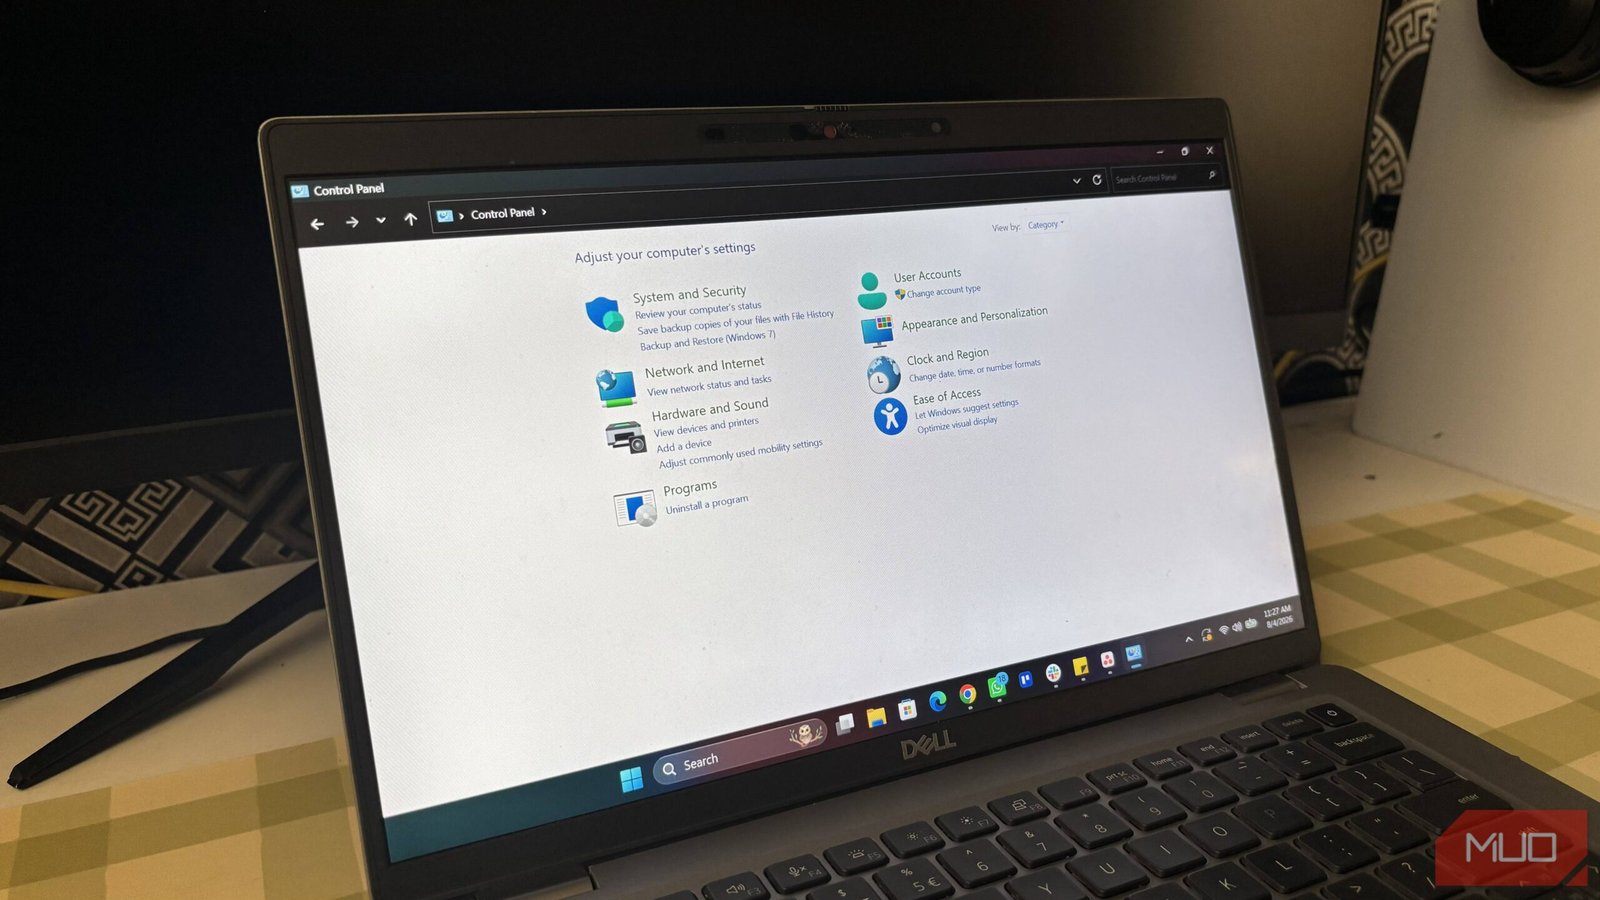
Microsoft has been clear about its intentions. The Control Panel is on its way out, replaced by the modern Settings app in Windows 11. But here’s the thing — the transition is far from complete. Several essential tools remain stranded in the old interface, and users are left to hunt for them.

It’s not just about nostalgia. Some of these features are genuinely important for power users, IT admins, and anyone who likes to tweak their system beyond the basics. So if you’ve been wondering where certain options went, you’re not alone.

Let’s look at the five most critical features that Microsoft hasn’t moved over yet.

1. Uninstall programs — the old way

The Settings app has its own “Apps & Features” section, and it works fine for basic removals. But it’s missing some details that the Control Panel’s “Programs and Features” list still provides.

In the classic view, you can see the installed date, version, and publisher at a glance. You can also access the repair or change options for many applications — something that the Settings app doesn’t always offer. For troubleshooting, that’s a big deal.

To get there, type “appwiz.cpl” in the Run dialog (Win + R). It’s still there. It just doesn’t have a home in the new interface.

2. Advanced system properties

This is the big one. The “System Properties” window — accessible via “sysdm.cpl” — holds several critical settings that you simply can’t reach through Windows 11’s Settings app.

Need to adjust virtual memory? That’s here. Want to configure the system restore point? Also here. Environment variables? You guessed it.

Microsoft has moved some of these options into Settings, but the advanced tab is still missing. For anyone who works with development tools or just wants to tweak performance settings, this is an essential tool that hasn’t been replaced.

3. Network adapter settings

Windows 11’s Settings app has a decent network section. You can see your Wi-Fi status, change IP settings, and even reset your network stack. But the old “Network Connections” page (accessible via “ncpa.cpl”) still offers more granular control.

For example, you can right-click a network adapter, disable it, or change its properties — things like setting a static IP, configuring DNS, or enabling QoS. The Settings app lets you do some of this, but it’s clunkier and doesn’t offer the same level of detail.

If you’re managing multiple network profiles or troubleshooting connectivity issues, the old dialog is still your best friend.

4. Device Manager’s hidden options

Device Manager itself is already in Windows 11, but it’s a bit of a hidden gem. You can open it from the Start menu, but the Settings app doesn’t link to it directly — you have to search for it.

More importantly, the Control Panel version gives you access to some advanced features that are buried in the Settings app. For example, you can view hidden devices, update drivers from a specific folder, or roll back to a previous driver version.

These are things you can do in the Settings app too, but they’re not as straightforward. For power users, the old Device Manager remains the better tool.

5. Administrative Tools

The “Administrative Tools” folder in the Control Panel is a collection of shortcuts to various system utilities — Event Viewer, Disk Cleanup, Performance Monitor, and more.

Windows 11 has scattered these tools across different places in the Settings app, but there’s no single, unified location. The old folder still exists, and it’s still the fastest way to access all of them at once.

You can find it by typing “control admintools” in the Run dialog. It’s a small thing, but it saves a lot of time if you’re constantly jumping between these utilities.

Why the migration is taking so long

Microsoft’s approach has been gradual, and that’s probably intentional. Moving every feature at once would be a massive undertaking, and it risks breaking compatibility with third-party apps that rely on the old interfaces.

But the result is a fragmented experience. Users have to remember which settings are in the new app and which are still in the old one. It’s not ideal, and it’s a common source of frustration.

The company has said it’s committed to the transition, but there’s no official timeline for when the Control Panel will be completely retired. For now, the old tools remain, and they’re still essential.

What can you do about it?

If you rely on these features, the best approach is to create shortcuts to the old dialogs. Pin them to your taskbar or Start menu, and you won’t have to hunt for them.

You can also use the Windows 11 power user menu (Win + X) to access the Control Panel options quickly, though it’s a bit hidden.

And if you’re curious about other Windows 11 hidden features, there are plenty of tricks to make the OS work better for you.

The Control Panel isn’t gone yet. But when it finally disappears, these five features will need a new home. Hopefully, Microsoft will figure that out before it’s too late.

Continue Reading

Social Media

Fresh Ways to Expand Your Instagram Reach Without Creating More Content

Published

on

Instagram reach tips

The Problem: You’re Posting, but Reach Is Flat

Every brand knows the grind. You craft a carousel, polish a Reel, write the perfect caption. Then? Crickets. Organic reach on Instagram has been sliding for years, and the algorithm keeps changing the rules. The old playbook—post more, hashtag harder—doesn’t move the needle anymore.

But here’s the thing: Instagram has quietly rolled out several new tools that most users haven’t even touched. These aren’t gimmicks. They’re built to push your content to fresh audiences, often without you producing a single extra asset.

Let’s walk through the updates that actually matter for Instagram reach tips in 2025—and how to use them before your competitors catch on.

Instagram TV App: Your Content Gets a Second Life

Remember when IGTV flopped? Instagram is trying again, but smarter. The standalone Instagram TV app is designed for long-form video—think tutorials, behind-the-scenes docs, or serialized content. The key difference: it’s a separate surface, which means your existing videos can be repurposed instead of created from scratch.

Here’s the smart play. Take your top-performing Reels or Stories, expand them into longer versions, and post them to the TV app. You’re not generating new ideas—you’re giving old ones a longer shelf life. The app’s algorithm tends to favor creators who post consistently, and early adopters often get a visibility boost while the feature is still gaining traction.

Don’t overthink the production. A 10-minute talking-head video with simple captions can outperform a polished 30-second clip if it answers a deeper question your audience has.

AI-Powered Story Effects: Stop Scrolling, Start Interacting

Stories are still the fastest way to stay top-of-mind, but the swipe-away rate is brutal. That’s where Instagram’s AI-driven effects come in. These aren’t your typical face filters—they’re interactive overlays that respond to user actions, like changing the background based on a poll answer or morphing an image in real time.

Why does this matter? Interactive content stops the thumb. When someone taps, swipes, or plays with your effect, Instagram’s algorithm interprets it as a strong engagement signal. That pushes your story to more of your followers’ friends—and beyond.

Try this: Create a simple AI effect that lets viewers “try on” a product or visualize a transformation. A skincare brand could use an effect that shows how a routine changes skin over 7 days. A gym could let users “scan” their posture. The more playful, the better.

Audio Swap: A One-Click Refresh for Old Reels

Here’s a frustration every creator knows: you spend hours on a Reel, it performs okay, and then the audio trend dies. Your content becomes invisible. Instagram’s audio swap feature fixes that.

Instead of re-editing the whole video, you can simply swap the soundtrack to a trending audio track. The algorithm treats it as a new post in some ways, giving it a fresh chance to appear in the Reels feed. It’s the ultimate low-effort hack for Instagram reach tips—no new filming, no new editing, just a new audio layer.

Pro tip: Check the audio’s momentum before swapping. Use Instagram’s built-in trend tracker or third-party tools to see if a track is rising or already peaked. Swapping to a dying trend is like boarding a train that’s already left the station.

Adding Music to Carousels: Turn a Static Post Into a Mini-Show

Carousels have been the workhorse of educational content—tips, step-by-steps, before-and-afters. But they’re static. Until now.

Instagram now lets you add music to carousels, turning a swipe-through into a mini-experience. The audio plays as viewers swipe, which changes the emotional tone completely. A recipe carousel with upbeat music feels like a cooking show. A travel guide with ambient sound feels like a mini-documentary.

This is a subtle but powerful way to boost engagement. Music increases the time someone spends on your post, and dwell time is a ranking factor. Plus, if the song is popular, your carousel can appear in the audio’s explore page—a whole new discovery surface.

How to Pick the Right Track

  • Match the mood: Don’t slap a random hit on a serious tutorial. The music should reinforce your message, not fight it.
  • Keep it short: A 15-second loop is usually enough. Longer tracks can feel repetitive.
  • Check the licensing: Use Instagram’s own music library to avoid copyright strikes.

Putting It All Together: A Simple Content Refresh Plan

You don’t need to adopt every feature at once. Start with one and measure the results. Here’s a practical order of operations:

  1. Audit your top 10 posts from the last 90 days. Which ones had the best engagement but could have gone further?
  2. For Reels: Use audio swap to update the soundtrack on 2–3 older videos.
  3. For carousels: Add music to your best-performing slides.
  4. For Stories: Build one AI effect and use it consistently for a week.
  5. For long-form: Repurpose a popular Reel into a 5-minute TV app episode.

Track your insights weekly. Look at reach, saves, and shares—not just likes. If a feature isn’t moving the needle after two weeks, drop it and try another.

One more thing: don’t forget the basics. These new tools work best when your profile is optimized, your bio is clear, and your posting schedule is consistent. For more on the fundamentals, check out our guide on Instagram marketing strategy or dive into how the algorithm ranks Reels.

The algorithm keeps shifting, but the principle stays the same: give people a reason to stop, interact, and share. These new features are your easiest path to doing exactly that—without burning out on content creation.

Continue Reading

Trending