Connect with us

Video

How to Change the WAN IP Address on a Tenda Router: A Step-by-Step Guide

Published

on

Have you ever stared at your router’s admin panel, wondering why your internet connection keeps dropping or why your IP address seems stuck? For many home users, the WAN IP address is a mysterious number that just sits there—until it causes problems. Whether you’re setting up a static IP for remote work, hosting a server, or troubleshooting connectivity issues, knowing how to change the WAN IP address on a Tenda router is a valuable skill.

This guide walks you through the entire process, based on a clear tutorial that shows exactly how to configure the ISP-provided WAN IP. You’ll learn what WAN means, when you need a static IP, and how to apply the settings in just a few minutes. No jargon, no guesswork—just straightforward steps that work.

What Is a WAN IP Address and Why Would You Change It?

Before diving into the router settings, it helps to understand what you’re actually changing. WAN stands for Wide Area Network—that’s the network your router connects to from the outside world, typically your Internet Service Provider (ISP). The WAN IP address is the public-facing address that websites and online services see when you connect.

Most ISPs assign a dynamic WAN IP that changes periodically. However, there are scenarios where you need a static IP—one that never changes. For instance, if you run a home server, use IP cameras, or need consistent access to your network remotely, a static IP is essential. Additionally, some ISPs require you to manually enter the IP details they provide, especially for business plans or fiber connections. That’s when knowing how to change the WAN IP address on a Tenda router becomes crucial.

Step-by-Step: How to Change the WAN IP Address on a Tenda Router

The process is surprisingly simple, and you don’t need to be a networking expert. The tutorial breaks it down into six clear steps, and here’s how to apply them.

Connect to Your Tenda Router

First, ensure your computer or phone is connected to your Tenda Wi-Fi network. Alternatively, you can plug an Ethernet cable into one of the LAN ports for a more stable connection. This step is essential because you need to access the router’s admin interface from within your local network.

Access the Admin Panel

Open any web browser and type **192.168.0.1** into the address bar. That’s the default gateway for most Tenda routers. Press Enter, and you’ll be prompted to log in. Use your administrator password—if you haven’t changed it, check the sticker on the router for the default credentials.

Locate the Internet Settings

Once logged in, you might land on a quick setup homepage. If so, click on **Advanced** to access the full settings menu. Then, navigate to **Internet Settings** (sometimes called WAN Settings). This is where all your connection parameters live.

Choose Static IP Connection Type

In the Internet Settings page, look for the **Connection Type** drop-down menu. By default, it’s often set to *Dynamic IP* or *PPPoE*. To manually assign a WAN IP, select **Static IP**. This option tells the router to use the exact details you provide instead of fetching them automatically.

Enter Your ISP-Provided Details

Now, fill in the fields with the information your ISP gave you:

– **IP Address**: The static IP you’ve been assigned.
– **Subnet Mask**: Usually 255.255.255.0, but check with your ISP.
– **Default Gateway**: The router address provided by your ISP.
– **DNS Server**: If your ISP didn’t supply one, use **8.8.8.8** (Google’s DNS) for reliable resolution.

Double-check every number before proceeding—a typo can knock you offline.

Save and Apply

Finally, click **Save** or **OK** to apply the changes. Your router will reboot or reconnect to the ISP. Once it’s back online, verify your new WAN IP by checking the status page or simply browsing the internet. If something fails, revisit the settings and confirm the details.

Why This Matters for Your Network Performance

Changing the WAN IP address isn’t just about fixing a technical issue—it’s about taking control of your network. For example, if you’re experiencing frequent disconnects due to IP conflicts, a static IP can stabilize your connection. Similarly, if you need to access your home network remotely, a fixed WAN IP makes it easy to set up port forwarding or VPN access.

Moreover, the process is identical for many other router brands, so learning it on a Tenda gives you transferable skills. The tutorial even includes a quick quiz to reinforce your understanding—for instance, WAN stands for *Wide Area Network*, not *Wireless Area Network*—which is a handy reminder for beginners.

Common Mistakes to Avoid When Configuring a Static WAN IP

While the steps are straightforward, a few pitfalls can trip you up. Here’s what to watch out for:

– **Using the wrong subnet mask**: If you’re unsure, stick with 255.255.255.0 unless your ISP specifies otherwise.
– **Forgetting to update DNS**: Always set a valid DNS server, or you might lose web access even though the IP is correct.
– **Mixing up LAN and WAN settings**: Double-check that you’re editing the WAN section, not the LAN settings, which control your local network.
– **Saving without testing**: After saving, run a quick ping test or open a website to confirm everything works.

If you run into issues, the tutorial suggests checking your ISP’s documentation or contacting their support—they’re the only ones who can confirm the correct static IP details.

Final Thoughts: Take Charge of Your Tenda Router

Learning how to change the WAN IP address on a Tenda router is one of those tasks that seems intimidating until you do it once. The process takes less than five minutes, yet it can solve persistent connectivity problems and open doors to advanced configurations like remote access.

Whether you’re a home user or a small business owner, this skill pays off. And if you’re the kind of person who likes to learn by watching, the video tutorial provides a live walkthrough that makes every click crystal clear. So, grab your laptop, log into your Tenda router, and give it a try—you might be surprised how easy it is.

Continue Reading
Click to comment

Leave a Reply

Your email address will not be published. Required fields are marked *

Video

10 Things Every Smart YouTuber Does Immediately After Uploading (With AI)

Published

on

smart YouTuber post-upload tasks

You’ve just hit the publish button on your latest YouTube video. The adrenaline fades, and then what? Most creators close the tab and wait for the views to roll in. But the smartest YouTubers know that the real work begins the moment that video goes live. In a new video, Shane Hummus breaks down the 10 smart YouTuber post-upload tasks with AI that can transform your channel’s performance. From optimizing titles to leveraging artificial intelligence, this guide is a game-changer for creators at any level.

Why the First Hour After Uploading Matters More Than You Think

The first hour after you publish a video is critical. YouTube’s algorithm is watching, and it decides early whether your content deserves a push. As Shane explains, smart creators treat this window like a launch event, not a finish line. They don’t just upload and forget. Instead, they execute a series of strategic moves designed to signal quality and relevance to the platform. This is where the smart YouTuber post-upload tasks with AI come into play, giving you a competitive edge that passive creators miss.

The Baseball Strategy for Titles and the Hidden Description Trick

One of the first lessons Shane shares is the “baseball strategy” for titles. Think of your title as a player who needs to hit two bases at once: it must appeal to human curiosity while also satisfying YouTube’s search algorithm. He demonstrates how to craft titles that do double duty, increasing click-through rates without sacrificing clarity. Then, he reveals a hidden description trick that almost nobody uses. This simple addition can provide extra context to YouTube’s crawlers, helping your video rank for more keywords. These are exactly the kind of smart YouTuber post-upload tasks with AI that separate pros from amateurs.

Chapter Strategy, Pinned Comments, and the 30-Second Step

Chapters are a double-edged sword, as Shane points out. For some channels, they boost watch time; for others, they hurt retention. He explains how to decide if chapters are right for your content and how to structure them for maximum benefit. Next, he covers the 30-second step that most creators skip: updating your video’s metadata or adding a quick call-to-action. This tiny effort can have a big impact on early engagement. He also dives into pinned comments, a technique that’s often overlooked but can drive comments, likes, and even subscriptions. By weaving AI into these tasks, you can automate and optimize each step, making your workflow smarter and faster.

The Forgotten Tab, Reply Method, and Repurposing System

Most creators never open the “Translations” tab on YouTube Studio, but Shane insists it’s a goldmine. By adding translated titles and descriptions, you can reach global audiences without extra effort. Then, he shares a reply method that multiplies engagement: instead of just responding to comments, you ask a follow-up question that encourages a conversation. This boosts your comment count and signals to YouTube that your community is active. Finally, he outlines a repurposing system that turns one video into multiple pieces of content for other platforms. This is where AI shines, helping you generate clips, captions, and social posts in minutes. These smart YouTuber post-upload tasks with AI ensure you squeeze every drop of value from each upload.

The Non-Negotiable Thumbnail Rule and End Screen Blueprint

Thumbnails are your video’s first impression, and Shane stresses a non-negotiable rule: consistency. Your thumbnail must match your brand’s style so viewers recognize your content instantly. He also provides a blueprint for end screens that keeps viewers watching your other videos, boosting session time and channel growth. Both elements are crucial for long-term success, and with AI tools, you can test variations and optimize them faster than ever.

Final Thoughts: Make Every Upload Count

In conclusion, the smart YouTuber post-upload tasks with AI outlined in this video are not optional extras—they’re essential habits. Whether you’re a beginner or a seasoned creator, adopting these strategies can lead to higher rankings, more engagement, and steady growth. Shane’s practical advice, backed by real examples, makes it easy to implement these steps immediately. So, the next time you upload, don’t walk away. Stay, execute, and watch your channel thrive. For the full breakdown, be sure to watch the video above—it’s packed with actionable insights you won’t want to miss.

Continue Reading

Video

What Are the Fundamentals of IT? The Essential Basics Every Beginner Should Master

Published

on

IT fundamentals

If you’re stepping into the world of technology, the sheer volume of information can feel overwhelming. You might be asking: What should I actually focus on? Where do I even begin? The answer lies in mastering the IT fundamentals — the timeless building blocks that underpin every system, network, and application you’ll ever encounter. In a recent video, a seasoned IT professional breaks down these core concepts, offering a clear roadmap for anyone starting their journey.

Why IT Fundamentals Matter More Than You Think

Before you dive into cloud computing or cybersecurity, you need a solid foundation. Think of IT fundamentals as the alphabet of technology. Without understanding how a computer processes data, what an operating system does, or how networks communicate, advanced topics will feel like a foreign language. The video emphasizes that employers don’t just look for certifications; they want candidates who grasp the underlying principles. This knowledge not only helps you troubleshoot effectively but also makes you adaptable as technology evolves.

The Core Pillars of Computer Fundamentals

The video walks through several key areas that form the backbone of IT. First, there’s hardware — the physical components like the CPU, RAM, and storage devices. Understanding how these parts interact is crucial. Then comes software, which includes both the operating system (like Windows, Linux, or macOS) and the applications that run on it. You’ll also learn about basic troubleshooting: how to identify a failing hard drive or why a machine won’t boot. These hands-on skills are exactly what entry-level IT support roles demand.

Networking: The Glue of Modern IT

Another critical section covers networking basics. You’ll explore concepts like IP addresses, DNS, and how data travels from one device to another. The video explains why knowing the difference between a switch and a router matters, and how subnets work in practical terms. As more businesses move to the cloud, understanding networking fundamentals becomes even more vital. Even if you’re not aiming to be a network engineer, this knowledge helps you communicate with colleagues and solve connectivity issues faster.

Practical Steps to Start Learning Today

Building on these insights, the video offers actionable advice. It suggests setting up a home lab — even a simple one with an old PC — to practice installing operating systems and configuring network settings. You can also use free resources like YouTube tutorials, online courses, and virtual machines to experiment safely. The key is to get your hands dirty. Reading about IT fundamentals is useful, but applying them cements the knowledge. Start with one topic, like building a computer or setting up a small home network, and expand from there.

Your IT Career Starts Here

Ultimately, the video serves as a wake-up call for anyone who thinks IT is just about coding or fixing printers. It’s a diverse field with endless opportunities, but every path begins with the same basics. Whether you’re interested in help desk roles, system administration, or even software development, a strong grasp of IT fundamentals will give you confidence and a competitive edge. So, watch the video, take notes, and start building your foundation today. Your future self will thank you.

Continue Reading

Video

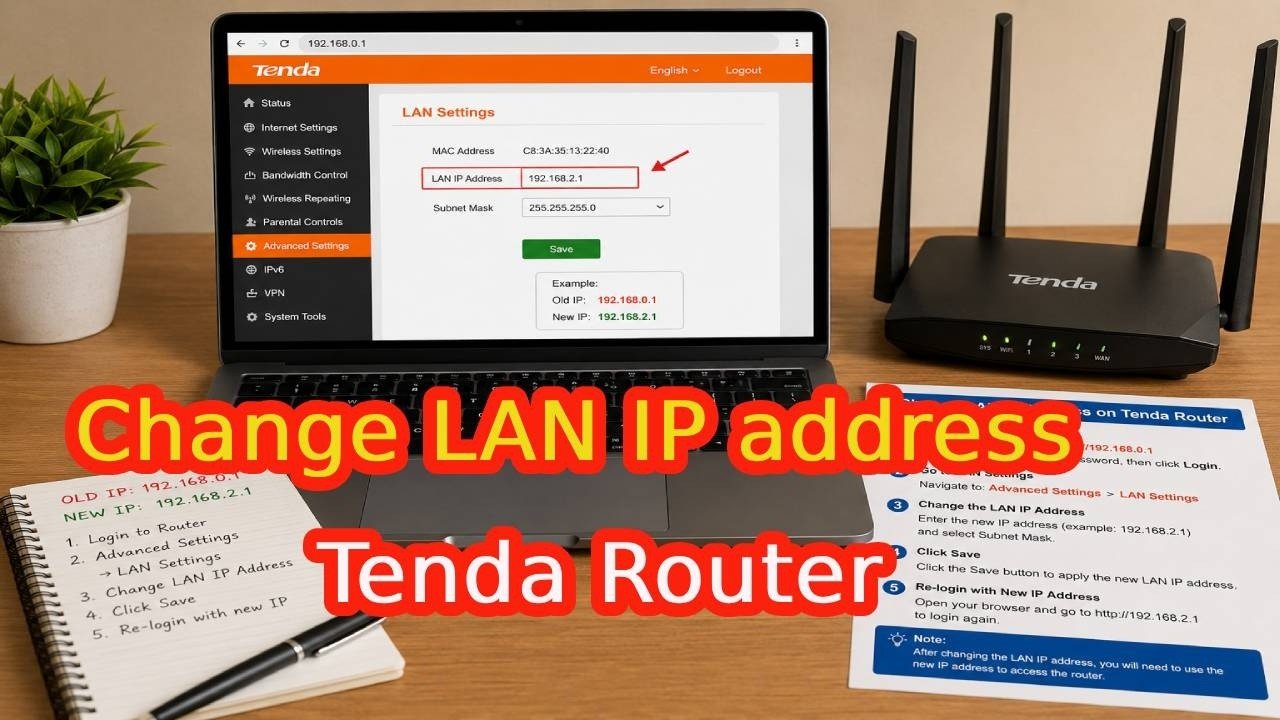
How to Change the Default IP Address or DHCP Server IP Pool on a Tenda Router

Published

on

Tenda router LAN IP

Have you ever tried to log into your Tenda router only to find the default IP address clashes with another device on your network? It’s a frustrating moment, but it’s also one you can fix in under five minutes. In this guide, we’ll walk through exactly how to change the default IP address or DHCP server IP pool on a Tenda router – a simple tweak that can save you from endless connectivity headaches.

Why Change Your Tenda Router’s LAN IP Address?

Your router’s LAN IP address is the gateway to your entire network. It’s where your devices go to find the internet, and it’s the address you use to access the router’s admin panel. However, there are times when the default IP – often 192.168.0.1 or 192.168.1.1 – isn’t ideal.

For instance, if you have two routers on the same network, they might both use the same default IP, causing a conflict. Alternatively, your internet service provider might use a modem that already occupies that address. In either case, changing the LAN IP on your Tenda router can resolve the clash and keep your network running smoothly.

Building on this, adjusting the DHCP server IP pool is equally important. The DHCP pool defines the range of IP addresses your router can assign to connected devices. If you change the LAN IP, you’ll often need to update the pool to match the new subnet – otherwise, devices may not get valid addresses.

Step-by-Step: Changing the LAN IP on Your Tenda Router

Before you start, make sure you’re connected to your Tenda Wi-Fi network or have plugged in an Ethernet cable. Then, open a web browser and type the default gateway address – it’s usually printed on the router’s sticker. Once you’ve entered it, log in with your admin password. If you haven’t set one, try the default credentials found in the manual.

Accessing the LAN Settings

After logging in, look for the **Administration Settings** in the left-hand menu. Click on it, and you’ll find **LAN Settings** or **LAN IP**. This is where the magic happens.

Entering Your New IP Address

Now, enter your new IP address. For example, you might change it from 192.168.0.1 to 192.168.9.1. Make sure the new address is on a different subnet if you’re avoiding a conflict, but keep it within a private range like 192.168.x.x or 10.x.x.x.

Once you’ve typed the new IP, click **OK**, **Apply**, or **Save**. The router will likely restart to apply the changes. Wait about a minute, then reconnect to the network using the new IP address.

Adjusting the DHCP Server IP Pool

After you’ve changed the LAN IP, you’ll need to check the DHCP settings. The DHCP server IP pool should be within the same subnet as your new LAN IP. For instance, if your new LAN IP is 192.168.9.1, the pool might start at 192.168.9.100 and end at 192.168.9.200.

To do this, return to the **LAN Settings** page and look for the **DHCP Server** section. Here, you can modify the **Start IP** and **End IP** fields. Save your changes, and the router will assign addresses from the new pool going forward.

In addition, it’s wise to ensure the DHCP pool doesn’t include your router’s own IP address. That would cause a conflict, so always leave a gap – for example, start the pool at .100 instead of .2.

Common Pitfalls and Troubleshooting Tips

One of the most common mistakes is forgetting to update the DHCP pool after changing the LAN IP. If you skip this step, devices that were previously connected might fail to obtain an IP address. As a result, they’ll show a “no internet” connection even though the router is working.

Another issue is using an IP address that’s already taken by another device on your network. To avoid this, pick a unique address and verify it’s not in use by pinging it from a computer.

If you get locked out of the router after changing the IP, don’t panic. Simply reset the router by holding the reset button for 10 seconds, then log in with the default settings. This is a last resort, but it’s good to know.

Why This Skill Matters for Home Networking

Understanding how to change your Tenda router LAN IP is more than just a technical trick – it’s a fundamental skill for anyone managing a home network. Whether you’re setting up a second router for better coverage, connecting to a VPN, or just trying to organize your devices, having control over your IP scheme gives you flexibility.

Moreover, it’s a great way to improve security. By changing the default IP, you make it slightly harder for outsiders to guess your router’s address. It’s not a substitute for a strong password, but it’s an extra layer of obscurity.

Ready to Take Control of Your Network?

Changing the LAN IP and DHCP pool on a Tenda router is a straightforward process that anyone can master. With the steps outlined above, you’ll avoid conflicts, keep your network stable, and gain a deeper understanding of how your home network operates.

If you found this guide helpful, consider watching the full video tutorial for a visual walkthrough. It’s always easier to follow along when you can see the exact clicks. And if you have any questions, drop a comment below – the community is always happy to help.

Now, go ahead and give it a try. Your network will thank you.

Continue Reading

Trending