Connect with us

How To

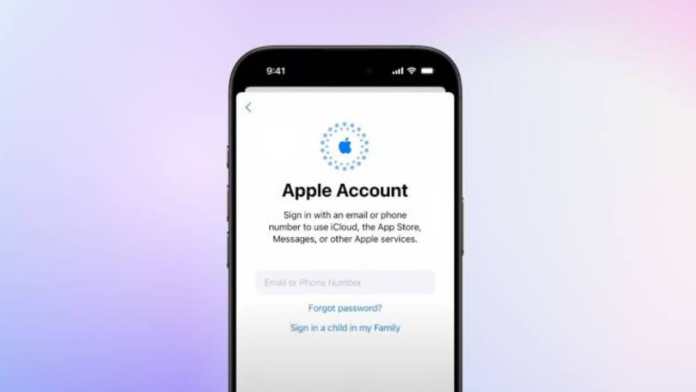
How to Delete Apple ID or Apple Account: The Complete Walkthrough

Published

on

How to Delete Apple ID or Apple Account: The Complete Walkthrough

Thinking about leaving the Apple ecosystem? Whether you’ve switched to another platform or simply want to clean up old accounts, knowing how to delete Apple ID is essential. This guide walks you through every step, from preparation to permanent removal, so you can say goodbye without regrets.

What Happens When You Delete Your Apple ID?

Deleting your Apple account isn’t a minor action—it’s a permanent decision. Once the process is complete, you lose access to every Apple service tied to that ID. iCloud, FaceTime, iMessage, and Apple Pay will no longer function. Your photos, videos, and documents stored in iCloud are erased. Purchased apps, music, and movies become inaccessible. Subscriptions like Apple Music or iCloud+ get canceled after the billing cycle ends.

Importantly, your email address cannot be used to create a new Apple ID. Apple Support cases and Genius Bar appointments are also voided. Financial records, however, are retained for legal compliance. If you have pending payments, such as an Apple Pay Later balance, you must settle them before proceeding. Apple will not process a deletion request until all dues are cleared.

Preparing to Delete Apple ID: Essential Steps

Before you hit the delete button, take these precautions to protect your data and avoid future headaches.

Back Up Your Data

First, save everything you care about. Download your photos, contacts, and files from iCloud to your computer or an external drive. Use Apple’s data privacy portal to request a copy of your account data. This includes emails, calendars, and documents. Without a backup, you’ll lose it all permanently.

Sign Out of All Devices

Next, log out of your Apple ID on every device—iPhone, iPad, Mac, and even browsers. If you skip this step, those devices may become unusable or locked to your account. Go to Settings, tap your name, scroll down, and select Sign Out. Repeat this for each gadget.

Review and Cancel Subscriptions

Check active subscriptions like Apple Music, Apple TV+, or Apple Arcade. Decide whether to cancel them now or let them expire. If you plan to create a new Apple ID later, you can resubscribe with that fresh account. Unused prepaid subscriptions will be forfeited.

How to Delete Apple ID Permanently

Apple’s deletion process is handled through its privacy website. Follow these steps carefully.

Step-by-Step Deletion Process

  1. Navigate to privacy.apple.com in your browser.
  2. Sign in with your Apple ID and password. If two-factor authentication is enabled, verify your identity with a trusted device.
  3. Scroll down to the Delete your account section and click Request to delete your account.
  4. Select a reason for leaving from the dropdown menu. This helps Apple improve its services.
  5. Read the on-screen information about what deletion entails. Then check the box to agree to the terms.
  6. Choose how you want to receive updates—via email or phone—and click Continue.
  7. Apple will generate a unique access code. Save it immediately. Screenshot it or write it down in a safe place. This code is your only way to cancel the deletion request.
  8. Enter the access code when prompted, then confirm your decision by clicking Delete account.
  9. You’ll see a confirmation screen. Click Sign out to finish.

Deletion is not instant. Apple takes up to seven days to process the request. During this cooling-off period, your account remains active. You can cancel by contacting Apple Support and providing your access code. After the seven days, your account and all associated data are gone forever.

How to Temporarily Deactivate Apple ID

If you’re unsure about permanent removal, consider deactivation instead. This pauses your account without erasing anything. You won’t be able to use Apple services during the deactivation period, but your data remains intact.

Steps to Deactivate

  1. Visit privacy.apple.com and sign in.
  2. Go to the Temporarily deactivate your account section.
  3. Click Request to deactivate your account and choose a reason.
  4. Follow the on-screen instructions to receive another unique access code. Save this code securely.
  5. Confirm deactivation by clicking Deactivate account.

Back up your data before deactivating. You cannot access anything until you reactivate. This option is ideal if you think you might return to Apple later.

How to Reactivate Your Apple ID

Reactivating a deactivated account is straightforward—but only if you have the access code. Contact Apple Support via their website or phone. Provide the code, and Apple will verify your identity and restore your account. Without the code, recovery is impossible. Treat that code like a key to a locked vault.

Final Thoughts

Deciding to delete Apple ID is a significant move. Ensure you’ve backed up everything important, signed out of all devices, and reviewed your subscriptions. If doubt lingers, choose deactivation over deletion—it gives you a safety net. Always store your access code in a secure location. Follow the steps outlined here, and the process will be smooth and stress-free. Choose wisely before parting ways with Apple.

Continue Reading
Click to comment

Leave a Reply

Your email address will not be published. Required fields are marked *

How To

I Ditched Task Manager for a 17-Year-Old Free App That Puts It to Shame

Published

on

free app beats Task Manager

Task Manager Has a Blind Spot

For as long as I’ve used Windows, Task Manager has been my go-to for checking hardware usage or hunting down rogue processes. But honestly? I stuck with it out of habit, not because it’s the best tool for the job.

That hit me hard last week. My CPU was pinned at a steady 40 percent, and the culprit was dllhost.exe. Task Manager showed me the process name and its CPU number — and that was it. No details on which DLL it was hosting, no file path, no way to dig deeper. I was staring at a black box.

Enter Process Explorer: A 17-Year-Old Veteran

Then I remembered a tool I’d used years ago: Process Explorer. First released in 2001, this free utility from Microsoft’s Sysinternals suite is still actively maintained. It’s often called Task Manager on steroids — and for good reason.

Within minutes of launching it, I could see exactly what dllhost.exe was doing. Process Explorer reveals the command line, the full path to the executable, and even the specific COM object the process is hosting. That one insight turned a frustrating guessing game into a quick fix.

What Process Explorer Does That Task Manager Can’t

  • Tree view: See parent-child relationships between processes, so you know what spawned what.
  • Full details: Double-click any process to get a mountain of tabs — performance, threads, TCP/IP, environment variables, and more.
  • DLL and handle search: Use Ctrl+F to find which process has a file or DLL locked. Task Manager can’t do this at all.
  • Color-coded processes: Services are pink, processes are blue, and new items flash green — you can spot changes instantly.

Why a 17-Year-Old App Still Wins

You’d think a tool that predates Windows XP would feel dated. Process Explorer doesn’t. It’s been updated consistently, and it supports 64-bit systems, high-DPI displays, and modern Windows versions up to Windows 11. It’s free, portable (no installation needed), and runs on any Windows PC.

Task Manager has improved over the years — the Windows 10 and 11 versions are far better than the old XP-era one. But it still hides the deep technical data that power users crave. Process Explorer hands it to you on a silver platter.

If you’re troubleshooting a dllhost.exe high CPU issue or just want to understand what your computer is really doing, this is the tool to grab. It’s also a lifesaver for finding which process is using a specific file — something Task Manager simply can’t do.

How to Get Started

Download Process Explorer from the official Sysinternals site. Unzip the folder, run procexp64.exe (or procexp.exe on 32-bit systems), and you’re in. It doesn’t even need admin rights for basic viewing, though you’ll want to run it as administrator to see full details on system processes.

Replace Task Manager in your muscle memory. The learning curve is gentle — the interface looks familiar, but every click reveals more depth. Once you’ve used Process Explorer, going back to the default tool feels like driving a car with a blindfold on.

So next time your CPU spikes and Task Manager gives you nothing but a name and a number, remember: there’s a free 17-year-old app that runs circles around it. Give it a try.

Continue Reading

How To

Stop settling for Android’s surface-level automation—Tasker does what Google won’t

Published

on

Tasker automation

Why Android’s built-in automation feels shallow

Most people have dabbled with the smart automation features baked into our phones. Between Samsung’s routines, Google Assistant, and the newer Gemini integrations, it feels like there are plenty of ways to automate a job. But here’s the thing: I’ve always found them disappointingly surface-level, especially when you stack them against the Shortcuts app on iPhones, which is genuinely stellar.

Android’s native tools are fine for the basics—turning on Wi-Fi when you get home, silencing notifications during a meeting. But the moment you want something even slightly unconventional, you hit a wall. Google’s approach is to hand you a few pre-baked recipes and hope you don’t ask for more.

That’s where Tasker automation steps in. It’s been around for over a decade, and it still does things that Google won’t even attempt.

Tasker isn’t just another automation app—it’s a toolbox

Tasker isn’t a single-purpose tool. It’s closer to a Swiss Army knife for your phone’s operating system. You build “profiles” that trigger “tasks” based on conditions you define—time, location, sensor data, app activity, even the content of a notification.

Want your phone to read out incoming texts when you’re driving? Tasker can do that. Want to automatically switch to grayscale mode at 10 PM to curb late-night scrolling? Done. Want to log every time you open Instagram and how long you spend there? Tasker will track it and even generate a report.

The real power, though, comes from its plugin ecosystem. Tools like AutoInput let you simulate taps and swipes, while Tasker’s built-in variables let you create logic loops that would make a programmer smile.

Tasker vs. Samsung Routines: No contest

Samsung’s Routines are slick and user-friendly, no doubt. But they’re also locked down. You can only use the conditions and actions Samsung decided to expose. Tasker, on the other hand, gives you root-level access if you’re willing to go that far, and even without root, it can reach into system settings that Samsung hides away.

Tasker vs. Google Assistant’s routines

Google Assistant routines are voice-first and cloud-dependent. That means they break when your connection is flaky, and they can’t do anything that requires local, real-time processing. Tasker runs entirely on your device, so it’s faster, more private, and infinitely more flexible.

What Tasker can do that Google won’t touch

Let’s get concrete. Here are five things I’ve personally set up with Tasker that would be impossible (or absurdly convoluted) with Google or Samsung’s tools:

  • Notification-based triggers: When a specific app sends a notification with certain text, Tasker can react—like auto-replying to a message from your partner when you’re in a meeting.
  • Sensor fusion: Combine accelerometer data, light sensor readings, and battery level to create a context-aware profile. For example, if the phone is face-down and the room is dark, it could assume you’re asleep and silence everything.
  • Variable manipulation: Store data across profiles, calculate things, and build complex decision trees. It’s like having a mini programming language in your pocket.
  • Auto-input simulation: With the AutoInput plugin, Tasker can physically tap buttons on your screen. That means you can automate apps that don’t offer any official automation hooks.
  • Tasker scenes: Create custom floating buttons or menus that appear over other apps. I’ve built a one-tap timer for my workouts that overlays any screen.

Getting started with Tasker: A quick primer

Tasker has a reputation for being intimidating, and honestly, it deserves it. The interface is dense, and the learning curve is steep. But the payoff is worth it, and there are ways to ease in.

Start with the built-in Tasker 101 tutorial, which walks you through your first profile. Then, browse the best Tasker profiles shared by the community—there are thousands of ready-made ones you can import with a single tap.

You’ll also want to grab a few essential plugins: Tasker itself, plus AutoInput, AutoNotification, and AutoTools. They’re paid, but they turn Tasker from a curiosity into a genuine workhorse.

Beginner mistakes to avoid

  • Don’t try to build everything at once. Pick one small automation and master it before moving on.
  • Read the variable names carefully. A single typo will break your profile silently.
  • Use the “Test” button on every action before you rely on it. Trust me, you’ll save yourself hours of debugging.

Is Tasker still relevant in 2025?

You might be wondering: with all the AI-powered automation coming from Google and Samsung, is Tasker still necessary? The short answer is yes—more than ever.

Gemini and Assistant are great at understanding natural language commands, but they’re still bound by the same API limitations. They can’t reach into the guts of your device the way Tasker can. And as Google continues to lock down Android’s internals for security, Tasker’s community keeps finding workarounds.

Moreover, Tasker has evolved. It now supports JavaScript, has a modernized UI, and integrates with Home Assistant for smart home automation. It’s not a relic; it’s a living project with a dedicated developer and a passionate user base.

The bottom line

If you’re happy with the surface-level automation that Google and Samsung offer, that’s fine. But if you’ve ever felt that nagging itch—the sense that your phone could do so much more—then Tasker automation is the answer. It’s not the easiest path, but it’s the most rewarding one.

Give it a weekend. Import a few profiles. Break something. Fix it. You’ll never look at your Android the same way again.

For more on getting the most out of your device, check out our guide on Android customization tips and advanced phone productivity tricks.

Continue Reading

Social Media

Bluesky’s active user base is shrinking as its focus expands beyond the app

Published

on

Bluesky user decline

The post-election bump has faded

Bluesky rode a wave of discontent out of X in late 2024. Millions signed up after the U.S. elections, eager for a decentralized alternative. But two years on, the numbers tell a sobering story.

According to digital intelligence firm Similarweb, Bluesky’s mobile app had 10.4 million monthly active users worldwide in June 2026. That’s down 27.2% year-over-year. Daily active users fell even harder — 25.6% year-over-year in July, landing around 3 million.

These are not just post-election jitters. The app has lost more than half its monthly active users since its late-2024 peak. Quarterly averages dropped from roughly 22.1 million in Q4 2024 to 10.7 million in Q2 2026. That’s a 52% decline.

So what happened? Some of those who fled X simply didn’t stick around. The initial surge was real, but retention has been the challenge.

Quality over quantity: the committed core

Here’s the silver lining. The people who stayed are actually engaged. Bluesky’s stickiness rate — the ratio of daily to monthly active users — held at roughly 29% in June. That’s about the same as Threads, Meta’s X competitor.

This suggests Bluesky isn’t a ghost town. It’s a smaller, more loyal community. For a platform built on principles rather than scale, that might be enough.

But is it? The company’s public stats claim nearly 46 million registered users. Yet it doesn’t share daily or monthly active figures. Similarweb’s data fills that gap — and it’s not pretty.

Pivoting beyond the app: the AT Protocol bet

New CEO Toni Schneider isn’t panicking. And here’s why: Bluesky’s future may not be the Bluesky app at all.

The company is increasingly focused on the AT Protocol — the underlying infrastructure that powers Bluesky and now a growing ecosystem of third-party apps. Projects like BlackSky and Eurosky are gaining traction. Video-focused Skylight has found early adopters. The company even launched Attie, an AI-powered research tool.

This is a strategic shift. Instead of competing head-to-head with X or Threads for every user, Bluesky is betting that the protocol becomes the backbone for a new wave of social apps. If that happens, the app’s declining numbers matter less.

Private data support is also on the roadmap. That could attract a different type of user — people more interested in closed communities than public squares.

What the data doesn’t show

One fear was that Bluesky’s losses meant a return to X. Similarweb says no. X’s mobile monthly active users were down 3% year-over-year in June. Daily active users fell 7% in July to 123.7 million.

X is still huge, though — around 302 million monthly active users on mobile as of June 2026. Web visits actually grew 5.3% year-over-year to 4.7 billion in July.

So people aren’t rushing back to X. They’re just… leaving Bluesky.

Threads is the real winner

If anyone’s benefiting from Bluesky’s slide, it’s Threads. The Meta-owned app’s daily active users jumped 21.3% year-over-year to 147 million in July 2026. Website visits soared 112% to 471.6 million.

It’s unclear whether Threads is stealing Bluesky’s disenchanted users or attracting people who never used a Twitter-like service. Either way, the momentum is unmistakable.

For Bluesky, the question is whether a protocol-first strategy can sustain the company while the flagship app shrinks. It’s a risky bet. But with a loyal core and a growing developer ecosystem, it’s not a crazy one.

The next year will tell whether Bluesky becomes the decentralized social network that powers a new generation of apps — or just a footnote in the Twitter wars.

Continue Reading

Trending