Connect with us

How To

App Volume Controller: The Ultimate Guide to Managing Individual App Sound on Android

Published

on

App Volume Controller: The Ultimate Guide to Managing Individual App Sound on Android

Have you ever been frustrated by your phone’s audio? Perhaps a loud video on Facebook blasts out, or a gentle podcast is drowned by a noisy game notification. This common Android annoyance has a powerful solution: the App Volume Controller. This tool provides precise, per-application audio management, transforming how you interact with your device’s soundscape.

What is the App Volume Controller App?

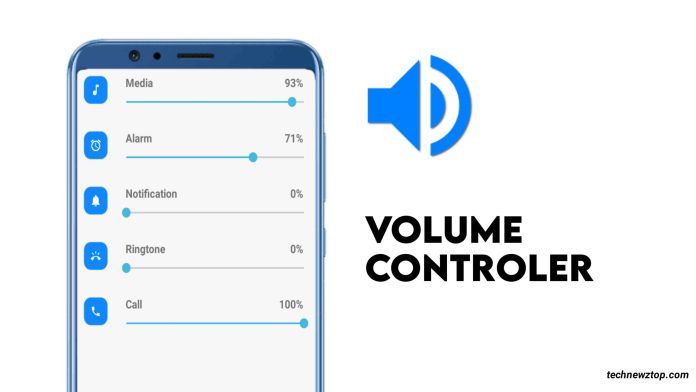
In essence, the App Volume Controller is a utility application for Android that grants users granular control over audio output. Instead of a single master volume slider affecting everything, this app allows you to set a unique volume level for each installed application. Consequently, you can tailor your audio experience to match your daily activities perfectly.

For instance, you might set your messaging apps to a low volume, your music player to 80%, and your navigation app to a clear, mid-level tone. Once configured, these settings are remembered. Therefore, every time you open WhatsApp, it will automatically use the volume level you assigned, eliminating the need for constant manual adjustments.

Key Features and Practical Benefits

This application shines through its simplicity and powerful feature set. Building on this, its design focuses on user convenience without requiring complex permissions or internet access.

Direct Notification Panel Control

A standout feature is the ability to adjust volumes directly from the notification shade. This means you can change an app’s sound level or switch your ringer profile without ever leaving the app you’re currently using. It integrates seamlessly into the Android ecosystem, acting as a virtual extension of your phone’s physical buttons.

Set-It-and-Forget-It Functionality

The core promise of the App Volume Controller is permanent customization. After you define the preferred volume for YouTube, that setting persists indefinitely. This is ideal for creating personalized audio environments for work, commuting, or relaxation. You can learn more about optimizing your Android experience in our guide on essential Android customization tips.

Installation and Performance

Available on the Google Play Store, the app boasts impressive credentials. With over 500,000 downloads and a 3.9-star rating, it has proven its reliability to a large user base. Remarkably, it achieves all this while being incredibly lightweight, requiring a mere 1.7 MB of storage space. This efficiency ensures it runs smoothly in the background without draining battery life.

On the other hand, its minimal footprint is a significant advantage for users with older devices or limited storage. Installation is straightforward, and no special permissions are needed, which enhances privacy and security. For those concerned about ads, the developers offer an ad-free experience, allowing for uninterrupted use.

Who Should Use This App?

This tool is incredibly versatile. Primarily, it’s a boon for multitaskers. Imagine listening to a calm audiobook while browsing the web; you can lower your browser’s sound effects to a whisper while keeping the narration clear. Similarly, content creators and professionals who frequently switch between communication, media, and utility apps will find it indispensable.

Furthermore, it’s perfect for parents who want to limit the maximum volume of games on their child’s device, or for anyone sharing a space who needs to keep certain notifications discreet. The utility extends to improving accessibility by allowing users to amplify sounds from specific essential apps.

How It Compares to Built-in Android Features

While newer versions of Android have introduced some basic per-app volume controls within the system settings, they often lack the immediacy and permanence offered by a dedicated App Volume Controller. The dedicated app provides a centralized, intuitive interface and the crucial “set for always” functionality that system settings sometimes reset. Discover other powerful utility apps in our review of the best Android productivity tools.

This means that the app fills a genuine gap in the Android user experience. It doesn’t just offer control; it offers consistent, automated control that adapts to your lifestyle rather than forcing you to adapt to the device’s limitations.

Final Verdict and Getting Started

In summary, the App Volume Controller app is a elegantly simple solution to a widespread audio management problem on Android. It empowers users with precise, permanent control over their device’s sound output on an app-by-app basis. The combination of a lightweight design, an ad-free environment, and seamless notification panel integration makes it a highly recommended utility for almost any Android user.

To get started, simply search for “App Volume Controller” on the Google Play Store, download the app, and begin customizing your audio profiles. The process is intuitive, and the payoff—a perfectly calibrated audio environment that works automatically—is immediate. Have you tried managing your app volumes individually? Share your experience or questions in the comments below.

Continue Reading
Click to comment

Leave a Reply

Your email address will not be published. Required fields are marked *

How To

How to Save Another User’s WhatsApp Status: A Simple Step-by-Step Guide

Published

on

How to Save Another User’s WhatsApp Status: A Simple Step-by-Step Guide

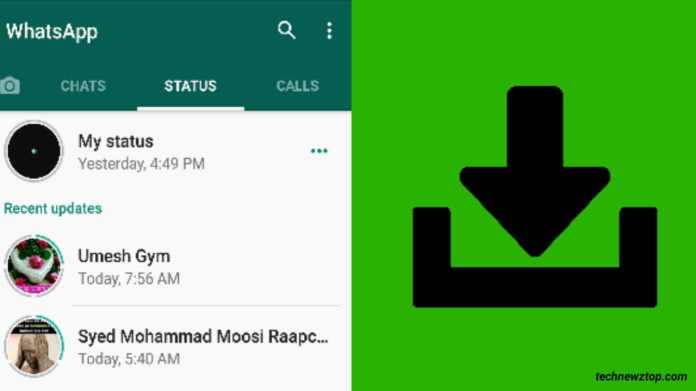
Have you ever stumbled upon a friend’s WhatsApp status that you wished you could keep forever? Perhaps it was a hilarious video or a stunning photo. Unfortunately, WhatsApp doesn’t offer a built-in way to download someone else’s status directly. However, there is a straightforward solution. In this guide, we’ll show you how to save another user’s WhatsApp status using a free third-party app. This method works on Android devices and takes just a few taps.

Why You Might Want to Save Another User’s WhatsApp Status

WhatsApp status updates disappear after 24 hours. This ephemeral nature can be frustrating when you see content you’d like to revisit. Whether it’s a friend’s travel photo, a funny meme, or an important announcement, having a local copy is useful. Additionally, you might want to share the status with someone who missed it. Instead of relying on screenshots (which don’t work for videos), using a dedicated app is the most efficient way to save another user’s WhatsApp status.

The Best Tool for the Job: Status Saver App

Several apps on the Google Play Store can help you download WhatsApp statuses. One of the most popular and user-friendly options is Status Saver. This lightweight app scans your phone’s internal storage for recently viewed WhatsApp statuses and presents them in a simple interface. It requires minimal permissions and is free to use. Below, we walk through the entire process step by step.

Step 1: Install the Status Saver App

First, open the Google Play Store on your Android phone. In the search bar, type “Status Saver” and look for the app with a high rating. Tap the “Install” button and wait for the download to complete. This typically takes less than a minute on a stable internet connection.

Step 2: Grant Necessary Permissions

Once installed, open the app from your app drawer. The app will request permission to access your photos, media, and files. Grant this permission. This is essential because WhatsApp stores status media in a hidden folder on your phone. The app needs read access to locate those files. Rest assured, Status Saver does not upload your data anywhere—it only reads local files.

Step 3: View Recent Status Updates

After granting permissions, the app will automatically scan your device. You will see a list of photos and videos that your contacts have recently posted as WhatsApp statuses. The list updates in real time as new statuses appear. Scroll through to find the specific status you want to keep.

Step 4: Select and Preview the Status

Tap on the photo or video you wish to download. The app will show a full-screen preview. This allows you to double-check that you are saving the correct content. If it’s a video, you can play it directly within the app to ensure it’s what you want.

Step 5: Download and Save

Below the preview, you will see a prominent “Download” button. Tap it. The app will instantly save the file to your phone’s storage. A confirmation message will appear, and the file will be stored in a dedicated folder named “Status Saver” inside your Downloads directory.

Step 6: Access Your Saved Statuses

Open your phone’s file manager or gallery app. Navigate to the “Status Saver” folder. You will find all your downloaded WhatsApp statuses there. You can now view, share, or edit these files anytime—even after the original 24-hour period has passed.

Important Considerations and Privacy Tips

While using a status saver app is legal for personal use, always respect others’ privacy. Do not share downloaded statuses without the original poster’s permission. Also, keep the app updated to ensure compatibility with the latest WhatsApp updates. For more tips on managing your WhatsApp experience, check out our guide on how to read WhatsApp deleted messages.

Frequently Asked Questions

Can I save WhatsApp statuses on iPhone?

Unfortunately, iOS restrictions make it harder to use third-party apps for this purpose. Status Saver is primarily designed for Android. iPhone users may need to use screen recording or ask the person to share the file directly.

Is Status Saver safe to use?

Yes, the app is safe if downloaded from the official Google Play Store. It does not request unnecessary permissions and has a good track record. However, always read user reviews before installing any app.

Will the person know I saved their status?

No. The app works locally on your device. WhatsApp does not notify users when someone saves their status through third-party tools. Your activity remains private.

Final Thoughts

Learning how to save another user’s WhatsApp status is a handy skill that enhances your messaging experience. With the Status Saver app, the process is quick, free, and reliable. For more useful tricks, explore our article on who viewed your WhatsApp profile. If you have any questions, leave a comment below. Don’t forget to share this guide with friends who might find it helpful!

Continue Reading

How To

How to Automatically Create Facebook Posts from an RSS Feed: A Complete Guide

Published

on

How to Automatically Create Facebook Posts from an RSS Feed: A Complete Guide

Social media managers and content creators often look for ways to streamline their workflow. One of the most effective methods is to automatically generate Facebook posts from an RSS feed. This approach saves time, ensures consistent posting, and helps maintain an active presence on the platform. But how exactly does it work? Let’s break it down step by step.

Why Automate Facebook Posts from an RSS Feed?

Manually sharing every new article or blog post to your Facebook page can be tedious. Automating this process using an RSS feed ensures that your audience sees fresh content as soon as it goes live. It also reduces the risk of forgetting to share important updates.

Many popular media outlets already use this technique to keep their followers engaged. The key is setting up a dedicated RSS feed that Facebook can read and publish instantly. This method works particularly well for blogs, news sites, and any website that publishes content regularly.

Building on this, there are two primary ways to achieve automated posting: using Facebook’s built-in Instant Articles feature, or relying on third-party automation tools like IFTTT. Both have their advantages, and we’ll cover each in detail.

Method 1: Using Facebook Instant Articles with RSS

Facebook Instant Articles allow publishers to load content up to 10 times faster than standard web pages. This feature improves user experience and encourages sharing. However, it requires a separate RSS feed specifically formatted for Instant Articles.

Creating the Right RSS Feed

Your RSS feed must include specific elements to be compatible with Facebook Instant Articles. Each article should be represented as an <item> with the following required fields:

  • <title> – The headline of the article.
  • <link> – The canonical URL for the article on your site.
  • <content:encoded> – The full HTML content of the article.
  • <description> – A plain text summary of the article.
  • <guid> – A unique identifier for the article, often the URL.

Once your feed is ready, connect it to your Facebook page through the Publishing Tools section. Navigate to the Instant Articles configuration, select your production RSS feed, and submit it for approval. After approval, new articles will automatically appear as Instant Articles on your page.

Troubleshooting Your Setup

If something goes wrong, check the Publishing Tools dashboard for error messages. Facebook provides detailed feedback on RSS feed issues, such as missing fields or formatting errors. You can also visit Facebook’s RSS-Instant Articles Setup Page for official guidance.

This method is ideal if you want to leverage Facebook’s native features for speed and engagement. However, it requires technical setup and may not suit every publisher.

Method 2: Automating with IFTTT

For those who prefer a simpler, code-free solution, IFTTT (If This Then That) offers a powerful way to auto post RSS feed Facebook content. This service works by creating an “applet” that monitors your RSS feed and publishes new items to your Facebook page automatically.

Step-by-Step IFTTT Setup

  1. Create or sign in to your IFTTT account.
  2. Click the “Create” button at the top of the page to start a new applet.
  3. Select “If This” and search for the RSS Feed service.
  4. If prompted, click “Connect” to link the service to your account.
  5. Choose “New Feed Item” as the trigger. This will activate the applet every time a new item appears in your feed.
  6. Alternatively, select “New feed item matches” if you only want posts containing specific keywords or phrases.
  7. Enter your RSS feed URL. If you chose the matching option, also type the required keyword or phrase.
  8. Click “Create Trigger”.
  9. Now select “Then That” and search for the Facebook Pages service.
  10. Connect your Facebook account and choose the page you want to post to.
  11. Select “Create a Link Post”. This is the most relevant action for sharing RSS items.
  12. In the Message box, type any text you want to accompany the link. Use variables like EntryTitle to make each post dynamic.
  13. Confirm that the correct Facebook page is selected in the account menu.
  14. Click “Create Action”, then “Continue”.
  15. Rename your applet if desired, enable notifications, and click “Finish”.

This method is highly flexible and works with any RSS feed. You can customize the post message, include the author’s name, or add the publication date. It’s a favorite among bloggers and small business owners who want to maintain a consistent posting schedule without manual effort.

Comparing Both Methods

Choosing between Facebook Instant Articles and IFTTT depends on your goals. If you prioritize fast loading times and deeper integration with Facebook’s ecosystem, Instant Articles is the way to go. However, it requires a properly formatted RSS feed and approval from Facebook.

On the other hand, IFTTT offers a more straightforward setup with no approval process. It’s perfect for those who want a quick, reliable way to share content from any source. The trade-off is that posts appear as standard link shares, not Instant Articles.

Both methods effectively generate Facebook posts from an RSS feed. The best choice depends on your technical comfort level and content strategy.

Final Thoughts

Automating your Facebook posting workflow is a smart move for any content creator. By using an RSS feed, you ensure that your audience never misses an update. Whether you choose Facebook’s native Instant Articles or the flexibility of IFTTT, the result is a more efficient, consistent social media presence.

Ready to try it yourself? Start by setting up a dedicated RSS feed for your site, then pick the method that suits you best. With a little initial effort, you’ll save hours of manual work and keep your followers engaged with fresh content every day.

For more tips on managing your online presence, check out our guide on how to delete a Facebook account permanently or explore 10 best WhatsApp tricks and tips to enhance your digital toolkit.

Continue Reading

How To

What Is WhatsApp Disappearing Messages? A Step-by-Step Guide to Enable & Use

Published

on

What Is WhatsApp Disappearing Messages? A Complete Guide to Enable & Use

In today’s fast-paced digital world, privacy is more important than ever. WhatsApp Disappearing Messages is a powerful feature designed to help you keep your conversations clean and secure. But what exactly is it, and how can you make the most of it? This guide walks you through everything you need to know.

WhatsApp, owned by Meta, has introduced this feature to give users more control over their chat history. Whether you’re chatting one-on-one or in a group, disappearing messages automatically remove texts after a set period. It’s a simple yet effective way to reduce digital clutter and protect sensitive information.

How Disappearing Messages Work on WhatsApp

The core idea behind WhatsApp Disappearing Messages is straightforward: once enabled, any new message sent or received in the chat will vanish after seven days. This applies to both individual and group conversations. However, it’s important to note that this feature does not affect messages that were sent before you turned it on.

But there’s a catch: the disappearing rule does not apply to forwarded messages. If someone forwards a message from a chat with disappearing messages enabled, the forwarded copy will not auto-delete. This means that while your chat remains tidy, forwarded content can still persist elsewhere.

Another key point is that the feature works across all platforms—Android, iOS, and WhatsApp Web. So whether you’re on your phone or desktop, the seven-day timer starts from the moment each message is sent.

Benefits of Using WhatsApp Disappearing Messages

Why should you consider turning on this feature? For starters, it significantly enhances your privacy. Sensitive details like addresses, passwords, or personal plans won’t linger in your chat history indefinitely. Instead, they automatically disappear after a week.

Additionally, it helps declutter your chat list. If you’re someone who hates scrolling through endless old messages, disappearing messages are a lifesaver. They ensure that only recent conversations stay visible, making it easier to find what you need.

Furthermore, this feature is ideal for temporary discussions—like planning a surprise party or sharing one-time information. Once the conversation is over, the messages vanish without any manual effort required.

How to Enable Disappearing Messages on WhatsApp

Ready to give it a try? Enabling WhatsApp Disappearing Messages is a quick and easy process. Follow these steps to turn it on for any chat:

Step 1: Open the Chat

Launch WhatsApp and navigate to the individual or group chat where you want to enable the feature. Tap on the contact’s name or group subject at the top of the screen to open the chat info page.

Step 2: Find the Disappearing Messages Option

Scroll down the info page until you see the “Disappearing Messages” option. Tap on it to proceed. You’ll be presented with a simple toggle or a continue button, depending on your app version.

Step 3: Turn It On

Tap “Continue” or toggle the switch to enable disappearing messages. Once activated, a notice will appear in the chat informing all participants that disappearing messages are now active. That’s it—you’re all set!

If you ever want to disable it, simply follow the same steps and turn the feature off. Remember, disabling it will not restore already deleted messages.

Limitations You Should Know

While WhatsApp Disappearing Messages is a fantastic tool, it’s not a silver bullet for privacy. The feature only deletes messages after seven days, so if someone takes a screenshot or forwards a message before it disappears, the content can still be shared. WhatsApp does not notify you if a screenshot is taken, so always be cautious with highly sensitive information.

Moreover, the feature does not apply to media that is saved to the device’s gallery. If a recipient downloads a photo or video before the seven-day mark, that file remains on their phone indefinitely. Therefore, think twice before sharing anything you wouldn’t want to last forever.

For more tips on managing your WhatsApp privacy, check out our guide on How to Recover WhatsApp Deleted Messages and WhatsApp Business New Features.

Final Thoughts

WhatsApp Disappearing Messages is a valuable addition for anyone who values privacy and a tidy inbox. It’s easy to enable, works across all devices, and gives you peace of mind that old conversations won’t stick around forever. However, it’s not a complete privacy solution—so use it wisely alongside other security practices.

Have you tried this feature yet? Let us know in the comments below! And don’t forget to share this post with friends who might find it useful.

Continue Reading

Trending