Connect with us

How To

How to Download Books to a Kindle Fire in 2025: A Complete Guide

Published

on

How to Download Books to a Kindle Fire in 2025: A Complete Guide

Reading every day is a fantastic habit, but purchasing books can quickly drain your wallet. Fortunately, you can download books to a Kindle Fire without spending a fortune. With a few straightforward techniques, you can fill your digital library with both new releases and timeless classics. This guide walks you through every reliable method available in 2025.

Using the Amazon Store Directly on Your Kindle Fire

The most straightforward way to get content is through the built-in Amazon Store. It comes pre-installed on every Kindle Fire, offering millions of titles, many of which are free.

Step-by-Step: Buying or Borrowing from Amazon

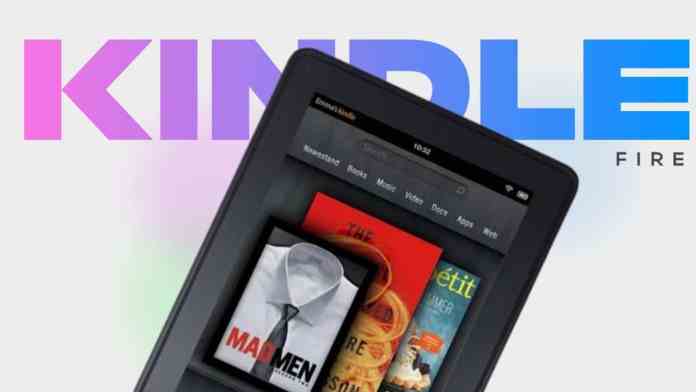
First, turn on your device and connect to a Wi-Fi network. From the Home screen, tap the Books tab at the top. Next, select the Store option to browse the catalogue. You can search for a specific author or browse categories like “Top 100 Free.”

When you find a promising title, tap the cover to open its details page. Here, you will see the price, user ratings, and a brief description. Many books offer a “Try a Sample” feature, letting you read the first chapter for free. If you are an Amazon Prime member, look for the “Borrow for Free” badge. To complete the purchase or borrow, simply tap Buy or Borrow. The file will begin downloading instantly.

To start reading, return to the Books tab on your Home screen. Tap the cover of your newly acquired book, and it will open immediately. This method is undeniably the simplest way to download books to a Kindle Fire.

Downloading Books via Your Computer or Laptop

Another reliable approach involves using a computer. This method is particularly useful if you prefer browsing on a larger screen.

How to Send Books from a Web Browser

Open your preferred web browser and go to Amazon.com. Sign in with your Amazon credentials. Use the search bar at the top to look for Kindle books, or click on the Kindle tab to explore genres like fiction, non-fiction, or bestsellers.

Once you select a book, click on it to see the price, customer reviews, and a summary. Before clicking the orange Buy button, ensure your Kindle Fire is selected in the “Deliver to” dropdown menu. After the purchase, the book is sent directly to your Amazon cloud library.

On your Kindle Fire, connect to the internet and open the Books tab. Pull down to refresh your library, and the new title will appear. Tap it to start the download. This computer-based workflow is ideal for those who manage their digital library from a desktop.

Borrowing Free eBooks with the Libby App

For readers who want to access thousands of titles without paying a cent, the Libby app is a game-changer. It connects directly to your local library’s digital collection.

Setting Up Libby on Your Kindle Fire

First, you need a library card. Visit your local library in person or check if they offer online registration. Once you have your card number and PIN, download the Libby app from the Amazon Appstore on your Kindle Fire. Open the app and follow the on-screen prompts to add your library card.

After linking your account, tap the library icon to browse the collection. You can search by author, title, or genre. When you find a book you want, tap Borrow. If it is currently checked out, tap Place Hold and wait for an email notification.

To read the borrowed book on your Kindle, tap Read With Kindle. This will open Amazon’s website in your browser. Confirm the delivery by clicking Get Library Book. Finally, open the Books tab on your Kindle Fire and refresh the page. The book will appear, ready to read. Most titles are returned automatically after the due date, so you never have to worry about late fees.

Alternative Sources for Free Kindle Books

Beyond Amazon and Libby, several other platforms provide free content legally.

Amazon’s Top 100 Free List

Amazon updates a daily list of free bestsellers. Navigate to the Kindle Store and search for “Top 100 Free.” Authors often offer the first book in a series for free to attract readers. Be aware that some free books end on a cliffhanger, encouraging you to purchase the next volume.

Public Domain Websites

Books with expired copyrights are in the public domain. Websites like Project Gutenberg and ManyBooks offer thousands of classics by authors like Jane Austen and Mark Twain. You can download these in Kindle Fire PDF or MOBI format. After downloading, transfer the file to your device using a USB cable or the Send to Kindle email feature.

Email Alert Services

Platforms such as BookBub and Free Booksy send daily newsletters featuring discounted and free Kindle books. Sign up, select your favourite genres, and receive curated lists directly in your inbox. This saves you time searching manually.

Sending Personal PDFs to Your Kindle Fire

If you have documents, notes, or eBooks in PDF format, you can easily transfer them. Connect your Kindle Fire to a computer using a USB cable. Unlock the screen, and your device will appear as a drive on your PC. Drag and drop the PDF files into the Documents folder. After safely ejecting the device, tap the Docs tab on your Kindle Fire to find your files. This method is perfect for personal use or sharing reading material.

Building on these methods, you now have a complete toolkit to download books to a Kindle Fire in 2025. Whether you prefer the Amazon Store, library apps, or public domain archives, each approach is safe, legal, and budget-friendly. Start exploring today and enjoy unlimited reading without breaking the bank.

Continue Reading
Click to comment

Leave a Reply

Your email address will not be published. Required fields are marked *

How To

WhatsApp Introduces Edit Button, Undo Message Feature, and Double Verification: What You Need to Know

Published

on

WhatsApp Introduces Edit Button, Undo Message Feature, and Double Verification: What You Need to Know

WhatsApp, the world’s most popular messaging platform, is preparing to roll out three significant updates that promise to transform how users interact with the app. After years of development, the company has officially announced that a WhatsApp edit button, an undo message feature, and a double verification system are currently under testing. These additions aim to address long-standing user frustrations and bolster security.

For millions of Android and iOS users, the inability to correct a typo in a sent message has been a persistent annoyance. Similarly, accidentally deleting a conversation or worrying about unauthorized account access has led to calls for better controls. Now, WhatsApp appears to be listening.

Edit Button: Finally, the Power to Correct Mistakes

One of the most requested tools in messaging history is finally arriving. The WhatsApp edit button will allow users to modify text messages even after they have been sent. Previously, the only option was to delete the message entirely and resend it—a clunky workaround at best.

Apple introduced a similar capability for iMessage users years ago, but Android users have been left waiting. According to WhatsApp’s beta announcements, the feature has been in development for roughly five years. After a long pause, the company has now confirmed its official rollout is imminent.

How will it work? Once the feature goes live, you will be able to tap on a sent message and select an edit option. The edited version will replace the original, though recipients may see a small “edited” label to maintain transparency.

Why This Matters for Everyday Users

Think about how often you send a message with a typo, autocorrect error, or incomplete thought. With the edit button, those awkward moments become a thing of the past. It is a small change that significantly improves communication clarity.

Undo Message Feature: A Safety Net for Accidental Deletions

Alongside the edit button, WhatsApp is testing an undo message feature. This tool is designed to help users recover conversations they have accidentally deleted. The scenario is familiar: you intend to delete a message for everyone but mistakenly tap “delete for me” instead. Once that happens, the chat is gone from your device with no way back.

The new undo feature will act as a safety net. After deleting a message using the “delete for me” option, a temporary prompt will appear, giving you a few seconds to reverse the action. This time-bound window—likely just a few seconds—will allow you to restore the deleted content before it is permanently removed.

This is a practical solution for a common problem. Many users have accidentally wiped out important conversations, only to realize their error too late. The undo button provides a second chance without requiring complex workarounds.

How to Use the Undo Feature

When the feature becomes available, simply delete a message as usual. A small notification with an “Undo” button will appear at the bottom of the screen. Tap it within the allotted time, and the message will be restored instantly.

Double Verification: Strengthening Account Security

Security remains a top priority for WhatsApp, and the double verification feature is the latest step in that direction. This tool is specifically designed for users who log into their WhatsApp account on a new smartphone. Instead of a single verification code, the platform will now require two separate security codes.

The process works like this: when you attempt to sign in on another device, WhatsApp will send a 6-digit code to your registered phone number. After entering that code, you will be prompted to provide a second code, which will also be sent to the same number. This two-step approach makes it significantly harder for unauthorized parties to gain access, even if they have your phone number.

This is an upgrade over the current single-code system, which has been vulnerable to SIM-swapping attacks in the past. By adding an extra layer of verification, WhatsApp aims to protect sensitive conversations and personal data.

What These Features Mean for the Future of Messaging

Together, these three updates represent a shift toward a more user-centric design. The WhatsApp edit button empowers users to communicate more accurately, while the undo feature reduces the stress of accidental deletions. Meanwhile, double verification adds a robust security layer that keeps accounts safe.

It is important to note that all three features are still in the testing phase. Beta users on both Android and iOS will likely see them first, followed by a wider rollout once bugs are ironed out. WhatsApp has not provided an exact release date, but the official announcement suggests that the wait will not be much longer.

For those eager to try these tools early, joining the WhatsApp beta program is a good option. You can sign up through the Google Play Store or Apple’s TestFlight app. Keep an eye on update logs for mentions of edit, undo, or double verification.

To stay updated on the latest WhatsApp developments, check out our guide on How to Use Meta AI on WhatsApp. Also, learn about WhatsApp Disappearing Messages for more privacy tips.

In conclusion, WhatsApp is finally addressing some of its most persistent pain points. The edit button, undo message feature, and double verification are not just gimmicks—they are practical tools that will improve daily communication for billions of users. As testing continues, the messaging giant is proving that it still values innovation and user feedback.

What do you think about these upcoming features? Share your thoughts in the comments below. If you found this article helpful, consider sharing it with your friends on social media.

Continue Reading

How To

How to Delete Apple ID or Apple Account: The Complete Walkthrough

Published

on

How to Delete Apple ID or Apple Account: The Complete Walkthrough

Thinking about leaving the Apple ecosystem? Whether you’ve switched to another platform or simply want to clean up old accounts, knowing how to delete Apple ID is essential. This guide walks you through every step, from preparation to permanent removal, so you can say goodbye without regrets.

What Happens When You Delete Your Apple ID?

Deleting your Apple account isn’t a minor action—it’s a permanent decision. Once the process is complete, you lose access to every Apple service tied to that ID. iCloud, FaceTime, iMessage, and Apple Pay will no longer function. Your photos, videos, and documents stored in iCloud are erased. Purchased apps, music, and movies become inaccessible. Subscriptions like Apple Music or iCloud+ get canceled after the billing cycle ends.

Importantly, your email address cannot be used to create a new Apple ID. Apple Support cases and Genius Bar appointments are also voided. Financial records, however, are retained for legal compliance. If you have pending payments, such as an Apple Pay Later balance, you must settle them before proceeding. Apple will not process a deletion request until all dues are cleared.

Preparing to Delete Apple ID: Essential Steps

Before you hit the delete button, take these precautions to protect your data and avoid future headaches.

Back Up Your Data

First, save everything you care about. Download your photos, contacts, and files from iCloud to your computer or an external drive. Use Apple’s data privacy portal to request a copy of your account data. This includes emails, calendars, and documents. Without a backup, you’ll lose it all permanently.

Sign Out of All Devices

Next, log out of your Apple ID on every device—iPhone, iPad, Mac, and even browsers. If you skip this step, those devices may become unusable or locked to your account. Go to Settings, tap your name, scroll down, and select Sign Out. Repeat this for each gadget.

Review and Cancel Subscriptions

Check active subscriptions like Apple Music, Apple TV+, or Apple Arcade. Decide whether to cancel them now or let them expire. If you plan to create a new Apple ID later, you can resubscribe with that fresh account. Unused prepaid subscriptions will be forfeited.

How to Delete Apple ID Permanently

Apple’s deletion process is handled through its privacy website. Follow these steps carefully.

Step-by-Step Deletion Process

  1. Navigate to privacy.apple.com in your browser.
  2. Sign in with your Apple ID and password. If two-factor authentication is enabled, verify your identity with a trusted device.
  3. Scroll down to the Delete your account section and click Request to delete your account.
  4. Select a reason for leaving from the dropdown menu. This helps Apple improve its services.
  5. Read the on-screen information about what deletion entails. Then check the box to agree to the terms.
  6. Choose how you want to receive updates—via email or phone—and click Continue.
  7. Apple will generate a unique access code. Save it immediately. Screenshot it or write it down in a safe place. This code is your only way to cancel the deletion request.
  8. Enter the access code when prompted, then confirm your decision by clicking Delete account.
  9. You’ll see a confirmation screen. Click Sign out to finish.

Deletion is not instant. Apple takes up to seven days to process the request. During this cooling-off period, your account remains active. You can cancel by contacting Apple Support and providing your access code. After the seven days, your account and all associated data are gone forever.

How to Temporarily Deactivate Apple ID

If you’re unsure about permanent removal, consider deactivation instead. This pauses your account without erasing anything. You won’t be able to use Apple services during the deactivation period, but your data remains intact.

Steps to Deactivate

  1. Visit privacy.apple.com and sign in.
  2. Go to the Temporarily deactivate your account section.
  3. Click Request to deactivate your account and choose a reason.
  4. Follow the on-screen instructions to receive another unique access code. Save this code securely.
  5. Confirm deactivation by clicking Deactivate account.

Back up your data before deactivating. You cannot access anything until you reactivate. This option is ideal if you think you might return to Apple later.

How to Reactivate Your Apple ID

Reactivating a deactivated account is straightforward—but only if you have the access code. Contact Apple Support via their website or phone. Provide the code, and Apple will verify your identity and restore your account. Without the code, recovery is impossible. Treat that code like a key to a locked vault.

Final Thoughts

Deciding to delete Apple ID is a significant move. Ensure you’ve backed up everything important, signed out of all devices, and reviewed your subscriptions. If doubt lingers, choose deactivation over deletion—it gives you a safety net. Always store your access code in a secure location. Follow the steps outlined here, and the process will be smooth and stress-free. Choose wisely before parting ways with Apple.

Continue Reading

How To

How to Download Music from YouTube Easily in 2025: Legal, Safe, and Fast Methods

Published

on

How to Download Music from YouTube Easily in 2025

YouTube remains the world’s largest music streaming platform, but not everyone has constant internet access. Whether you’re commuting, traveling, or simply want to save data, learning how to download music from YouTube is a practical skill. In 2025, several options exist—from official subscriptions to free desktop tools and browser-based converters. This guide breaks down the safest, most efficient methods available today.

Why You Might Want to Download Music from YouTube

Listening to songs offline offers clear advantages. You avoid buffering issues, save mobile data, and enjoy uninterrupted playback. Many users also want to create personal playlists without relying on a live connection. However, not all download methods are equal in terms of legality, safety, or convenience.

The Official Route: YouTube Music Premium

The most straightforward way to download music from YouTube is through YouTube Music Premium. This paid subscription costs roughly $9.99 per month and grants legal offline access to millions of songs. It works seamlessly on Android, iOS, and the web.

To get started, install the YouTube Music app, search for your desired track, and tap the download arrow icon. For entire playlists, use the three-dot menu and select “Download.” All saved content remains within the app—you cannot transfer files to another folder. This limitation is intentional to prevent copyright infringement.

Benefits include ad-free listening, high-quality audio, and reliable offline playback. On the downside, you must maintain an active subscription. If you cancel, downloaded songs become inaccessible.

Desktop Tools for Flexible Downloads

For users who want more control over file formats and storage locations, dedicated software offers a solid alternative. Two popular choices are 4K Video Downloader and MediaHuman YouTube Downloader. Both are free, support Windows, macOS, and Linux, and allow you to extract audio from YouTube videos.

Using 4K Video Downloader

This tool is widely trusted for its simplicity. After downloading the software from the official website, copy a YouTube video URL and paste it into the application. Select “Extract Audio” and choose your preferred format—MP3 or M4A. You can also adjust the audio quality before clicking “Extract.” The process is fast and outputs files you can store anywhere on your computer.

Key features include batch downloading, no intrusive ads, and support for high-bitrate audio. However, always download from the official source to avoid malware. Use antivirus protection as an extra precaution.

MediaHuman YouTube Downloader

MediaHuman offers a similarly clean experience. Install the app, paste a YouTube link, click the music icon to switch to audio mode, and hit the download button. It supports MP3, M4A, and other common formats. The interface is intuitive, making it ideal for beginners.

Both desktop tools are best suited for personal use. Avoid downloading copyrighted material without permission. Stick to Creative Commons or royalty-free content to stay within legal boundaries.

Online Converters: Quick but Risky

If you prefer not to install software, online converters provide a browser-based solution. Websites like dirpy.com, loader.to, and x2download.com let you convert YouTube videos to audio files instantly. Simply copy the video URL, paste it into the converter, select MP3 or M4A, and click “Download.” The process takes seconds.

These platforms work on any device, including smartphones and tablets. No installation is required, which is convenient. Nevertheless, online converters come with significant risks. Many display aggressive ads, pop-ups, or even malware. Some sites have been known to track user activity or inject harmful scripts.

To stay safe, use a trusted antivirus program and avoid clicking on suspicious banners. Stick to well-known converter sites and consider using an ad blocker. Even then, be aware that these services may disappear or change their policies without notice.

Legal and Safety Considerations

Before you download music from YouTube, understand the legal landscape. Downloading copyrighted songs without permission violates YouTube’s terms of service and copyright law. This could lead to account suspension or legal action in extreme cases. Always check if a video is under a Creative Commons license or explicitly marked for free use.

Safety is equally important. Untrusted software or websites can compromise your device. Stick to official sources like YouTube Music Premium or reputable desktop applications. Keep your operating system and antivirus software up to date. If a tool seems too good to be true, it probably is.

Which Method Should You Choose?

Your choice depends on your priorities. If convenience and legality matter most, YouTube Music Premium is the clear winner. It costs money but eliminates all risks. For desktop users who want free, flexible downloads, 4K Video Downloader or MediaHuman are excellent options. Online converters work in a pinch but require caution.

Ultimately, the best method is the one that aligns with your needs and respects copyright. By following the guidelines in this article, you can enjoy your favorite music offline without compromising your security or ethics.

For more tips on digital tools and online safety, check out our guides on staying safe online and best music streaming apps.

Continue Reading

Trending