Connect with us

How To

How to Recover Deleted Text Messages on Android: All Possible Ways

Published

on

How to Recover Deleted Text Messages on Android: All Possible Ways

Accidentally deleting a crucial text message can be a moment of panic. Whether it’s a confirmation code, a heartfelt note, or an important work update, the loss feels immediate. However, there is good news: you can often recover deleted text messages on Android using several built-in methods. This guide walks you through every possible solution, from simple unarchiving to restoring from backups.

Many Android users assume that once a message is gone, it is gone forever. In reality, your device often keeps copies in hidden folders or backup systems. Below, we break down the most effective techniques for different apps and scenarios.

Recover Deleted Texts in Google Messages via Unarchive

Google Messages is the default SMS app on many Android phones. If you accidentally swiped away a conversation, it may not be deleted—just archived. This is a common oversight that can save you a lot of trouble.

To check, open the Google Messages app and tap your profile picture in the top-right corner. Select “Archived” from the menu. You will see all hidden conversations here. Long-press the message you want and tap the unarchive icon at the top. That’s it—your text is back in the main inbox.

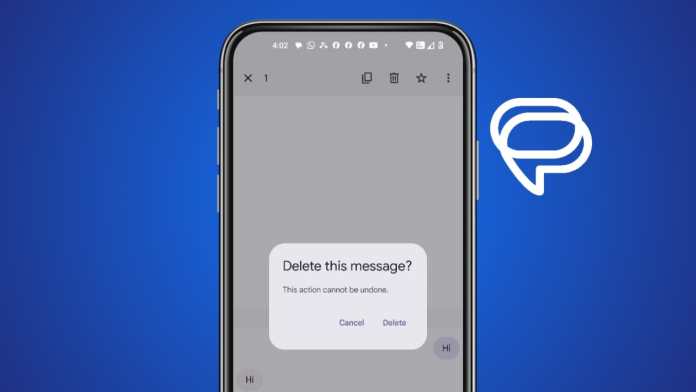
This method works only if you archived rather than permanently deleted the message. If you performed a full deletion, move on to the next sections.

Use Samsung Messages Recycle Bin to Restore Lost SMS

Samsung devices offer a unique safety net: a Recycle Bin within the Samsung Messages app. This feature temporarily stores deleted messages for 30 days before permanent removal. It is one of the easiest ways to recover deleted text messages on Android without extra software.

Open the Samsung Messages app and tap the three-dot menu in the top-right corner. Select “Recycle Bin” and browse the list of recently deleted items. Long-press the desired message and choose “Restore.” The message reappears in its original thread.

Keep in mind that this option is exclusive to Samsung’s native messaging app. If you use a third-party SMS app, you will need a different approach.

Recover Deleted WhatsApp Messages on Android

WhatsApp handles message deletion differently. Since chats are stored locally and in the cloud, you have two recovery paths: notification history and backups.

Method 1: Check Notification History

If you deleted a WhatsApp message before reading it, the notification might still be logged in your phone’s notification history. Go to Settings > search for “Notification History” and enable it if off. Scroll through the log to find the WhatsApp notification containing the deleted text. This works best for unread messages.

Method 2: Restore from WhatsApp Backup

WhatsApp automatically backs up your chats daily (if configured). To restore, uninstall and reinstall WhatsApp, then sign in with the same phone number. During setup, you will see a prompt to restore from backup. Tap “Restore” to retrieve all messages, including those you deleted.

This method overwrites current chats with the backup version, so use it carefully. Ensure your backup predates the deletion for best results.

Factory Reset as a Last Resort for Message Recovery

When all else fails, a factory reset can help—but only if you have a Google backup that contains the deleted messages. This is an extreme step, as it wipes all data on your phone.

First, check your backup date by going to Settings > Google > Backup. If the backup is older than the message deletion, proceed with a factory reset via Settings > System > Reset Options > Erase All Data. After the reset, restore from the Google backup during setup.

This method is risky but can be effective when other options fail. Always back up current data before resetting.

Prevent Future Message Loss on Android

To avoid panic in the future, enable automatic backups for your messaging apps. For SMS, consider using Google Drive backups or third-party apps like SMS Backup & Restore. For WhatsApp, verify that chat backup is turned on in Settings > Chats > Chat Backup.

Additionally, check your phone’s Recycle Bin settings—Samsung users should ensure the feature is active. A few minutes of setup can save you hours of recovery effort later.

Final Thoughts on Android Message Recovery

Losing text messages is frustrating, but as this guide shows, you have multiple ways to recover deleted text messages on Android. From unarchiving in Google Messages to using Samsung’s Recycle Bin or restoring WhatsApp backups, each method targets a specific scenario. For critical cases, a factory reset with Google backup remains an option.

Remember: act quickly. The longer you wait, the higher the chance that deleted data gets overwritten. For more tips on managing your Android device, check out our guides on freeing up storage and securing your phone.

Continue Reading
Click to comment

Leave a Reply

Your email address will not be published. Required fields are marked *

How To

Phone Cooler Android App: Keep Your Phone Temperature Cool!

Published

on

Phone Cooler Android App: Keep Your Phone Temperature Cool!

Is your phone feeling like a hot brick in your hand? Overheating is a common issue, especially during heavy usage or gaming. Fortunately, there is a simple solution: the Phone Cooler Android app. This free tool is designed to bring down your device’s temperature quickly and protect it from damage. In this guide, we explore how this app works, why you need it, and how to get it installed right away.

Why Your Phone Overheats and How a Cooling App Helps

Smartphones generate heat naturally. Processor-intensive tasks like gaming, video streaming, or using GPS can push temperatures up. When a phone gets too hot, performance slows down, battery life suffers, and in extreme cases, hardware can be damaged.

A dedicated phone cooler app works by identifying and closing background processes that consume excess CPU power. By reducing the workload on the processor, the device cools down faster. This approach is safer than physical cooling methods, as it relies on software optimization rather than external accessories.

However, it is important to note that no app can physically cool a phone beyond its ambient temperature. Instead, these apps prevent further heat buildup by managing system resources efficiently.

Features of the Phone Cooler Android App

The Phone Cooler Android app, also known as Cooling Master, offers several useful features. First, it provides a one-tap cooling function. With a single press, the app scans for heat-generating processes and stops them immediately.

Second, the app displays real-time temperature readings. This helps you monitor your phone’s heat level and take action before it becomes a problem. Third, it includes a battery saver mode that extends usage time by reducing power drain.

Another benefit is its lightweight design. The app takes only about 5.2 MB of storage space, making it suitable for devices with limited memory. It has earned a solid 4.2-star rating on the Google Play Store with over 1 million downloads, indicating widespread user satisfaction.

How to Download and Install the Phone Cooler App

Getting started with the Phone Cooler Android app is straightforward. Follow these steps:

  1. Open the Google Play Store on your Android device.
  2. Search for “Cooling Master Phone Cooler” or use the direct download link provided below.
  3. Tap the Install button and wait for the download to complete. The app is free of charge.
  4. Once installed, open the app and grant the necessary permissions for temperature monitoring.
  5. Tap the “Cool Down” button to start reducing your phone’s temperature immediately.

After installation, you can use the app regularly to maintain optimal performance. For more tips on managing your device, check out our guide on Android performance optimization.

Is the Phone Cooler App Safe to Use?

Many users worry about the safety of third-party cooling apps. The Phone Cooler Android app is safe when downloaded from the official Play Store. It does not require root access or intrusive permissions beyond what is necessary for temperature monitoring.

That said, not all cooling apps on the market are trustworthy. Some may contain ads or request unnecessary access to your data. Always stick to well-reviewed apps from reputable developers. If you have questions about app security, read our article on how to identify safe Android apps.

In summary, this app is a practical tool for users who frequently experience overheating. It is not a cure-all, but it provides a quick and easy way to manage heat without requiring technical knowledge.

Final Thoughts: Should You Install the Phone Cooler App?

If your phone regularly gets hot during normal use, the Phone Cooler Android app is worth trying. It offers a free, lightweight solution that can improve performance and extend battery life. The simple interface makes it accessible for everyone, from tech enthusiasts to casual users.

However, remember that software-based cooling has limits. For persistent overheating issues, consider checking for hardware problems or reducing usage of demanding apps. Combine this app with good habits—like avoiding direct sunlight and removing thick cases—for the best results.

Have you tried the Phone Cooler app? Share your experience in the comments below. If you found this post helpful, share it with friends who struggle with phone heat. For more app reviews and tech tips, explore our collection of Android app reviews.

Continue Reading

How To

How to Delete Your Google Search History: A Complete Step-by-Step Guide

Published

on

How to Delete Your Google Search History: A Complete Step-by-Step Guide

When you need an answer, you likely turn to Google first. It’s a habit that has become second nature. However, every query you type leaves a digital footprint. Your search history is stored, creating a detailed record of your online activity. Fortunately, you have full control over this data. This guide will walk you through every method to delete Google search history across all your devices, ensuring your privacy remains intact.

Why You Should Regularly Clear Your Search History

Your search history can reveal a lot about your interests, habits, and even personal information. Regularly clearing it helps protect your privacy, especially if you share a device with others. It also frees up storage space and can improve the performance of your browser. Beyond privacy, a clean slate can help you avoid embarrassing moments when someone picks up your phone or laptop. Taking a few minutes to manage your history is a simple yet effective step toward better digital hygiene.

Delete Google Search History on Mobile Devices

Deleting your search history from a phone or tablet is straightforward. You can remove everything at once or just the last 15 minutes of activity. The process varies slightly depending on whether you use the Google Search app or the Chrome browser.

Using the Google Search App (Android & iOS)

The Google Search app offers built-in privacy controls. Follow these steps to clear your history:

  1. Open the Google Search app on your phone or iPad.
  2. Tap your profile picture in the top-right corner.
  3. Select Search history from the menu.
  4. You may need to verify your identity. Tap the blue Verify button and follow the prompts (e.g., enter your device PIN or password).
  5. Once verified, you’ll see your full history. To remove a single entry, tap the X next to it. To delete an entire day’s history, tap the X beside that date.
  6. For bulk deletion, tap the blue Delete icon at the top. Choose from options like Delete Today, Delete Custom Range, Auto-delete, or Delete All-time.
  7. If you select Auto-delete, you can set a period (3, 6, or 18 months) after which your history is automatically removed.

It’s important to note that this only clears your Google search history, not your browsing history from Chrome. For that, you’ll need to follow the Chrome-specific steps below.

Clearing History in Google Chrome (Android)

If you use the Google Chrome browser on Android, your browsing data is stored separately. Here’s how to erase it:

  1. Tap the three-dot menu icon in the top-right corner.
  2. Go to Settings > Privacy and security.
  3. Tap Clear browsing data.
  4. Choose a time range (e.g., Last hour, Last 24 hours, All time) and select the data types you want to remove (Browsing history, Cookies, Cache).
  5. Tap Clear data to confirm.

Deleting History in Google Chrome (iPhone & iPad)

The process on iOS is similar but with a slightly different interface:

  1. Open Chrome on your iPhone or iPad.
  2. Tap the three-dot menu icon in the top-right corner.
  3. Select History, then tap Clear Browsing Data.
  4. Choose a time range (e.g., Last hour, Last 24 hours, All time).
  5. Tap Clear Browsing Data and confirm.

Delete Google Search History on Desktop

You can manage your history from any computer, even if you don’t have your phone nearby. The desktop method gives you more control over filtering and bulk deletion.

Using Google My Activity

This is the most comprehensive way to manage your Google search history from a desktop browser:

  1. Visit Google My Activity and sign in to your account.
  2. You’ll see a list of all your activity, including searches from your mobile devices.
  3. Use the filter options (date range and product) to narrow down what you want to delete. For example, select Search as the product to see only your queries.
  4. Click Search and then Apply to see filtered results.
  5. To delete everything shown, click Delete results. You can choose to delete for the Last hour, Last day, or All time, or set a Custom range.
  6. Review the summary and click Delete to confirm.

Clearing Browsing Data in Chrome Desktop

To also delete your browsing history, cache, and cookies from Chrome on your computer:

  1. Open Chrome and click the three-dot menu in the top-right corner.
  2. Go to More tools > Clear browsing data.
  3. Select a time range and the types of data you want to remove.
  4. Click Clear data.

How to Auto-Delete Your Google History

For ongoing privacy, you can set your history to be deleted automatically. This is a hands-off approach that keeps your data clean without manual effort.

  1. Go to Google Activity Controls and sign in.
  2. Click the hamburger menu (three horizontal lines) in the top-left corner and select Activity controls.
  3. Find Web & App Activity and click Auto-delete (Off).
  4. Toggle on Auto-delete activity older than and choose a time period (3, 6, or 18 months).
  5. Click Next, preview your choices, and click Confirm to save.

This setting applies to all Google services, not just search. It’s a powerful tool for maintaining long-term privacy without constant manual intervention.

Final Thoughts on Managing Your Google Search History

Taking control of your search history is a crucial part of online privacy. Whether you prefer manual deletion or automated schedules, Google provides flexible options to suit your needs. For the best protection, consider using Incognito mode for sensitive searches, but remember that this doesn’t prevent your activity from being tracked by websites or your internet provider. Regularly reviewing and clearing your history, combined with strong privacy settings, gives you greater peace of mind. For more tips on managing your digital footprint, check out our guide on how to check suspicious links before clicking and how to enable WhatsApp encrypted backup.

Continue Reading

How To

WhatsApp Rolls Out Secret Codes for Locked Chats on Android Beta: A Privacy Breakthrough

Published

on

WhatsApp Rolls Out Secret Codes for Locked Chats on Android Beta: A Privacy Breakthrough

In an era where digital privacy is more critical than ever, WhatsApp is pushing boundaries with a new feature that promises to redefine how users protect their conversations. The company is now testing WhatsApp Secret Codes for locked chats, offering Android beta users an additional layer of security that goes beyond the standard Chat Lock. This development signals a significant shift in how the messaging giant approaches user privacy.

What Are WhatsApp Secret Codes?

Building on the existing Chat Lock feature, WhatsApp Secret Codes allow users to hide the entry point for their locked conversations. Instead of a visible folder, you can now access your most private chats by typing a custom code directly into the search bar of the Chats tab. This discreet method ensures that even if someone glances at your screen, they won’t know you have locked conversations at all.

Currently, this feature is available exclusively to beta testers running WhatsApp beta for Android version 2.23.24.20. Those who have updated through the Google Play Store can find the new Secret Code settings within the locked chats list, ready to be configured.

How the Secret Code Settings Work

Once you enable the feature, the Secret Code settings section appears prominently in your locked chats menu. You can set a unique code—something memorable but hard for others to guess. After setup, accessing your secure chats becomes a stealthy process: simply enter the code in the search bar, and your locked conversations appear instantly.

This approach adds a layer of obscurity that the original Chat Lock lacked. Previously, locked chats were grouped in a visible folder, which could still attract unwanted attention. Now, with the secret code, the very existence of those chats can be concealed from prying eyes.

A Safety Net for Forgetful Users

Worried about forgetting your secret code? WhatsApp has thought of that. Beta testers can now clear the list of locked chats directly from their privacy settings. This failsafe ensures that even if you misplace your code, you won’t be permanently locked out of your conversations. It’s a thoughtful addition that balances security with usability.

Why This Matters for User Privacy

Privacy has become a battleground for messaging apps, and WhatsApp is doubling down. The combination of Chat Lock and WhatsApp Secret Codes creates a dual-layer defense that addresses a common concern: visible indicators of private conversations. By hiding the entry point, users gain more control over their digital footprint.

This move also aligns with broader trends in the tech industry. Other platforms like Telegram and Signal have long offered advanced privacy features, but WhatsApp’s massive user base makes these updates particularly impactful. For millions who rely on the app for sensitive communication, this feature could be a game-changer in how they manage their online privacy.

What’s Next for WhatsApp’s Privacy Features?

Although the Secret Code feature is still in beta, WhatsApp is expected to roll it out to a wider audience in the coming weeks. The company has not announced a specific release date, but the momentum suggests a full launch is imminent. For now, Android beta users can test the waters and provide feedback that will shape the final version.

In the meantime, users on stable versions of WhatsApp can still rely on the existing Chat Lock feature, which remains a robust tool for securing conversations. However, the addition of secret codes marks a clear step forward in the ongoing evolution of messaging app security.

For more insights on protecting your digital conversations, check out our guide on WhatsApp View Once Media and learn how to send videos as documents for added privacy.

Continue Reading

Trending