Connect with us

How To

I Wired a Phone Into Home Assistant — Now My Smart Home Calls Me When Something Breaks

Published

on

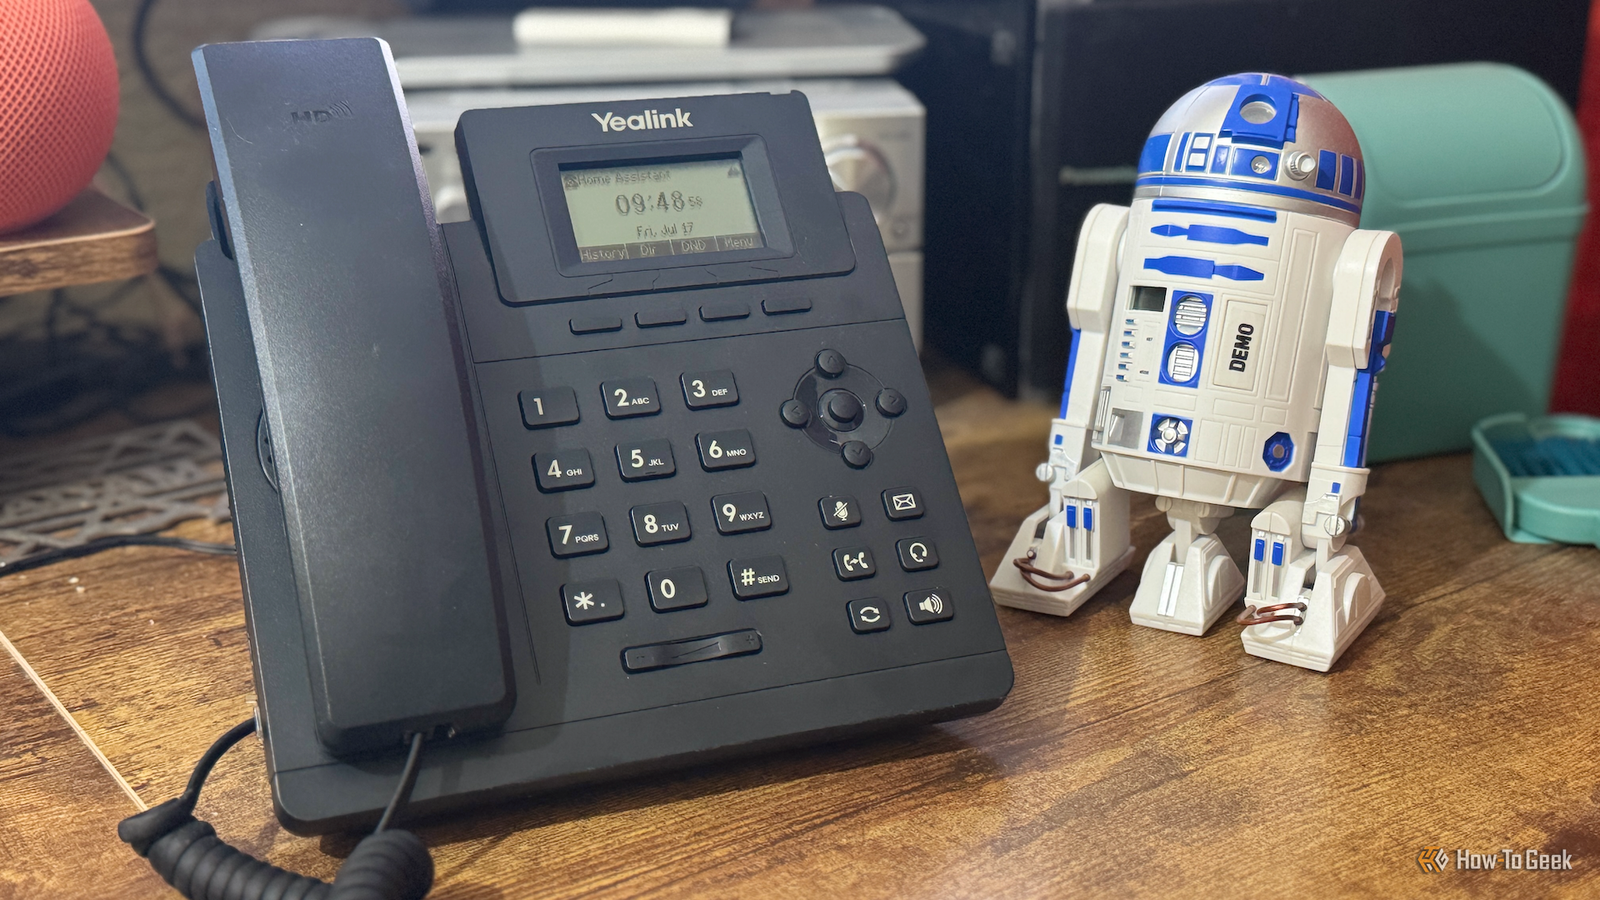
phone to Home Assistant

Why a Phone Beat a Notification

Notifications are easy to ignore. A flashing LED on a hub? Even easier. But a phone that actually rings — that gets your attention.

That’s the idea behind a clever Home Assistant setup: hook a physical phone into your smart home system, and let it call you when something needs a human. No app to check. No dashboard to open. Just a call, like a concerned friend.

It’s a simple concept, but the execution is where the magic happens. Here’s how it works.

What You Need to Get Started

Before you start wiring things together, gather a few essentials:

  • A spare smartphone (old Android phones work great)
  • A SIM card with a basic calling plan
  • Home Assistant already running on a server or Raspberry Pi
  • An automation that triggers on a sensor or device state

You don’t need a fancy VoIP setup. The phone itself does the heavy lifting.

Step 1: Connect the Phone to Home Assistant

The first step is getting the phone talking to Home Assistant. The easiest way is to install the Home Assistant Companion app on the phone. It links the device to your server over your local network.

Once paired, the phone becomes a notification target. But you’re not just sending pings — you’re setting up a call.

Use the Companion App for Reliable Notifications

The Companion app supports Home Assistant notifications with sound, vibration, and even critical alerts that override silent mode. That’s handy, but a ringing phone is still just a notification.

For a real call, you need something more.

Step 2: Set Up a Calling Service

There are a few ways to make the phone call you. The most straightforward is using a service like Twilio or a SIP provider. Twilio gives you a phone number and an API that Home Assistant can hit via a RESTful command.

Here’s a rough idea of the flow:

  1. Home Assistant detects a problem (say, a water leak sensor).
  2. An automation fires a webhook to Twilio.
  3. Twilio places a call to your number.
  4. You answer, hear a pre-recorded message, and deal with the issue.

It sounds technical, but Home Assistant’s automation editor makes it doable even if you’re not a developer.

Step 3: Build the Automation

In Home Assistant, create a new automation. Trigger it on whatever matters to you — a door opening at night, the thermostat dropping too low, or a smoke detector going off.

Then add an action that calls the phone. If you’re using Twilio, the action is a simple rest_command that sends a POST request. You can even include dynamic text in the call, like the sensor name or temperature.

Test it. Trigger the automation manually and see if the call comes through. Adjust the message until it sounds natural.

Why This Beats Every Other Alert System

Notifications get buried. Calls don’t. A ringing phone cuts through the noise, especially at 2 AM when a pipe bursts or the garage door is left open.

It’s also great for non-techy family members. My wife doesn’t touch the Home Assistant dashboard. But she knows that if the phone rings with a specific message, something’s actually wrong.

And you don’t need a landline. The spare phone sits in a drawer, charged and ready, doing nothing else. It’s the cheapest dedicated alert system you can build.

Take It Further: Two-Way Audio and More

Once the basic call works, you can expand. Add a microphone to the phone so you can talk back — useful for checking in on pets or hearing what’s happening at home while you’re away.

You could also set up different numbers for different alerts. A water leak calls your phone; a security breach calls your phone and your neighbor’s. The possibilities are wide open.

If you’re already deep into smart home automation ideas, this is a natural next step. It turns your smart home from a passive observer into an active communicator.

A Final Word on Reliability

This setup depends on a few things: internet, power, and the phone itself. Keep the phone plugged in and set to never sleep. Use a UPS for your Home Assistant server if you can.

Test the system monthly. A call that never comes is worse than no system at all.

For the cost of a used phone and a cheap SIM, you get a smart home that doesn’t just show you problems — it tells you. Loudly. And that’s worth a few minutes of setup.

Continue Reading
Click to comment

Leave a Reply

Your email address will not be published. Required fields are marked *

Social Media

Teen Drops Social Media Addiction Lawsuit Against Meta, Ending Bellwether Case

Published

on

social media addiction lawsuit

A Sudden End to a Landmark Case

The social media addiction lawsuit that was poised to become the first bellwether trial against Meta has been dropped. Just days before jury selection was set to begin in Los Angeles Superior Court, the plaintiff — a Florida teenager identified only as “R.K.C.” — voluntarily withdrew the case.

Meta confirmed the dismissal in a statement, emphasizing that no payment was made to the plaintiff. “This outcome makes clear that we will not back away from defending ourselves against baseless lawsuits,” the company said.

The abrupt end came less than 24 hours after Snap reached a tentative settlement with the same plaintiff, leaving Meta as the last defendant standing. That position lasted barely a day.

What Was the Case About?

R.K.C. was one of thousands of plaintiffs — teenagers, school districts, and state attorneys general — who accused the major tech platforms of knowingly engineering addictive products. The lawsuit targeted features like infinite scroll and the relentless ping of notifications, arguing these design choices were deliberately built to keep young users hooked.

The case carried outsized importance. As a bellwether trial, its outcome would have offered a preview of how juries might rule on the hundreds of similar suits still pending across the country. A verdict against Meta could have forced sweeping changes to how apps are built.

What Meta Planned to Argue

Court filings suggest Meta was ready to fight hard. The company intended to show that R.K.C. had used Facebook and Instagram for only minutes per day on average. Meta also planned to point out that most of the teen’s accounts were created only after he hired a lawyer.

Those arguments never got a hearing. The plaintiff’s decision to walk away — without a dime in compensation — raises questions about the strength of the case and the strategy behind the broader litigation.

Not All Good News for Meta

This dismissal doesn’t mean the company is out of the woods. Far from it.

Earlier this year, Meta suffered its first courtroom defeat over social media harms in a New Mexico case. A judge ordered the company to pay $375 million in penalties after finding it had misled consumers about platform safety and endangered children.

In March, a Los Angeles jury handed Meta and Google another loss, awarding roughly $6 million in damages to a plaintiff in a separate case. Those defeats show that juries and judges are increasingly willing to hold tech giants accountable.

What Happens Now?

The dismissal of this bellwether case doesn’t kill the broader litigation. Thousands of similar lawsuits remain active, and plaintiffs’ attorneys will likely regroup and search for a stronger vehicle for the next test case.

For Meta, this is a clear win — but a temporary one. The company still faces a mountain of legal challenges over teen safety and social media addiction claims. The pressure from regulators and lawmakers hasn’t let up either.

One thing is certain: the fight over how social media platforms are designed — and who bears responsibility for their effects on young minds — is far from over. This case may be gone, but the issue isn’t going anywhere.

Continue Reading

How To

Don’t Toss That Budget Tablet: 4 Free Apps That Make It Actually Worth Keeping

Published

on

cheap Android tablet

Why Your Budget Tablet Deserves a Second Chance

You bought it on a whim. Maybe it was a Black Friday deal, or a gift from someone who meant well. Now it sits in a drawer, collecting dust next to old charging cables. Sound familiar?

The truth is, most cheap Android tablets fail because of software, not hardware. The screens are decent, the batteries last long enough, but the apps people install are either bloated, ad-riddled, or just not built for big screens. So the tablet feels slow, clunky, and pointless.

But here’s the thing: you don’t need to spend another dollar to fix that. A handful of free apps can transform a budget Android tablet from a paperweight into a device you actually reach for daily. Let’s look at the four that make the biggest difference.

1. Nova Launcher: Make It Feel Fast Again

The first thing you notice on a cheap tablet is the lag. Icons stutter, swipes feel heavy, and the default launcher is usually crammed with bloatware you’ll never open.

Nova Launcher fixes that instantly. It replaces your entire home screen with something lighter and far more customizable. You can remove the app drawer clutter, set up gesture controls, and turn off animations that make the device feel slow.

The free version is genuinely useful. You get icon customization, scrollable docks, and backup options. The paid version adds more, but honestly, you won’t need it on a budget tablet.

Why Nova Works on Weak Hardware

Unlike many launchers that pile on features and slow things down, Nova is lean. It doesn’t sit in the background eating RAM. On a tablet with just 3GB or 4GB of memory, that’s a lifesaver.

Set it up once, and your tablet will feel snappier within minutes. No restart required.

2. Kiwi Browser: The Tablet Web Experience You’re Missing

Stock browsers on cheap tablets are often the worst offenders. They’re slow, show intrusive ads, and sometimes even redirect you to spam. Kiwi Browser changes the game.

Built on Chromium, Kiwi supports desktop extensions. That means you can install an ad blocker, a password manager, or even dark mode tools right on your tablet. It’s like having a desktop browser in your hands.

The free version includes everything you need: fast rendering, a clean interface, and support for extensions from the Chrome Web Store. For a budget tablet, this makes web browsing feel less like a chore.

Extensions Change Everything

Install uBlock Origin and suddenly pages load faster and look cleaner. Install a translator and you can read foreign sites without hassle. The possibilities are endless, and it costs nothing.

3. VLC for Android: Turn Your Tablet Into a Media Powerhouse

One of the best uses for a cheap tablet is media consumption. But the default video player on most Android tablets is limited. It won’t play MKV files, it struggles with subtitles, and it often crashes on high-bitrate content.

VLC for Android solves all of that. It plays almost any format you throw at it, handles subtitles beautifully, and even supports network streaming from your PC or NAS.

The app is completely free, with no ads and no in-app purchases. It’s the kind of software that makes you wonder why other apps are so greedy.

More Than Just Video

VLC also plays audio files, podcasts, and even internet radio. On a tablet with a headphone jack, this turns your budget device into a dedicated music player. Perfect for the kitchen or workshop.

4. Pocket: Save Articles, Read Them Later, Actually Use Your Tablet

Tablets are great for reading, but most people don’t use them that way. You find an interesting article on your phone, then forget about it. Pocket changes that habit.

With Pocket, you save articles, videos, and web pages from any device. Then, when you have downtime, you open the app on your tablet and read everything in a clean, distraction-free layout.

The free version gives you unlimited saves and a comfortable reading experience. It syncs across all your devices, so your tablet becomes the place you go to actually consume the content you’ve been collecting.

Offline Reading Is a Killer Feature

Download articles for offline reading, and your tablet becomes useful even when Wi-Fi is spotty. On a plane, in a waiting room, or just in a dead zone, Pocket keeps you entertained.

Make Your Tablet Earn Its Place

These four apps are a starting point, not a final answer. Once you install them, your tablet will feel more responsive, more capable, and more worth the money you spent.

Try them out. If you’re still not convinced, consider other tweaks like disabling unused apps or adjusting your display settings. But start here — this is the cheapest upgrade you’ll ever make.

And if you’re looking for more ways to get the most out of your devices, check out our guide on free Android apps that boost productivity or our tips on extending your tablet’s battery life.

Continue Reading

Social Media

How to Grow on Instagram Without Reels: The Carousel Strategy That Actually Works

Published

on

grow on Instagram without Reels

Why Carousels Are the Secret to Instagram Growth Without Video

Let’s face it: not everyone wants to dance, lip-sync, or deliver a monologue to a ring light at 7 a.m. The pressure to be a full-time video creator is exhausting. But here’s the thing — you don’t need Reels to grow on Instagram. Not even close.

Carousels — those swipeable multi-image posts — are quietly outperforming video for many creators and businesses. They’re easier to produce, they encourage deliberate engagement, and they stick around longer in people’s feeds. Sound good? Let’s break down exactly how to use them to grow your audience and bottom line.

Why Carousels Beat Reels for Building a Loyal Following

Reels are great for reach, but reach isn’t loyalty. A viral video might get you 100,000 views, but how many of those viewers actually care about what you do? Carousels force people to slow down. They swipe, they read, they save. That’s the kind of attention that converts to followers who actually buy.

Carousels also have a longer shelf life. A Reel is old news in 24 hours. A well-crafted carousel can keep generating saves and shares for weeks. Plus, the algorithm loves them because they increase dwell time — the precious seconds a user spends on your post. More dwell time, more distribution. Simple math.

The Psychology of the Swipe

There’s a reason people swipe through a carousel even when they wouldn’t watch a 30-second video. It’s micro-commitment. Each swipe is a tiny decision, a small investment of attention. Before they know it, they’ve read all 10 slides and feel like they’ve learned something. That feeling of accomplishment is gold for engagement.

How to Create Carousels That Actually Get Saves and Shares

Not all carousels are created equal. A lazy photo dump won’t cut it. Here’s what separates a carousel that flops from one that fuels growth:

  • Lead with a hook slide. Your first slide must stop the scroll. Ask a provocative question or tease a surprising result. No pressure, but you have about 1.5 seconds.
  • Tell a story with a payoff. Each slide should build on the last. Don’t just list tips — walk people through a process, a case study, or a before-and-after transformation.
  • Design for readability. Use large text, high-contrast colors, and plenty of whitespace. If people have to squint, they’ll swipe away.
  • End with a call to action. Ask people to save the post, share it with a friend, or comment with their biggest takeaway. Make it specific, not vague.

The 7-Slide Sweet Spot

Data suggests that carousels with 7-10 slides tend to perform best. Too few, and you’re not giving enough value. Too many, and you’ll lose people. Aim for 8 slides: one hook, six value-packed slides, and one CTA. That structure works across niches.

Generating Leads and Revenue With Carousels

Growing followers is nice, but you want leads and sales, right? Carousels are surprisingly effective for that. Instead of a hard sell, you educate. You show the problem, the solution, and then — on the last slide — you invite people to take the next step.

For example, a fitness coach might create a carousel titled “5 Mistakes That Kill Your Progress at the Gym.” Slides 2-6 detail the mistakes. The final slide offers a free guide or a consultation link in bio. That’s lead generation without a single video clip.

Businesses can do the same. A software company could break down a complex feature into a step-by-step carousel, then direct viewers to a demo booking page. The key is to provide so much value that the CTA feels like a natural next step, not an interruption.

How to Repurpose Existing Content Into Carousels

You don’t need to create everything from scratch. Look at your analytics. What blog posts, podcasts, or old Reels got the most engagement? Turn those into carousels. It’s the smartest way to grow on Instagram without Reels — you’re recycling your best ideas into a new format.

For instance, a 1,200-word blog post can become an 8-slide carousel with key takeaways and a link to the full article. A podcast episode can be distilled into a “Top 3 Insights” carousel. You’re not creating more content; you’re repackaging it for a different audience.

A Simple Repurposing Workflow

  1. Pick your top-performing content from the last 90 days.
  2. Identify the 5-8 most valuable points.
  3. Write each point as a single slide with a clear headline.
  4. Design the slides in Canva or your preferred tool.
  5. Schedule and track which ones drive profile visits and link clicks.

Consistency Beats Virality

Finally, remember that growth on Instagram without Reels is a marathon, not a sprint. Posting one great carousel won’t change much. Posting three to four per week, consistently, will. The algorithm rewards consistent creators because they keep people on the platform.

So, ditch the camera if it doesn’t serve you. Embrace the carousel. It’s not a compromise — it’s a strategic choice that can build a more engaged, more loyal audience than any viral video ever will.

For more on building your Instagram presence, check out our guide on Instagram marketing strategy and learn how to create engaging Instagram posts that convert.

Continue Reading

Trending