Connect with us

How To

Lock Screen Widgets: Android & iOS Productivity Hacks That Save Time

Published

on

Lock Screen Widgets: Android & iOS Productivity Hacks That Save Time

How many times do you unlock your phone each day? Twenty? Fifty? More? Every time you swipe or tap to enter your device, you’re losing precious seconds. Those moments add up quickly. What if your phone could show you what you need before you even unlock it?

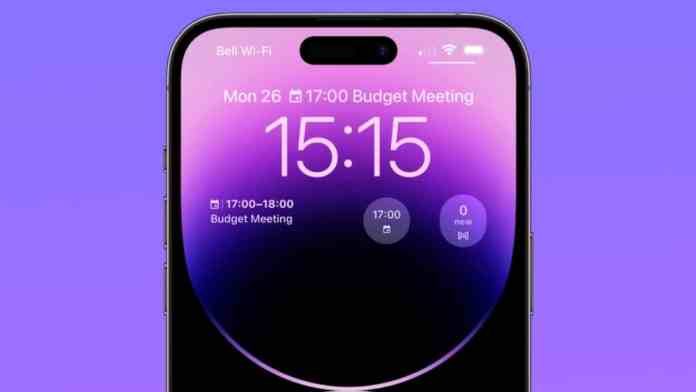
Modern smartphones have transformed the lock screen from a simple security barrier into a dynamic information hub. Both Android and iOS now support widgets that display everything from your next meeting to the weather forecast. This isn’t just about customization—it’s about reclaiming time and attention.

Why Your Lock Screen Should Work Harder

Think about your typical morning. You wake up and check your phone. Without widgets, you might unlock it, open your calendar app, check the weather app, then maybe glance at your fitness tracker. That’s multiple steps and several seconds gone.

With properly configured lock screen widgets, all that information appears at a glance. Your next meeting, today’s forecast, your activity rings—they’re all visible before you touch your passcode. This immediate access eliminates what psychologists call “micro-friction”—those tiny barriers that disrupt our flow throughout the day.

The benefits extend beyond convenience. By reducing unnecessary unlocks, you naturally decrease distractions. How often have you unlocked your phone for one specific purpose, only to find yourself scrolling through social media minutes later? A focused lock screen helps you stay on task.

Essential Widgets for Maximum Efficiency

Not all widgets are created equal. Some provide genuine utility, while others just add visual clutter. Here are the categories that deliver real value.

Calendar and Schedule Widgets

These are arguably the most useful lock screen additions for professionals. A well-designed calendar widget shows your next appointment, its location, and how soon it starts. No more frantic unlocking to check if you’re running late for that 2 PM conference call.

The best implementations show just enough information—time, title, and maybe the video conferencing link—without overwhelming the display. This glanceable format means you can check your schedule while walking between meetings or during a quick coffee break.

Weather and Travel Information

Will it rain this afternoon? Should you grab an umbrella before leaving the house? A weather widget answers these questions instantly. Beyond basic temperature, advanced widgets show precipitation chances, sunrise and sunset times, and even air quality indexes.

For travelers, some widgets can display multiple time zones or flight status information. Imagine knowing your boarding time without digging through email confirmations.

Quick Action and Control Widgets

These are your shortcuts to frequently used functions. Music playback controls let you skip tracks or adjust volume without opening your streaming app. Smart home widgets can turn lights on or off, adjust thermostats, or view security cameras.

Voice assistant widgets provide hands-free access to Siri or Google Assistant. Fitness widgets show your daily step count or exercise rings. The key is choosing actions you perform regularly—not every possible function your phone offers.

Customizing Your Lock Screen Experience

Both Android and iOS offer extensive customization options, though their approaches differ slightly.

iOS Lock Screen Personalization

Apple’s lock screen customization has evolved significantly, particularly with recent iOS versions. The system now supports multiple lock screens that you can switch between based on Focus modes or time of day.

Visual customization goes deep. You can adjust font styles and colors to match your wallpaper. The Depth Effect uses computational photography to make subjects appear in front of the time display. Photo Shuffle cycles through your favorite memories automatically.

Thematic lock screens—like travel, fitness, or minimalist designs—help create cohesive visual experiences. But remember: aesthetics should enhance functionality, not compete with it.

Android Widget Flexibility

Android’s approach varies by manufacturer and version, but generally offers more flexibility in widget placement and sizing. Some devices let you add widgets by swiping left or right on the lock screen, then tapping the plus icon.

Manufacturer skins matter. Samsung’s One UI might offer different widget options than Google’s Pixel launcher. The availability of third-party widgets also depends on your device and Android version.

Adding widgets typically requires authentication first—you’ll need to enter your PIN or use biometrics before making changes. This security measure prevents unauthorized modifications to your lock screen layout.

Avoiding Common Widget Mistakes

More widgets don’t necessarily mean more productivity. In fact, overcrowding your lock screen can have the opposite effect.

Too many widgets create visual noise. Instead of quickly finding the information you need, you waste time scanning through cluttered displays. Performance can suffer too—widgets that update frequently consume battery life and processing power.

Privacy considerations are crucial. Some widgets might display sensitive information like calendar details or message previews. Always balance convenience with security. If you work in public spaces, consider which widgets should appear on your lock screen versus those better kept behind authentication.

Choose widgets that update on demand rather than constantly refreshing. Calendar events don’t change minute-by-minute, so there’s no need for real-time updates. Weather information might refresh every hour, not every minute.

The Cumulative Impact of Small Savings

Let’s do some math. Suppose checking your calendar the old way takes 8 seconds—unlocking, finding the app, waiting for it to load. With a lock screen widget, it takes 2 seconds. That’s a 6-second saving.

If you check your calendar six times daily, you save 36 seconds. Add weather checks, music controls, and quick app launches, and you might reclaim 2-3 minutes daily. Over a year, that’s 12-18 hours saved—almost an entire waking day returned to you.

Beyond time savings, there’s cognitive benefit. Every decision to unlock your phone carries what behavioral economists call “decision fatigue.” By making essential information available without that decision, you preserve mental energy for more important tasks.

Your phone’s lock screen has evolved from a simple security feature to a potential productivity powerhouse. With thoughtful widget selection and mindful customization, you can transform those brief glances into meaningful time savings. The seconds you save today become hours you reclaim over months—all from a screen you were already looking at anyway.

Continue Reading
Click to comment

Leave a Reply

Your email address will not be published. Required fields are marked *

How To

Use Cast to TV & Screen Mirroring App to Make Your Phone Screen Bigger

Published

on

Use Cast to TV & Screen Mirroring App to Make Your Phone Screen Bigger

Do you ever feel your phone screen is just too small for watching movies, playing games, or sharing photos with friends? Many users face this frustration daily. However, there is a simple solution: the Cast to TV & Screen Mirroring app. This handy tool lets you mirror your phone’s display onto a much larger TV screen. In this guide, we will walk you through everything you need to know—from downloading the app to using it effectively. By the end, you will be able to enjoy your favorite content on a big screen without any hassle.

Why Use a Screen Mirroring App?

Screen mirroring apps have become essential for modern smartphone users. They bridge the gap between your handheld device and your home entertainment system. Instead of squinting at a small display, you can cast your phone screen to a TV for a more immersive experience. This is especially useful during family gatherings or when you want to share a presentation at work.

Moreover, the Cast to TV & Screen Mirroring app is free and easy to use. It works with most Android phones and smart TVs. As a result, you do not need expensive equipment or technical expertise. Simply follow the steps below to get started.

How to Download the Cast to TV & Screen Mirroring App

Getting the app on your phone is straightforward. The entire process takes just a few minutes. Here is what you need to do:

  1. Open the Google Play Store on your Android device.
  2. In the search bar, type “Cast to TV & Screen Mirroring.”
  3. Look for the official app by the developer. It usually has a high rating and many downloads.
  4. Tap the “Install” button. The app will download and install automatically.

Alternatively, you can visit the Google Play Store directly to find the app. Once installed, you are ready to connect your phone to your TV.

Step-by-Step Guide: How to Use the App

Using the Cast to TV & Screen Mirroring app is simple. After installation, follow these steps:

1. Open the App and Grant Permissions

Launch the app on your phone. You will see a clean interface with a few options. Tap the down arrow icon or the “Start” button to begin. The app will ask for permission to access your device’s screen. Accept this request to proceed.

2. Scan for Nearby TVs

Once permissions are granted, the app will start scanning for compatible TVs in your area. Make sure your TV is turned on and connected to the same Wi-Fi network as your phone. This step is crucial for a successful connection.

3. Select Your TV

After scanning, a list of available devices will appear. Tap on your TV’s name to initiate the connection. On your TV screen, you may see a prompt asking for permission. Confirm it to allow your phone to mirror its display.

4. Enjoy Mirroring

Now your phone screen is displayed on the TV. You can watch videos, browse photos, or even play games. Everything you do on your phone will appear in real-time on the big screen. To stop mirroring, simply close the app or tap the “Disconnect” button.

Tips for a Better Screen Mirroring Experience

To get the most out of your Cast to TV & Screen Mirroring app, keep these tips in mind:

  • Stable Wi-Fi: A strong internet connection ensures smooth streaming without lag.
  • Update Your TV: Make sure your smart TV’s firmware is up to date for compatibility.
  • Close Background Apps: Free up your phone’s resources for better performance.

Additionally, if you encounter any issues, try restarting both your phone and TV. Most problems are resolved with a simple reboot. For more tech tips, check out our guide on hiding WhatsApp blue ticks or learn about lock screen widgets.

Frequently Asked Questions

Q: Does this app work with iPhones?
A: No, the app is designed for Android devices. iPhone users can use AirPlay or third-party apps.

Q: Is the app free?
A: Yes, the basic version is free. Some advanced features may require in-app purchases.

Q: Can I mirror my phone without Wi-Fi?
A: Some apps support local casting via Miracast or DLNA, but Wi-Fi is recommended for best results.

Final Thoughts

Using the Cast to TV & Screen Mirroring app is a game-changer for anyone who wants a bigger screen. It is easy to set up, works with most TVs, and enhances your media consumption. Whether you are watching a movie or giving a presentation, this app makes your phone screen larger instantly.

Do not forget to share this guide with friends who might benefit from it. They will thank you for the tip! For more helpful articles, visit our homepage.

Continue Reading

How To

YoCutie App Review: 100% Free Dating for All Android Devices

Published

on

YoCutie App Review: 100% Free Dating for All Android Devices

Looking for a free dating app that actually works without hidden fees? YoCutie might be the solution you need. This Android-friendly platform promises 100% free dating, letting you connect with new people near you. In this review, we explore its features, download process, and whether it lives up to the hype.

What Is YoCutie App?

YoCutie is a location-based dating app designed for Android users. It allows you to chat with strangers in your vicinity, making it easier to form new friendships or romantic connections. The app integrates with Facebook for quick registration but assures users that personal information stays private—only your name and age are visible to others.

Unlike many dating platforms that require subscriptions, YoCutie markets itself as completely free. This means no paywalls for messaging, matching, or browsing profiles. For anyone tired of premium-only features, this is a refreshing change.

Key Features of YoCutie

Free Unlimited Chatting

One standout feature is the ability to chat with friends all night without restrictions. You can send messages, share interests, and build connections without worrying about daily limits. This makes it ideal for those who enjoy long conversations.

Daily New Connections

YoCutie encourages users to meet new people every day. The app refreshes your feed with nearby profiles, so you always have fresh options. Whether you’re looking for casual dating or a serious relationship, variety is at your fingertips.

Easy to Use Interface

The app is straightforward to navigate. After downloading, you create an account, and the GPS feature immediately shows people around you. No complicated settings—just swipe, chat, and connect.

Is YoCutie Really Free?

Yes, YoCutie is 100% free to use. You won’t encounter any payment requests for basic functions. However, like many apps, it may offer optional in-app purchases for extra features. But core dating activities—messaging, profile browsing, and location matching—remain free.

This transparency sets it apart from competitors that hide costs. For budget-conscious users, a free dating app like YoCutie removes financial stress while exploring new relationships.

How to Download and Install YoCutie

Getting started is simple. Follow these steps:

  1. Visit the official YoCutie website or open the Google Play Store on your Android device.
  2. Search for “YoCutie” and tap the download button.
  3. Install the app and grant necessary permissions (location, storage).
  4. Sign up using your Facebook account or email.
  5. Start browsing profiles near you and send messages instantly.

For a direct link, check the download page on our site. Once installed, you can begin connecting within minutes.

Pros and Cons of YoCutie

Pros

  • Completely free dating with no hidden charges.
  • Location-based matching for local connections.
  • Privacy-focused—Facebook data isn’t shared publicly.
  • Easy setup and user-friendly design.

Cons

  • Limited to Android devices only.
  • May have fewer users compared to bigger platforms like Tinder.
  • Some users report occasional bugs or slow loading times.

Alternatives to YoCutie

If YoCutie doesn’t meet your needs, consider these other free dating app options:

  • Bumble – Women-first approach with free messaging.
  • OkCupid – Detailed profiles and free matching.
  • Facebook Dating – Integrated with your social network.

Each has unique features, but YoCutie stands out for its simplicity and zero-cost model.

Final Verdict: Should You Try YoCutie?

For Android users seeking a no-strings-attached dating experience, YoCutie is worth a shot. It delivers on its promise of 100% free dating, with essential tools to meet people nearby. While it may not have the polish of premium apps, its accessibility and straightforward design make it a solid choice.

However, if you value a larger user base or advanced filters, you might explore alternatives. Ultimately, YoCutie serves its niche well—connecting people without costing a dime. Download it today and see who’s around you.

For more app reviews, check out our guide on best free dating apps for Android or learn how to stay safe online.

Continue Reading

How To

How to Make a WhatsApp Sticker from Your Photo: The Ultimate Guide for Custom Chat Fun

Published

on

How to Make a WhatsApp Sticker from Your Photo: The Ultimate Guide for Custom Chat Fun

Have you ever wanted to turn your favourite selfie into a playful sticker for WhatsApp? You are not alone. Millions of users love expressing themselves with custom stickers. In fact, learning how to make WhatsApp sticker from photo is simpler than you think. This guide walks you through every step so you can start sending personalised stickers today.

Why Create Custom WhatsApp Stickers from Your Photos?

Standard emojis and stickers are great, but nothing beats a sticker that features your own face or a funny moment. Custom stickers add a personal touch to conversations. They make your chats more engaging and memorable. Whether it is a birthday greeting or a silly expression, a photo-based sticker stands out.

Moreover, creating your own stickers is completely free. You only need a reliable app and a few minutes of your time. This process works on both Android and iOS devices. So, no matter what phone you use, you can join the fun.

What You Need to Make a WhatsApp Sticker from a Photo

Before diving into the steps, gather these essentials:

  • A smartphone with WhatsApp installed.
  • A photo you want to convert into a sticker.
  • The Sticker Maker app (available on Google Play Store).
  • Basic editing skills – cropping and background removal.

That is it. No paid subscriptions or advanced tools required.

Step-by-Step: How to Make a WhatsApp Sticker from Your Photo

Step 1: Download the Sticker Maker App

First, open the Google Play Store on your Android device. Search for “Sticker Maker”. Look for the app by developer Marsvard. It has millions of downloads and a high rating. Tap “Install” and wait for the download to finish.

Step 2: Open the App and Create a New Sticker Pack

Once installed, launch the Sticker Maker app. You will see a clean interface. Tap on “Create a new sticker pack”. A pop-up will ask you to name your pack. Choose something descriptive, like “My Faces” or “Funny Selfies”. This name will appear in WhatsApp later.

Step 3: Enable Permissions

The app will request access to your storage and photos. Grant these permissions. Without them, you cannot select an image from your gallery. Do not worry – the app only uses the photos you choose.

Step 4: Select Your Photo

Tap the gallery icon. Browse your photo library and pick the image you want to transform. For best results, choose a photo with a clear subject and a simple background. This makes editing easier.

Step 5: Edit and Remove the Background

After selecting the photo, the app opens an editing screen. Use the cropping tool to trim unwanted areas. Then, tap the magic wand icon to erase the background automatically. You can refine the edges manually. Add text or doodles if you want extra flair.

Step 6: Save Your Sticker

When you are satisfied with the result, tap the save icon. The sticker is now stored inside your sticker pack in the Sticker Maker app.

Step 7: Add the Sticker Pack to WhatsApp

Go back to the main screen of Sticker Maker. You will see your new pack listed. Tap the “Add to WhatsApp” button. A confirmation message will appear. Accept it. Now, open WhatsApp and check your sticker tray. Your custom pack should be there.

Step 8: Send Your Custom Sticker to Friends

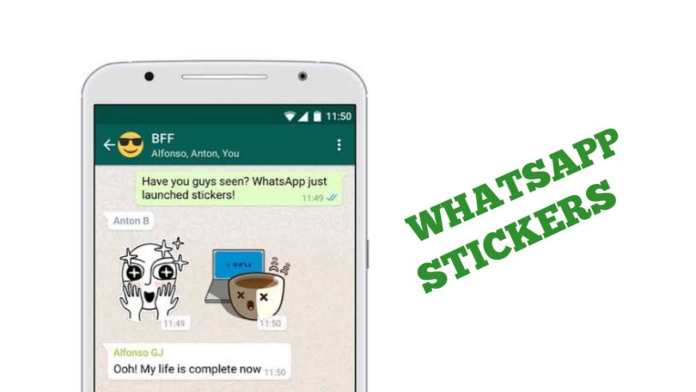
Open any chat in WhatsApp. Tap the sticker icon (smiley face). Swipe to your new pack. Select the sticker and send it. Your friends will see your photo as a sticker. They can even download and reuse it.

Tips for Making Better WhatsApp Stickers

Creating high-quality stickers takes a little practice. Here are some pro tips:

  • Use high-resolution photos: Blurry images make blurry stickers.
  • Choose photos with good lighting: Bright, even light helps the background removal tool work better.
  • Keep it simple: Stickers with one subject look cleaner than crowded scenes.
  • Experiment with text: Add a funny caption to make your sticker more expressive.

These small adjustments can elevate your sticker game significantly.

Common Questions About Making WhatsApp Stickers from Photos

Can I make stickers from photos on an iPhone?

Yes. While this guide focuses on Android, iPhone users can use apps like “Sticker Maker Studio” from the App Store. The process is nearly identical.

Is it safe to use third-party sticker apps?

Most reputable apps, including Sticker Maker, are safe. They do not share your photos without permission. However, always check app permissions and user reviews before downloading.

How many stickers can I add to one pack?

WhatsApp allows up to 30 stickers per pack. You can create multiple packs for different moods or occasions.

Explore More WhatsApp Tricks

Custom stickers are just one way to enhance your WhatsApp experience. Check out our guide on how to send WhatsApp message without saving number for another handy tip. You might also enjoy learning how to unblock yourself on WhatsApp if you ever face that issue.

Final Thoughts

Learning to make WhatsApp sticker from photo is a fun, creative skill that adds personality to your chats. With the Sticker Maker app and the steps above, you can create unlimited custom stickers in minutes. So, grab your phone, pick a photo, and start designing. Your friends will love the personal touch.

If you found this tutorial helpful, share it with your social media circle. And if you have any questions, drop a comment below. Happy stickering!

Continue Reading

Trending