Connect with us

How To

How to Use Do Not Disturb on Android to Stop Unwanted Notifications – Complete Guide

Published

on

How to Use Do Not Disturb on Android to Stop Unwanted Notifications – Complete Guide

Is your phone buzzing at the worst possible moments? Whether you are in a meeting, studying, or trying to sleep, constant alerts can ruin your focus. Fortunately, Android Do Not Disturb offers a powerful solution. This built-in feature silences unwanted notifications while letting important calls and reminders through. In this guide, you will learn everything about setting up, customizing, and troubleshooting this essential tool.

Understanding Android Do Not Disturb

Do Not Disturb (DND) is a native Android feature that controls sounds, vibrations, and visual alerts. Unlike simply turning down the volume, DND gives you granular control over what breaks your silence. You can allow specific contacts, apps, or even repeat callers to bypass the block.

This flexibility makes DND ideal for various scenarios. Professionals use it during meetings to avoid distractions. Students rely on it while studying for exams. Travelers appreciate fewer alerts during long journeys. Even at night, DND ensures peaceful sleep without missing urgent calls.

DND vs Silent Mode: What Is the Difference?

Many users confuse these two settings. Silent mode simply mutes all sounds, but notifications still appear on the screen. Every alert remains visible, which can still distract you.

DND works smarter. It can completely hide notifications, silence vibrations, and block visual interruptions. More importantly, you decide which alerts are important enough to show. This extra control makes DND far more effective for maintaining focus.

How to Enable Do Not Disturb on Android

Activating DND is straightforward. Android offers multiple methods, so you can choose what works best for you.

Using Quick Settings

The fastest way is through Quick Settings. Swipe down from the top of your screen once or twice to see all tiles. Look for the Do Not Disturb icon — it looks like a circle with a line through it. Tap it once to enable DND immediately. Tap again to turn it off.

This method is perfect for quick, temporary silence. You can also long-press the tile to jump directly into settings for deeper customization.

Through the Settings App

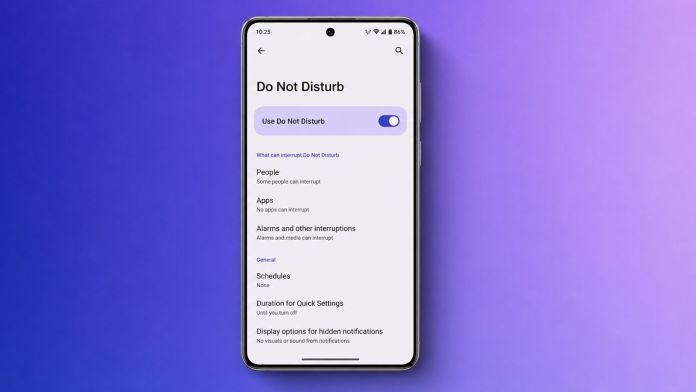
For full control, navigate to Settings > Sound & vibration > Do Not Disturb. Here, you will find a “Turn on now” button. This path also gives you access to all customization options in one place.

On Samsung devices, the menu might be labeled “Modes and Routines” within Settings. On Google Pixel phones, it follows the standard Android layout. Despite minor differences, the core functionality remains identical across brands.

Customizing DND to Stop Unwanted Notifications Effectively

Default settings work, but customization unlocks DND’s true potential. Tailor the feature to your lifestyle for maximum benefit.

Managing Calls and Messages

Open DND settings and tap “People.” Here, you can decide who can reach you. Options include allowing all contacts, only favorites, specific people, or blocking everyone. For messages, similar rules apply. This ensures that urgent communication from family or colleagues still gets through.

Android also includes a “Repeat callers” option. If someone calls twice within 15 minutes, the second call bypasses DND. This is a lifesaver during emergencies. To disable it, simply toggle the switch off in the calls section.

Adding App Exceptions

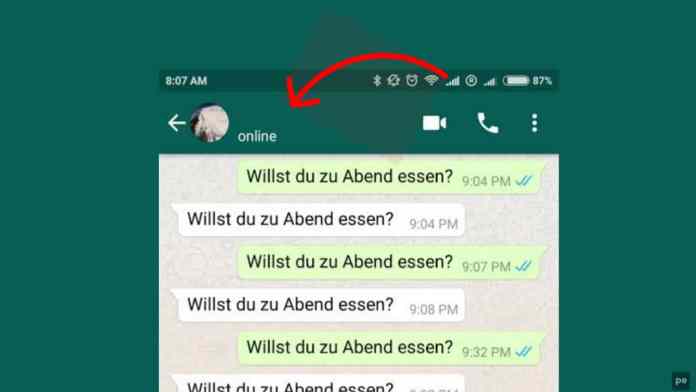
Not every app should be silenced. Messaging apps like WhatsApp, work tools like Slack, or calendar reminders might need priority access. Tap “Apps” in DND settings and select which apps can still send notifications. This way, you stop unwanted notifications from games or social media while staying connected to what matters.

Controlling Alarms and Media

Alarms typically override DND, so you will never oversleep. Media sounds can also be allowed if you want to listen to music or podcasts uninterrupted. Check the “Alarms & other interruptions” section to fine-tune these settings.

Creating Automatic DND Schedules

Manual activation is useful, but automation is where DND shines. Set it and forget it.

Time-Based Schedules

Go to Schedules within DND settings and tap “Add more” then “Time.” Name your schedule (e.g., “Sleep”), choose active days, and set start and end times. Your phone will automatically enter DND during those hours. This is perfect for bedtime or daily work hours.

Event-Based Scheduling

Android can sync with your Google Calendar. When a meeting is scheduled, DND activates automatically. In Schedules, tap “Event” and enable the feature. Select which calendars to monitor. This ensures you never get distracted during important appointments.

Samsung Modes and Routines

Samsung users have an extra layer of control. Open “Modes and Routines” and create custom modes like Sleep, Work, or Driving. Each mode can trigger DND along with other actions like changing wallpaper or opening specific apps. This creates a truly personalized experience.

Troubleshooting Common DND Issues

Sometimes DND behaves unexpectedly. Here are quick fixes for common problems.

  • Restart your phone: This refreshes system settings and resolves most temporary glitches.
  • Review exceptions: Double-check that allowed contacts or apps aren’t causing unwanted notifications.
  • Update software: Install the latest Android update to fix known bugs.
  • Use Safe Mode: Boot into safe mode to see if a third-party app is interfering with DND.
  • Reset app preferences: Go to Settings > System > Reset Options > Reset app preferences. This restores default settings without deleting data.

Frequently Asked Questions

Will alarms still sound during DND?

Yes, alarms remain active by default. You can disable them manually in DND settings if needed.

Can DND be turned on automatically?

Absolutely. Use time-based or event-based schedules to automate activation.

Does DND block all notifications?

Only those you choose to block. Exceptions for calls, messages, and apps can be set.

Final Thoughts

Mastering Android Do Not Disturb transforms how you interact with your phone. By stopping unwanted notifications, you reclaim focus, improve productivity, and enjoy better sleep. Take a few minutes to customize the settings today. Your future self will thank you.

For more tips, check out our guide on hiding WhatsApp blue ticks or learn about lock screen widgets for Android.

Continue Reading
Click to comment

Leave a Reply

Your email address will not be published. Required fields are marked *

How To

How to Uninstall McAfee on Your PC Completely: A Step-by-Step Guide for Windows and Mac

Published

on

How to Uninstall McAfee on Your PC Completely: A Step-by-Step Guide for Windows and Mac

Many computers ship with McAfee pre-installed, often as a trial version. While it offers solid protection, you might decide to switch to a different antivirus or rely on built-in security. However, simply deleting the shortcut won’t cut it. To truly uninstall McAfee on your PC and prevent annoying alerts or leftover files, you need a thorough approach. This guide covers every method for Windows and Mac, ensuring a clean removal.

Why a Complete Uninstall of McAfee Matters

McAfee is known for its deep integration with the operating system. A standard uninstall might leave behind background services, browser extensions, and registry entries. These remnants can cause notification pop-ups, slow down your system, or conflict with new security software. Therefore, a complete removal is essential for a smooth PC experience.

Moreover, many users report that McAfee can be resource-intensive, consuming CPU and memory. Others dislike the frequent renewal reminders after the trial ends. Whatever your reason, following the correct steps ensures you reclaim system resources and avoid future hassles.

Method 1: Uninstall McAfee on Your PC via Windows Settings

This is the most straightforward approach for modern Windows versions. It works well for most users and requires no additional tools.

For Windows 11 Users

Windows 11 offers a clean interface for removing programs. Start by clicking the Start button and typing “Settings.” Open the Settings app, then navigate to Apps > Installed apps. Use the search bar to find “McAfee.” Click the three-dot menu next to the McAfee product and select Uninstall. Confirm any prompts and allow the process to complete. Restart your PC afterwards to clear temporary files.

For Windows 10 Users

The process is nearly identical on Windows 10. Open Settings from the Start menu, then go to Apps > Apps & features. Locate McAfee in the list, click on it, and choose Uninstall. Follow the on-screen instructions and reboot when finished.

Additionally, don’t forget to remove McAfee WebAdvisor, a browser extension that often remains after the main app is gone. Find it in the same list and uninstall it separately for a cleaner system.

Method 2: Uninstall McAfee on Your PC Using Control Panel

The classic Control Panel method remains reliable, especially for older Windows versions like Windows 8 or 7.

For Windows 8 and 8.1

Press the Windows key to open the Start screen, type “Control Panel,” and select it. Go to Programs and Features. Find McAfee in the list, right-click it, and choose Uninstall. Confirm the action and follow the wizard. Restart your PC to finalize.

For Windows 7

Click the Start button, open Control Panel, then select Add or Remove Programs (or Programs and Features). Locate McAfee, click Uninstall, and follow the prompts. A restart is recommended.

A Quick Shortcut for Any Windows Version

For a faster route, press Windows + R to open the Run dialog. Type appwiz.cpl and hit Enter. This opens Programs and Features directly. From there, find McAfee, right-click, and select Uninstall. This trick saves time for experienced users.

Method 3: Use the MCPR Tool for Stubborn Remnants

Sometimes, standard uninstall methods fail. You might see error messages, or McAfee services continue running in the background. In such cases, the McAfee Consumer Product Removal (MCPR) tool is your best bet. It’s designed to remove every trace of McAfee software, including hidden files and registry keys.

When to Use MCPR

Consider using MCPR if:

  • McAfee refuses to uninstall through normal channels.
  • You encounter error codes during removal.
  • Leftover files or services persist after uninstalling.
  • You want a guaranteed clean slate before installing new antivirus software.

How to Download and Run MCPR

Visit the official McAfee Support website and search for “MCPR tool.” Download the latest version. Once downloaded, right-click the MCPR.exe file and select Run as administrator. Accept the user account control prompt. The tool will open a wizard—click Next, agree to the license terms, and enter the security code displayed on screen. The cleanup process may take a few minutes. When you see the “Removal Complete” message, click Restart.

After rebooting, check that McAfee is completely gone. This method is highly effective for removing McAfee antivirus entirely.

How to Uninstall McAfee on a Mac

Mac users aren’t left out. While the process is slightly different, it’s just as straightforward.

Remove the Main Application

Open Finder and go to the Applications folder. Look for an uninstaller named “McAfee Internet Security Uninstaller” or “McAfee Total Protection Uninstaller.” Double-click it, enter your administrator password when prompted, and follow the instructions. Once done, the main app should be gone.

Delete Leftover Files

McAfee often leaves behind support files. To find them, open Finder, click Go in the menu bar, and select Go to Folder. Search for folders containing “McAfee” in common locations like /Library and ~/Library. Delete any McAfee-related files you find. Be careful not to delete unrelated system files.

Also, remove the SiteAdvisor browser extension if present. Look for it in your browser’s extension settings and disable or remove it.

Finally, empty the Trash to permanently delete all removed files. This ensures a thorough McAfee removal on your Mac.

Final Checklist After Uninstalling McAfee

After you uninstall McAfee on your PC or Mac, take these final steps:

  • Restart your device to clear any cached processes.
  • Check for leftover folders in Program Files or Applications.
  • Install your preferred antivirus software to stay protected.
  • Consider using a registry cleaner (Windows) to remove any orphaned entries.

By following this guide, you can say goodbye to McAfee alerts and reclaim your system’s performance. Whether you’re on Windows or Mac, a complete uninstall is achievable with these proven methods.

For more tech tips, check out our guide on how to check suspicious links or learn about using Do Not Disturb on Android.

Continue Reading

How To

Master the Discord In-Game Overlay: A Complete Guide for Gamers in 2025

Published

on

Master the Discord In-Game Overlay: A Complete Guide for Gamers in 2025

For gamers who thrive on teamwork, staying connected with teammates is non-negotiable. Discord in-game overlay makes this possible without ever alt-tabbing away from the action. Whether you’re coordinating a raid, streaming your gameplay, or just chatting with friends, this tool puts everything you need right on your screen. In this guide, we’ll explore how to set it up, customize it, and solve common problems, all with a focus on the latest 2025 updates.

What Is the Discord In-Game Overlay?

The Discord in-game overlay is a transparent panel that appears on top of your game window. It lets you access voice channels, text chats, video calls, and even live streams without minimizing your game. This feature is especially valuable during multiplayer sessions where quick communication can determine victory or defeat.

Think of it as a command center that floats over your screen. You can see who’s online, respond to messages, and monitor voice activity, all while keeping your hands on the keyboard and your eyes on the game. It eliminates the need to switch between windows, which can be a lifesaver during intense matches.

Key Features You Can Access

  • Chat Bar: Type and read messages without leaving the game.
  • Voice Channel Widget: See who is speaking and adjust volume on the fly.
  • Video Tiles: View your friends’ webcams or animated avatars.
  • Activity Widget: Display the game you’re currently playing.
  • Screen Share Widget: Watch live streams from your party instantly.
  • Notifications Panel: Never miss a mention or invite again.

However, not all games support the overlay equally. Some titles, especially those running in exclusive full-screen mode, may require tweaks. We’ll cover those later.

How to Set Up and Use the Discord In-Game Overlay

Getting started is straightforward. Follow these steps to enable and use the overlay in 2025:

  1. Open Discord on your PC and log in.
  2. Join a voice channel to enable voice communication.
  3. Press CTRL + ` (backtick key, usually above Tab) to open the overlay.
  4. Drag widgets by clicking their dotted edges to reposition them anywhere on your screen.
  5. Customize the layout by hiding widgets you don’t need. Right-click on any widget to see options.

This setup works for a wide range of games, from fast-paced shooters like Call of Duty to strategy titles like League of Legends. The key is to arrange elements so they don’t block critical game UI.

Streaming and Watching Games via the Overlay

One of the most popular uses of the Discord in-game overlay is live streaming. You can share your screen with your voice channel in a single click:

  1. Open the Chat Bar in the overlay.
  2. Click the Screen Share button.
  3. Your stream automatically broadcasts to your current voice channel.

Discord adjusts stream quality based on your internet speed, but you can manually override this. For viewers, streams from friends appear in the Streams widget. Click any stream to watch it in a floating window that stays on top of your game.

This feature fosters a split-screen-like experience, making remote gaming sessions feel more connected. It’s ideal for co-op games where you need to see each other’s perspectives.

Troubleshooting Common Discord Overlay Issues

Even with the best setup, problems can arise. If your overlay isn’t showing up, try these fixes:

Check Overlay Settings

  • Go to User Settings > Game Overlay and ensure the toggle is ON.
  • Scroll to the Registered Games list and confirm the overlay is enabled for your specific game.

Adjust Game Display Mode

The overlay only works in windowed or borderless windowed modes. If your game is in exclusive full-screen, switch it in the game’s video settings.

Test Compatibility

Some older or less popular games don’t support the overlay. Try launching a different game to see if the issue persists.

Platform Limitations

As of 2025, the overlay remains a Windows-only feature. macOS and Linux users will not see it, regardless of settings.

If none of these steps work, restart Discord or your PC. Updating to the latest Discord version often resolves lingering bugs.

When and How to Disable the Discord Overlay

While the overlay is helpful, it’s not always ideal. Some gamers turn it off to improve performance on older hardware, reduce screen clutter during competitive play, or avoid compatibility issues with certain games.

Disable for All Games

  1. Open Discord and go to User Settings (gear icon near your username).
  2. Navigate to Game Overlay under Activity Settings.
  3. Toggle Open Discord Overlay to OFF.

Disable for Specific Games Only

  1. In User Settings, go to Registered Games.
  2. Click the monitor icon next to the game you want to disable.
  3. Toggle the overlay OFF for that title only.

This selective approach lets you keep the overlay for cooperative games while turning it off for solo or competitive ones where every millisecond counts.

Pro Tips for a Better Overlay Experience

  • Customize widget positions to avoid covering important game HUD elements.
  • Use the shortcut key (CTRL + `) to toggle the overlay on and off quickly.
  • Hide unused widgets to reduce visual noise.
  • Keep Discord updated for the latest features and bug fixes.
  • Run games in borderless mode for the most stable overlay performance.
  • Ensure a stable internet connection for smooth voice and video.

For games that don’t support borderless mode natively, consider third-party tools like Borderless Gaming to force windowed borderless mode.

Final Thoughts

The Discord in-game overlay remains one of the most powerful tools for modern gamers. It streamlines communication, enhances streaming, and keeps you focused on the game. With the steps outlined above, you can master its setup, customize it to your liking, and troubleshoot any issues that come your way. Whether you’re a seasoned raider or a casual player, this feature can elevate your gaming sessions in 2025.

For more tips on optimizing your gaming setup, check out our guide on using Do Not Disturb on Android to minimize interruptions, or learn how to hide WhatsApp blue ticks for uninterrupted gaming.

Continue Reading

How To

Keep Your WhatsApp Chat Real Name Hidden Using Hide Chat Name App

Published

on

Keep Your WhatsApp Chat Real Name Hidden Using Hide Chat Name App

Have you ever been chatting on WhatsApp while someone beside you glanced at your screen and saw the contact name you’d rather keep private? It happens more often than you’d think. Whether you’re in a crowded café or sitting next to a friend, unwanted eyes can catch a glimpse of your conversation. Fortunately, a simple tool called the Hide Real Chat Name app offers a practical solution. This article explains how to hide WhatsApp chat name effortlessly and regain control over your privacy.

Many people feel uneasy when others see who they are messaging. The app steps in to mask the contact name, so only you know who you’re talking to. It’s a straightforward privacy hack that doesn’t require technical skills. Below, we dive into downloading, setting up, and using this app effectively.

Why You Need to Hide WhatsApp Chat Name

Privacy isn’t just about encryption—it’s about what others see on your screen. When you’re messaging a colleague, a family member, or a friend, the contact name appears prominently. In shared spaces, this can lead to awkward questions or unwanted attention.

Using a tool to hide WhatsApp chat name gives you peace of mind. It doesn’t alter your chats or block messages; it simply conceals the name from view. This is especially useful for people who use WhatsApp in public transport, offices, or social gatherings.

Furthermore, the app works without interfering with WhatsApp’s core functions. You can still send texts, images, and voice notes normally. The only difference is that your contact name stays hidden from prying eyes.

How to Download the Hide Real Chat Name App

Unlike many popular apps, this tool isn’t available on the Google Play Store. Instead, you can find it through a quick web search. Here’s how to get it safely:

  • Open your browser: Use Google Chrome, Safari, or any search engine on your phone or computer.
  • Search for the app: Type “Hide Real Chat Name App” into the search bar and hit enter.
  • Choose a trusted source: Look for download links from reputable websites to avoid malware. Check user reviews or ratings if available.
  • Download and install: Tap the download button and follow the on-screen instructions. Enable installation from unknown sources in your settings if prompted.

After installation, you’re ready to set it up. The process takes less than a minute.

Step-by-Step Guide to Using the App

Once the app is installed, follow these simple steps to start hiding your contact names:

  1. Launch the app: Tap its icon from your app drawer.
  2. Grant necessary permissions: The app will request access to overlay on other apps or read notifications. Accept these permissions to let it function correctly.
  3. Tap ‘Start’: A button inside the app activates the name-hiding feature. You’ll see a confirmation message.
  4. Open WhatsApp: Go to any chat. The contact name at the top will now appear blank or replaced with a generic label like “Chat”.

That’s it! You can now chat freely without worrying about your contact name being visible. If you want to restore the names later, simply open the app again and toggle the feature off.

Tips for Best Results

To make the most of this privacy tool, consider these pointers:

  • Keep the app updated: Developers occasionally release fixes for compatibility with new WhatsApp versions.
  • Test with a friend: Before relying on it in sensitive situations, check that the name hiding works as expected.
  • Combine with other privacy settings: Use WhatsApp’s own privacy features—like hiding last seen or profile photo—for layered protection.

Is This App Safe to Use?

Safety is a valid concern when downloading apps outside official stores. The Hide Real Chat Name app has been used by many without issues, but you should take precautions. Always download from a source with positive feedback. Avoid clicking on ads that promise the app—stick to direct download links.

Additionally, the app does not access your messages or contacts. It only modifies the display of contact names on your screen. For extra safety, run a quick antivirus scan after installation. Most users find it reliable and lightweight.

Building on this, remember that no app is perfect. If you encounter bugs, check for updates or reinstall the app. The developer community often addresses problems promptly.

Final Thoughts on WhatsApp Name Privacy

Protecting your privacy on messaging platforms doesn’t have to be complicated. With the Hide Real Chat Name app, you can hide WhatsApp chat name in seconds and chat without second-guessing who might be looking. It’s a small tool that delivers a big peace of mind.

As a result, you can enjoy your conversations without the stress of exposure. Download the app today, follow the guide above, and take control of your WhatsApp privacy. For more tips on securing your digital life, check out our guide on changing your WhatsApp number without losing chats or explore WhatsApp’s latest features.

Have you tried this app? Share your experience in the comments below. Your feedback helps other readers decide if it’s right for them.

Continue Reading

Trending